I have been asked to post a tutorial on making a visiting card. A visiting card has limited space for a logo perhaps and the name and address. One thing about the logo should be remembered is that it should look good whether it is in black and white or in color. The logo should look equally attractive if it is scaled down. You must remember these two basic things.
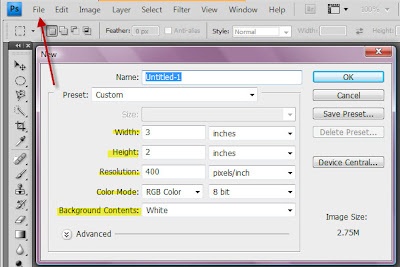
Step 1 : When you open a new document by going to File>New ensure that the resolution is high. I have set it at 400. I have set the size at 3 x 2 inches and the Color Mode to RGB, which should be changed to CMYK before printing.
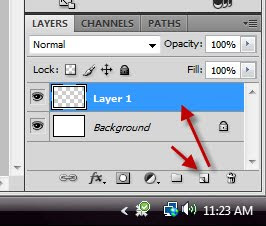
Step 2 : Click the new layer icon and a new blank layer forms above the white background layer. The new layer is Layer 1.

Step 3 : Click the Elliptical Marquee Tool.
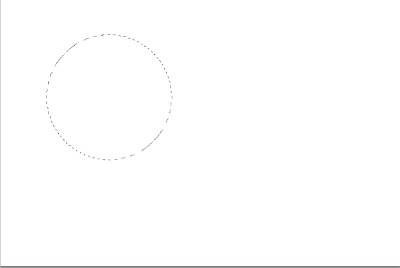
Step 4 : Keeping SHIFT pressed draw a circle with the Elliptical Marquee. It will be a perfect circle.
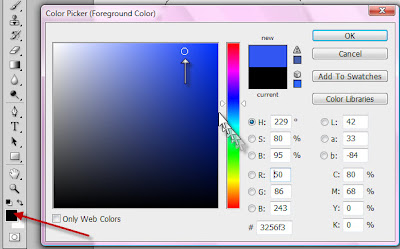
Step 5 : Click the Foreground Color in the left panel and the Color Picker comes up. Now drag the tiny white sliders on the Spectrum in the middle to select the color you want. I have chosen Blue. In the left panel I have clicked on a shade of Blue. The top half of New also changes to Blue. Click ok.
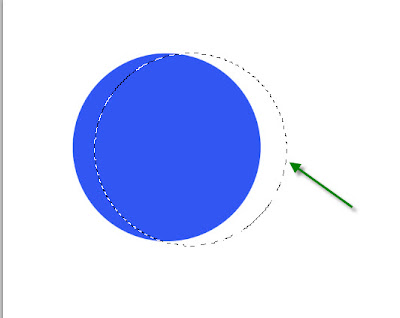
Step 6 : Now press ALT+Backspace. This will fill with the Foreground Color. Since we have changed the Foreground to Blue the circle is filled with the color. Press CTRL+D to deselect. Now click on the Elliptical Marquee again and draw out a perfect circle keeping SHIFT pressed. This is being done to cut out a crescent shape from the Blue circle.
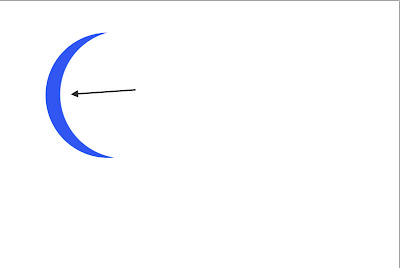
Step 7 : Press Delete. Press CTRL+D to deselect. You now have a Blue crescent as shown.
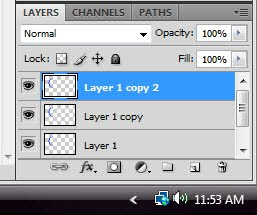
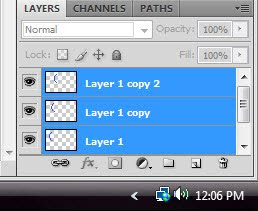
Step 8 : Now press CTRL+J twice. You will find Layer 1 duplicates into Layer 1 copy and Layer 1 copy 2. Layer 1 copy 2 is highlighted, which means you are on that layer.

Step 9 : With the Move Tool drag the crescent to the right.
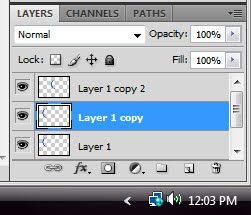
Step 10 : Click on layer 1 copy.
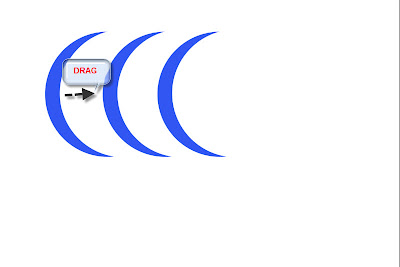
Step 11 : Now drag this layer apart. You should have three crescents now.
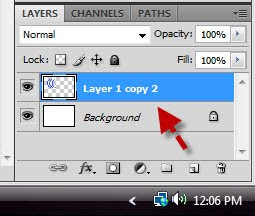
Step 12 : Now click on Layer1 copy 2, then Layer 1. All three layers will be highlighted as shown.
Step 13 : Now press CTRL+E. This will compress the three layers into a single layer as shown above.
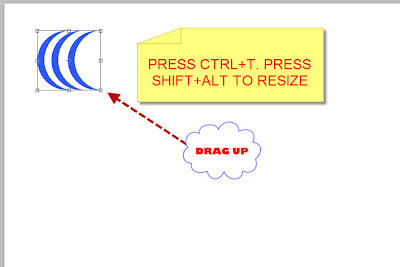
Step 14 : Press CTRL+T. Press SHIFT+ALT and resize the logo by dragging with the Move Tool. Then press Enter.
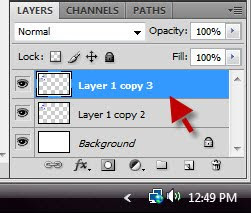
Step 15 : Remember you are on Layer1 copy 2. Press CTRL+J. It duplicates into Layer1 copy 3.
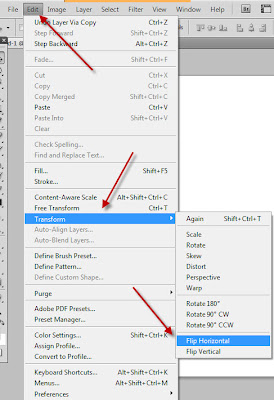
Step 16 : Go to Edit>Transform>Flip Horizontal.
Step 17 : Press CTRL+T. When a selection appears press SHIFT+ALT and resize so that it grows bigger. You can use the UP/DOWN/LEFT/RIGHT arrow keys to move the selection to the correct position instead of the Move Tool.
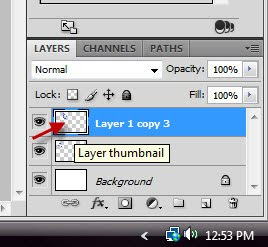
Step 18 : Now CTRL+CLICK the layer thumbnail.
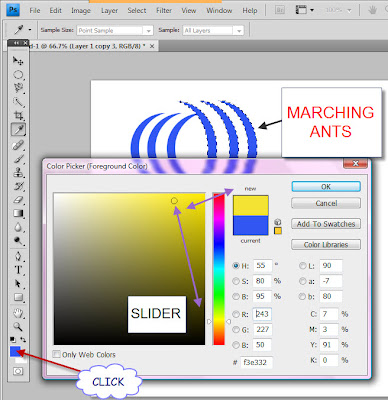
Step 19 : A selection of marching ants surround the crescents. Now click the Foreground Color. This will again bring up the Color Picker. Drag the slider down the Spectrum in the middle to choose s shade of Yellow. Select the shade from the left panel and click ok in the Color Picker.
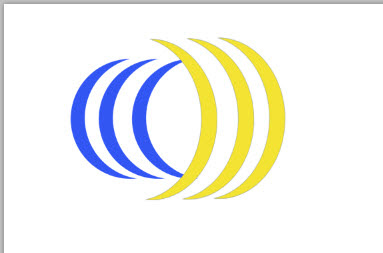
Step 20 : Now Press ALT+BACKSPACE to fill the selection with the Foreground Color. It is yellow. Press Ctrl+D to deselect. Merge the two layers by highlighting them and then press CTRL+E as shown in Step 12/13. Press CTRL+T then press SHIFT+ALT to resize the logo.

With The logo done, you can add Text. Use a font like Impact for stating your business and also your name. Use a smaller size font for your address. You can choose your colors or have the entire Text in Black. You can add a Drop Shadow or a Bevel and Emboss for the logo if you want. Lastly, after flattening your image go to Image>Mode>CMYK. You can leave it at RGB if you do not intend to print.


 Step 1 : I have chosen this free stock photo of a candle. It has a black background.
 Step 2 : I have also opened this free stock image. Note that it has a completely white background and some faint shadow. Ordinarily this should be difficult to manipulate.
 Step 3 : I have chosen this photo first. Click on it. Press CTRL+A (Select All) and then CTRL+C (Copy).
 Step 4 : Now go over the photo of the candle. Press CTRL+V (Paste). The photo of the girl will be pasted over the cangle image. Since both are high resolution images and this the bigger one it has completely covered the photo of the candle. Press CTRL+T. A selection appears all around the image.
 Step 5 : Press SHIFT+ALT and drag down. This will ensure that the image of the girl is resized while keeping proportions intact. You can see here I have dragged the photo of the girl down.
 Step 6 : Use the Move Tool to position the image correctly. Press Enter when you are satisfied. The selection will go away.


 Step 1 : I have opened this photo in Photoshop.
 Step 2 : Click the Crop tool.
 Step 3 : With the Crop Tool drag from the top left corner to the right bottom of the image.
 Step 4 : Now press CTRL+SHIFT and drag either the bottom or top central handle outwards.
 Step 5 : Now still keeping SHIFT+ALT pressed drag the middle corner handle either on the left side or the right side.
 Step 6 : Press Enter. And there is your frame. If you want something more, just keep following.
 Step 7 : Click the Magic Wand Tool.
 Step 8 : Now click once on the White Frame with the Magic Wand. A selection of marching ants select the White portion.
 Step 9 : Press CTRL+J. The White Frame will be cut and pasted onto Layer 1. The marching ants will automatically disappear. Now click the layer thumbnail again on Layer 1 and the marching ants will reappear.
 Step 10 : The marching ants reappear on the white frame.
 Step 11 : Go to Windows>Styles to reveal the Styles if it is not already visible on a panel in the right.
 Step 12 : The Styles dialogue box opens. These are the default Styles. There are many more Styles hidden. Click the tiny black arrow on the right top corner to reveal the other Gradients. You will have to click to select them. But here I will make do with the Styles that can be seen here.


