


Let me show you how to make a pencil in photoshop and notepaper to go with in Photoshop from scratch. You will be able to follow. I have been particularly detailed to help those new to Photoshop. Now to make the pencil.

Step 1 : Open a New white document.

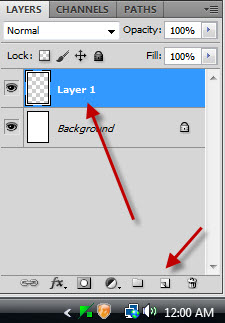
Step 2 : Click the New Layer icon and a new Layer1 forms.

Step 3 : Make sure Show Guides and Show Rulers are ticked. You will find this in the top Panel of CS5.
For earlier versions you will find them under Windows.

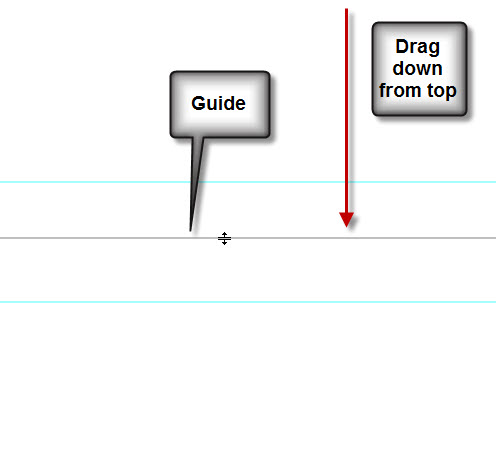
Step 4 : In the top panel click on top and drag down the Guide.

You can see the ruler at the left and on top. I have pulled down 2 guides and aligned them at the 2 inch and 3 inch marks on the ruler.
Step 5 : I have dragged down a third Guide from the top.
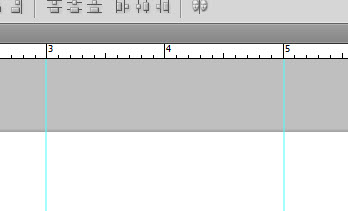
Step 6 : I have dragged two Guides from the left and positioned them at 3 inch and 5 inch.
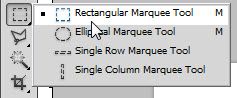
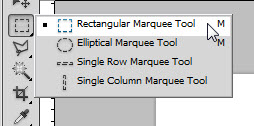
Step 7 : Click the Rectangular Marquee Tool.

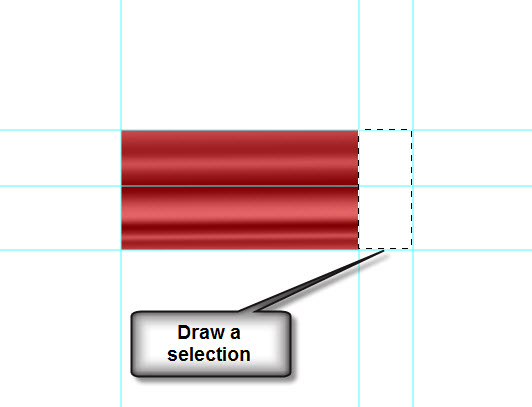
Step 8 : Draw a selection in the middle as shown.

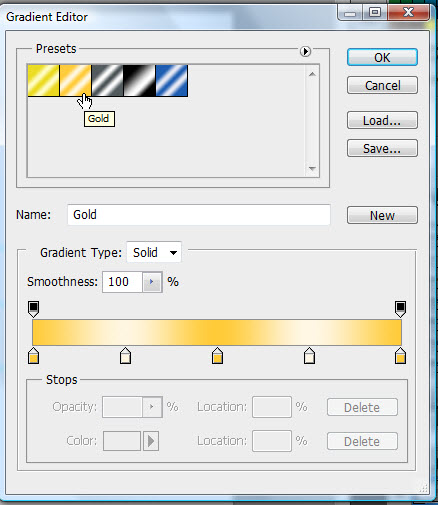
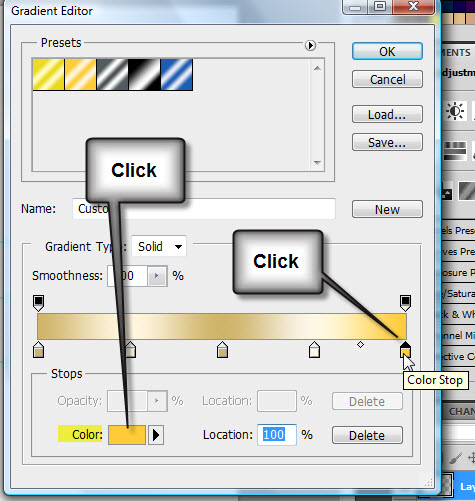
Step 9 : Press g on the keyboard. This is a shortcut for the Gradient Tool. In the top panel you can see the Gradient Editor. Click it.
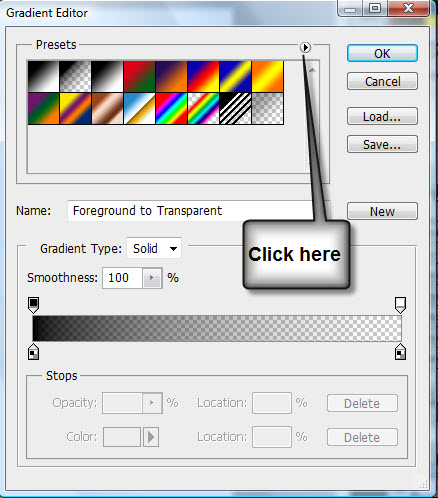
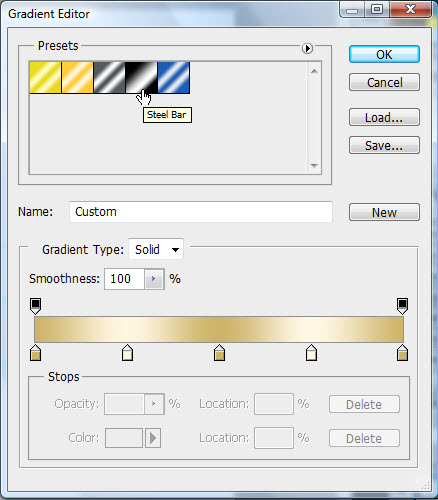
Step 10 : The Gradient Editor opens. Click the tiny arrow shown.

Step 11 : As soon as you click the arrow, you will find a drop down menu. Click on Metals.
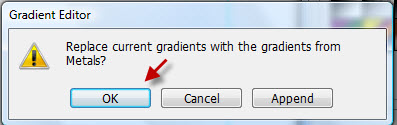
Step 12 : This dialogue bx opens. Click OK.

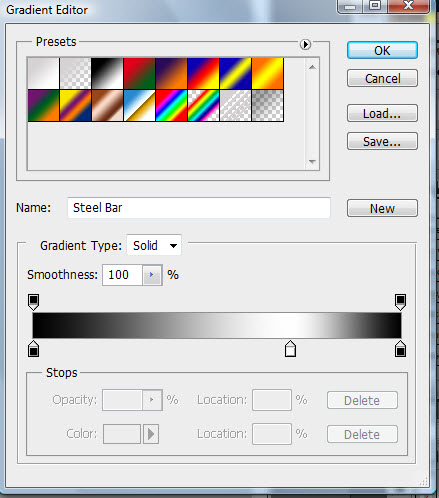
Step 13 : The Metal Presets are displayed. Click on Steel Bar. Click OK.

Step 14 : Press SHIFT drag from the top of the selection to the bottom.

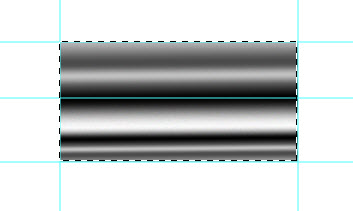
This is how the Gradient looks.
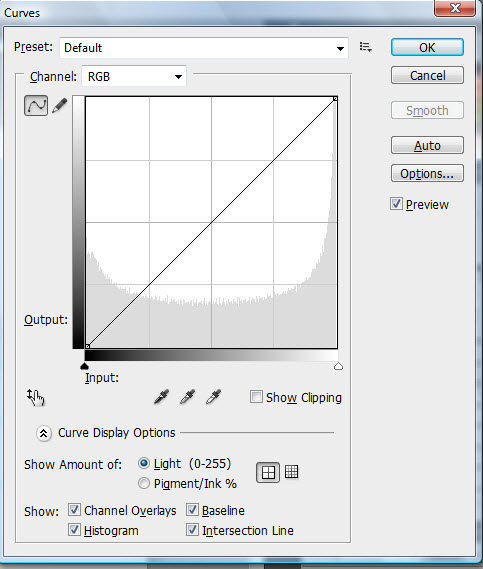
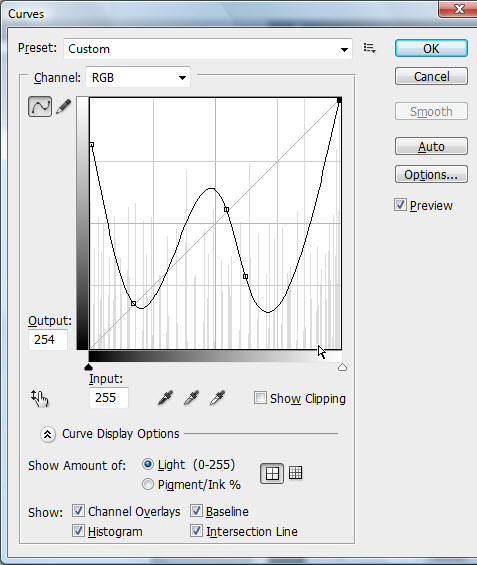
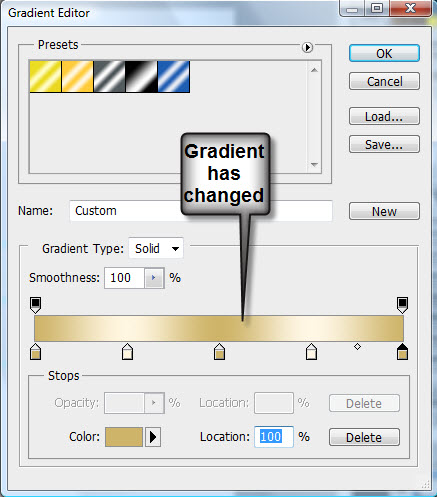
Step 15 : Press CTRL+M to bring up the Curves dialogue box.

Step 16 : Drag the diagonal in the middle to form a rough W shape.
Click OK.
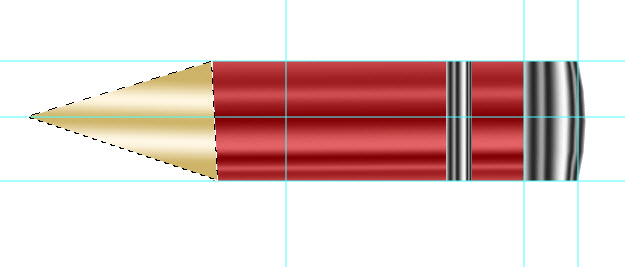
The Gradient looks like this after applying the Curves.

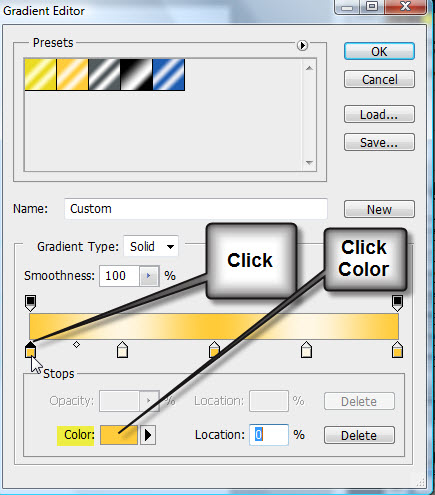
Step 17 : Click the Foreground Color.
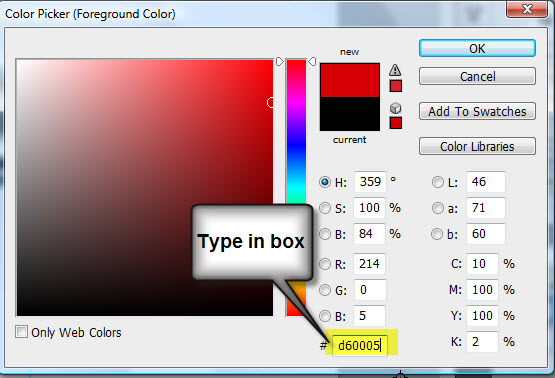
Step 18 : The Color Picker comes up. Just type in d60005 in the highlighted box. It is the numerical value for a shade of red. Click OK.
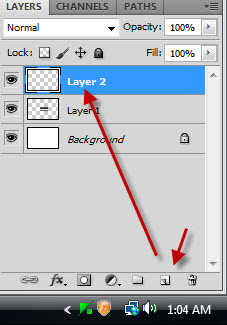
Step 19 : Click the New Layer icon. A new Layer 2 forms.
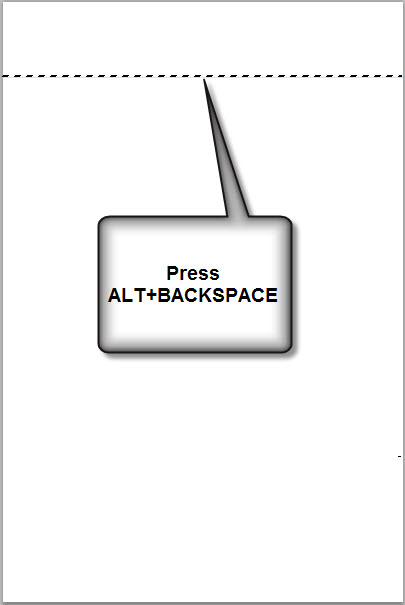
Step 20 : Press ALT+BACKSPACE. The selection is filled with the Foreground Color, which in this case is Red.

Step 21 : Reduce the Opacity of Layer 2 to 60%.

The selection looks like this. Press CTRL+D to deselect.
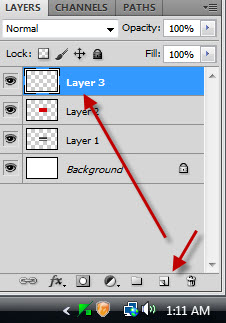
Step 22 : Click the New Layer icon. A new Layer 3 forms.
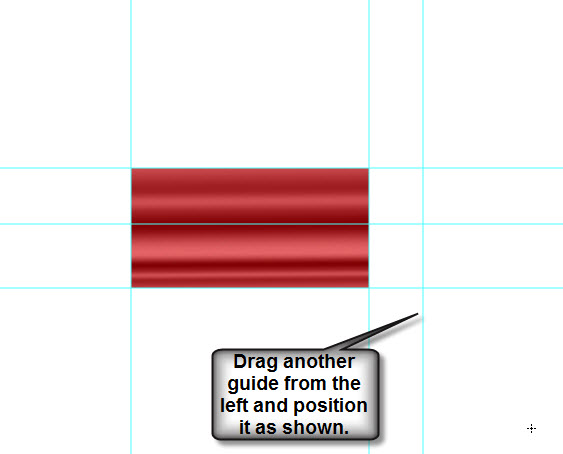
Step 23 : Drag another Guide from the left ruler as shown.
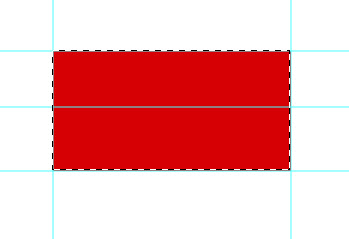
Step 24 : Click the rectangular Marquee Tool.
Step 25 : Draw a selection as shown.

Step 26 : Press g on the keyboard to bring up the Gradient Tool. The earlier Metal Gradient is still there.
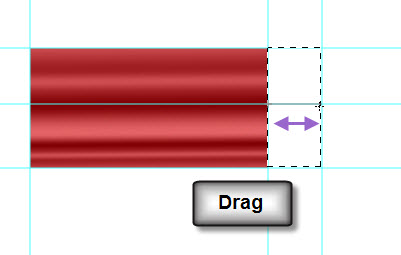
Step 27 : Drag with the Gradient Tool between the selection.

Step 28 : The Gradient looks like this.
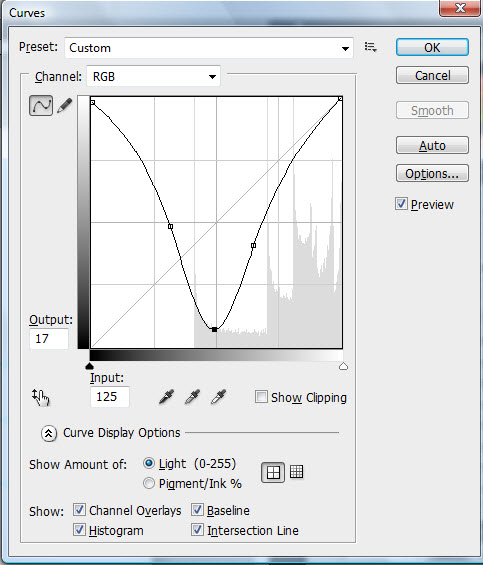
Step 29 : Press CTRL+M to bring up the Curves. Again turn the diagonal in the middle to a rough W shape. Click OK.
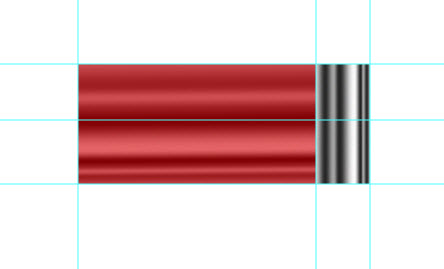
The Gradient looks likes this.
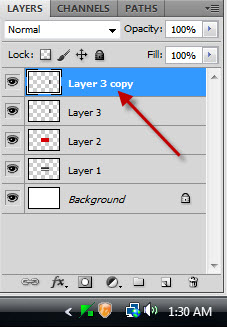
Step 30 : Press CTRL+J. Layer 3 duplicates into Layer 3 copy.
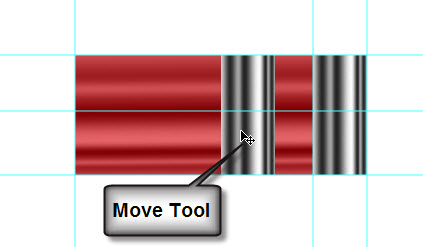
Step 31 : Press v on the keyboard for the Move Tool. Move the layer to the left.
Step 32 : Press CTRL+T a selection forms.
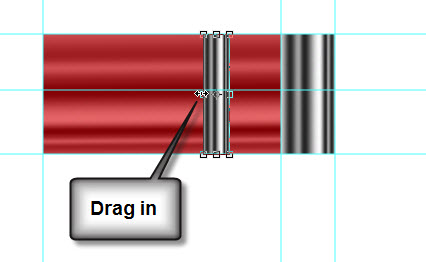
Step 33 : Press SHIFT+ALT. Drag inwards. Press ENTER.

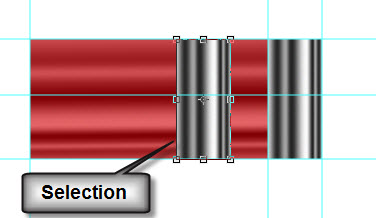
Step 34 : Click on Layer 3.
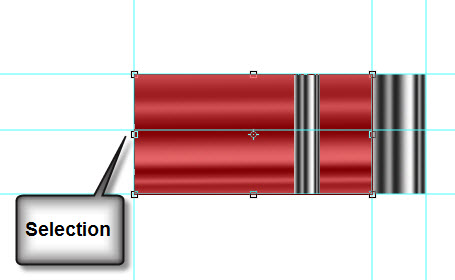
Step 35 : A selection forms around the body of the Pencil.

Step 36 : Press SHIFT and drag the middle handle to the left. Press ENTER.
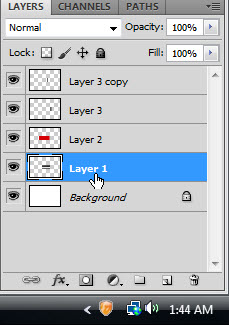
Step 37 : Click on Layer 1.

Step 38 : Press CTRL+T. A selection forms. Drag out the middle handle keeping SHIFT pressed till it aligns with Layer 2. Press ENTER.

Step 39 : Click on Layer 3.

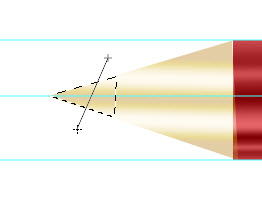
Step 40 : Press CTRL+T. A selection forms. Right click inside the selection. Click on Warp from the pop up.
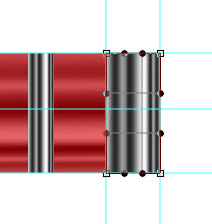
Step 41 : As soon as you click on warp. A selection like this forms.

Step 42 : Pull the handles on the right gently so that a slight curve forms.
Press Enter.

Step 43 : Click on Layer 3 copy.

Step 44 : Click on the New Layer icon. A new Layer 4 forms.
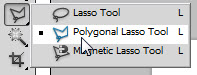
Step 45 : Click on the Polygon Lasso Tool.
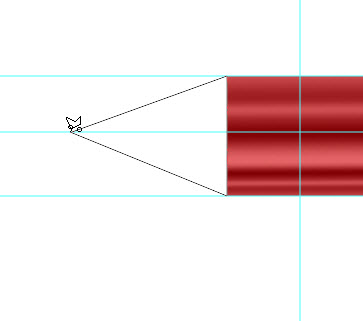
Step 46 : Draw a selection like this with the Polygon Lasso Tool.

Step 47 : The selection turns into marching ants.


Step 57 : Press CTRL+D to deselect. The image looks like this.


The marching ants reappear.
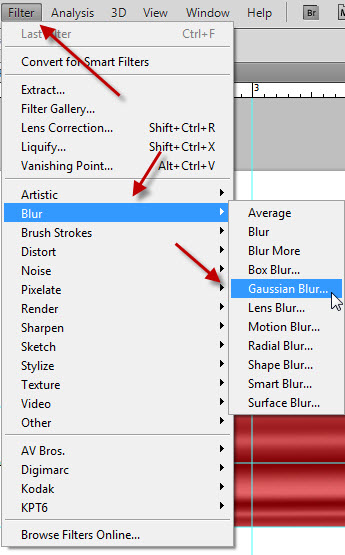
Step 61 : Go to Filter>Blur>Gaussian Blur.
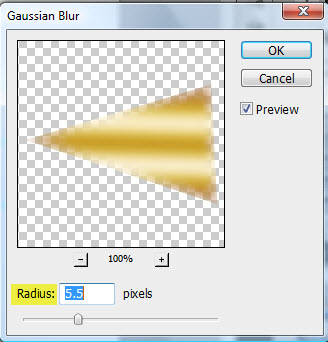 Step 62 : The Gaussian Blur dialogue box appears. I have set a radius of 5.5.
Click OK.
 Step 63 : Press CTRL+D to deselect. The Pencil looks like this.
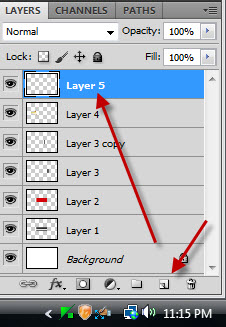 Step 64 : Click the new Layer icon to make a new Layer 5.
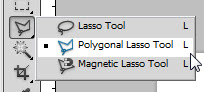 Step 65 : Click the Polygon Lasso Tool.
 Step 66 : Draw a selection as shown with the Lasso.
 The selection changes into marching ants.
 Step 67 : Press g to bring up the Gradient Tool. Open the Gradient editor. Click on Steel Bar preset. Click OK after clicking.
 Step 68 : Drag diagonally with the Gradient Tool.

The Pencil.
 Step 69 : Click the New Layer icon. A new Layer 6 forms.
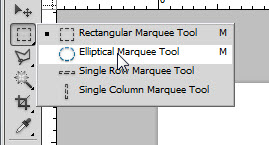 Step 70 : Click the Elliptical Marquee Tool.
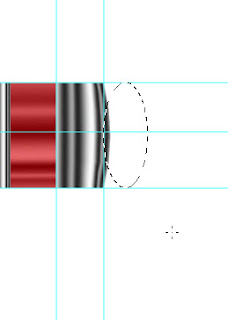 Step 71 : Draw a selection as shown.

Step 61 : Go to Filter>Blur>Gaussian Blur.
Click OK.

The Pencil.

Step 72 : Click the Foreground Color. The Color Picker appears.
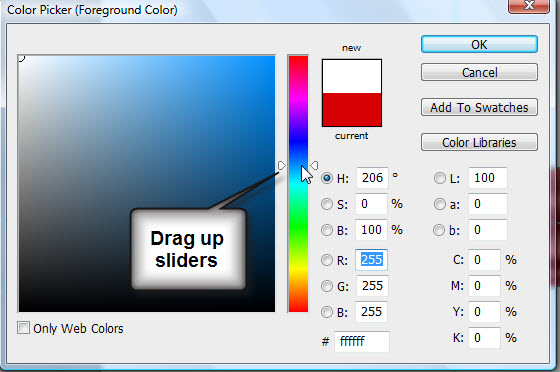 Step 73 : Drag up the slider beside the Spectrum in middle till you get Blue.
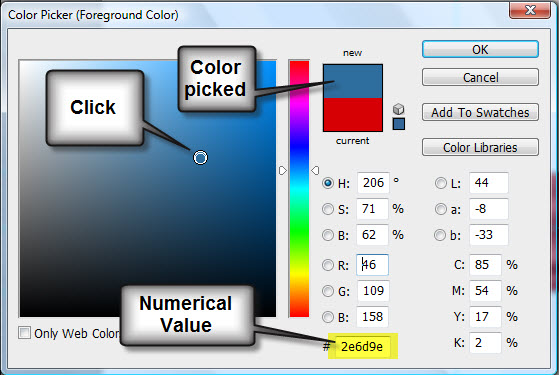 Step 74 : I have clicked on a dull shade of Blue. The numerical value is 2e6d9e. Click OK in the Color Picker.
 The Foreground Color changes to the color picked.
 Step 75 : Press ALT+BACKSPACE. The selection fills with color. Press CTRL+D to deselect.
 Step 76 : Drag layer 6 below Layer1.
 Step 77 : Press v (Move Tool). Use the left arrow key to shift the selection left.
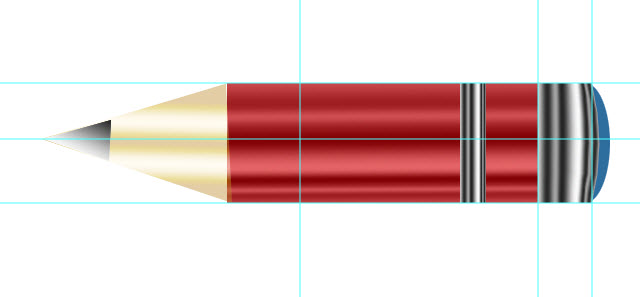
This is the complete Pencil.
 Step 78 : Press v (Move Tool) move the Guides one by one back to the Ruler at the top and left.
 All the Guides have been removed.
 Step 79 : Click on Layer 5 which is the top most layer.
 Step 80 : Press SHIFT and click on Layer 6.
All the layers are highlighted.
 Step 81 : Press CTRL+E. All the layers are compressed into Layer 5.
 Step 82 : Minimize the Pencil image. Open a new white document. Choose Portrait and not landscape.
 Step 83 : Click on the New Layer icon and a new Layer 1 forms.
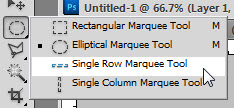
Step 84 : Click the Single Row Marquee Tool.
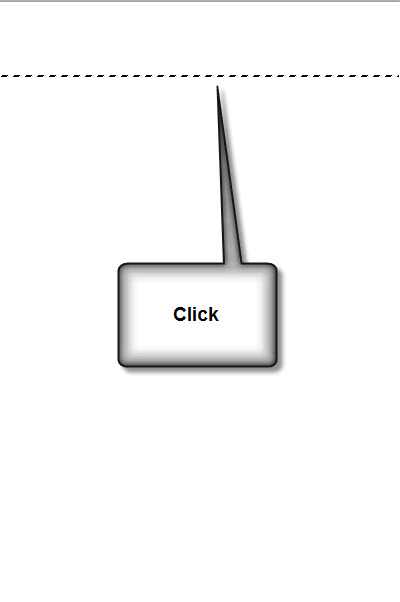 Step 85 : Click once with the Marquee Tool as shown.
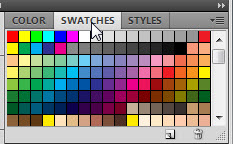 Step 86 : Click on the Swatches.
 Step 87 : Click on Light Cyan. Hover the cursor to read the names of the Swatches.
 The Foreground Color changes to the color picked.
 Step 88 : Press ALT+BACKSPACE. You may not notice anything on the image.
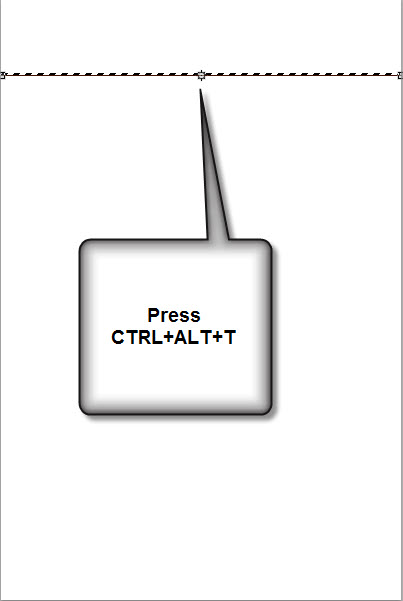 Step 89 : Press CTRL+ALT+T. The line looks like this.
 Step 90 : Press the Down Arrow a number of times. Remember how many times you pressed. Since this is a high resolution image, I have pressed the Down Arrow 20 times.
 Step 91 : Press ENTER. The lower line becomes a dotted line.
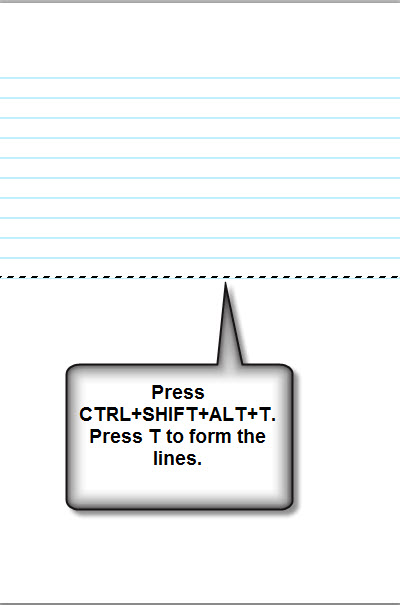 Step 92 : Press CTRL+SHIFT+ALT+T. Keeping CTRL+SHIFT+ALT keep pressing T. The lines will form one below the other automatically.
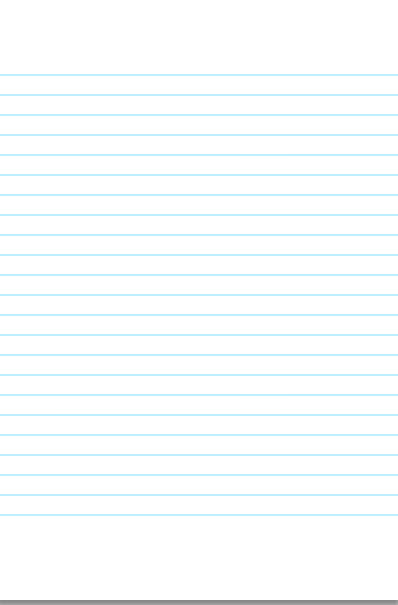 Step 93 : The blue lines.
Press CTRL+D to deselect after reaching the last line.
 Step 94 : Click the vertical Single Column Marquee.
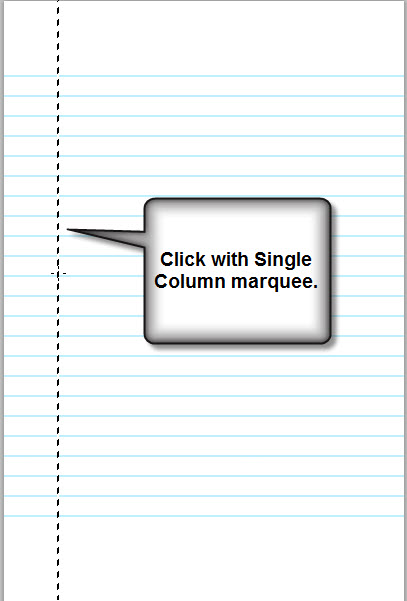
Step 95 : Click once with the Single Column Marquee.
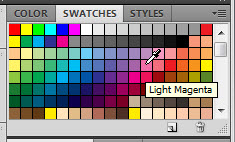 Step 96 : I have now clicked on a shade of Pink -- Light Magenta.
 The Foreground Color changes to the color picked.
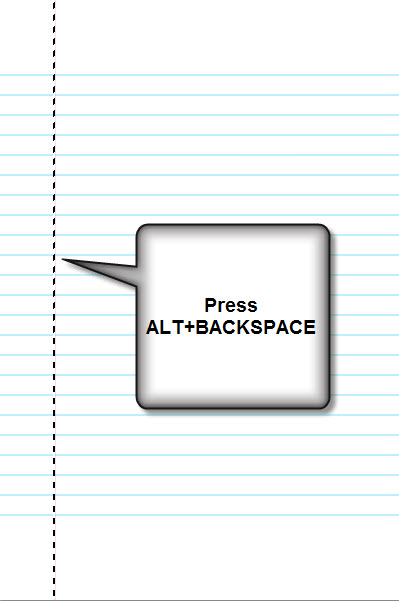 Step 97 : Press Alt+Backspace. Then CTRL+D to deselect.
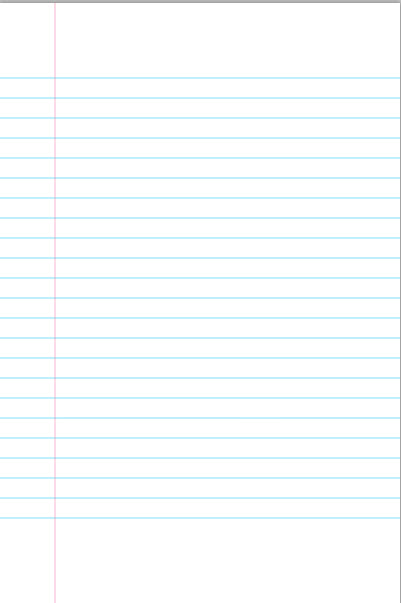
Step 98 : The pink margin has been added.
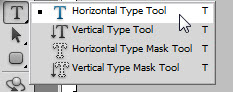 Step 99 : Click the Horizontal Text Tool.
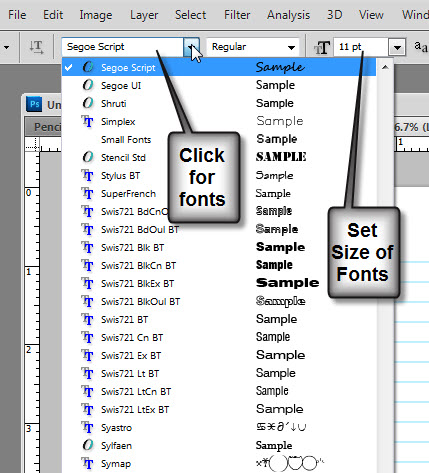 Step 100 : Click on top to reveal the fonts. At the right type in a Size.
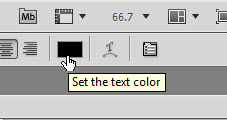 Step 101 : At the top you can set the Color of the Font. It works just like the Color Picker. By default the color is Black.
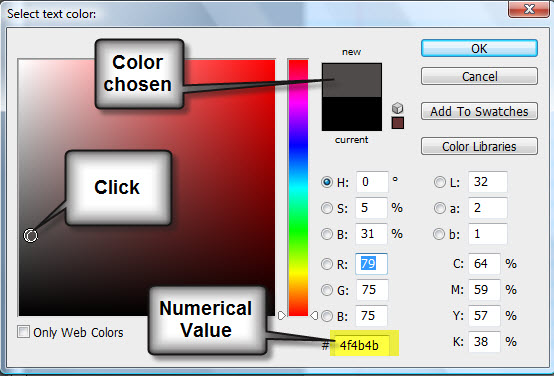 Step 102 : I have clicked on a Gray shade. Its numerical value is 4f4b4b. Click OK in the Select Text Color.
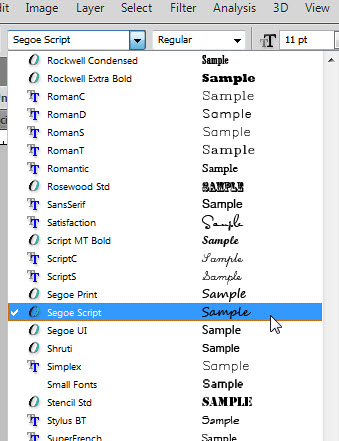 Step 103 : I have clicked on Segoe Script font. It is found in Photoshop CS5. If you do not have it use a free font which you can download from http://browse.deviantart.com/resources/?qh=§ion=&q=handwriting+font
You will only need to register. Registration is free. You can then download it. You can also use any font in your version of Photoshop.
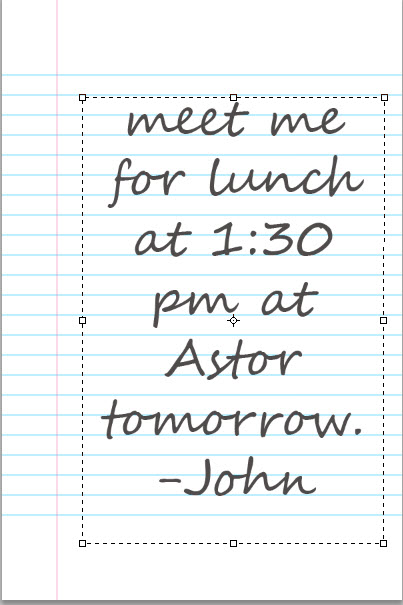 Step 104 : I have typed out my Text.
 Step 105 : Click the Tick Mark in the top panel.
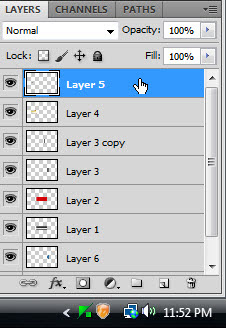
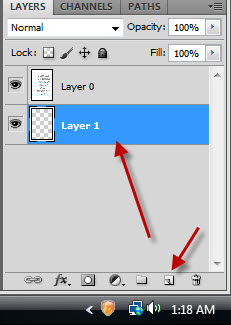
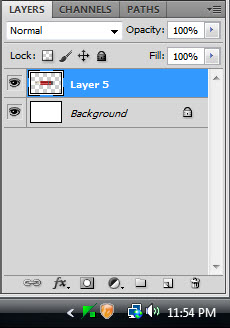
 The Layers palette looks like this.
 Step 106 : Press SHIFT and click on the Background Layer. All the layers are highlighted.
 Step 107 : Press CTRL+E. All the layers are compressed into the Background layer.
 Step 108 : Press ALT and Double Click the Background Layer. It changes to Layer0.
 Step 109 : Press CTRL and click the New layer icon. A Layer 1 forms below Layer0.
 This is how the Foreground/Background Color looks since the last time we used it. It is important to note that the Background Color is White.
 Step 110 : Press CTRL+BACKSPACE. This fills with Background Color which in this case is White.
 Step 111 : Click back on Layer0.
 Step 112 : Press CTRL+T. A selection forms.
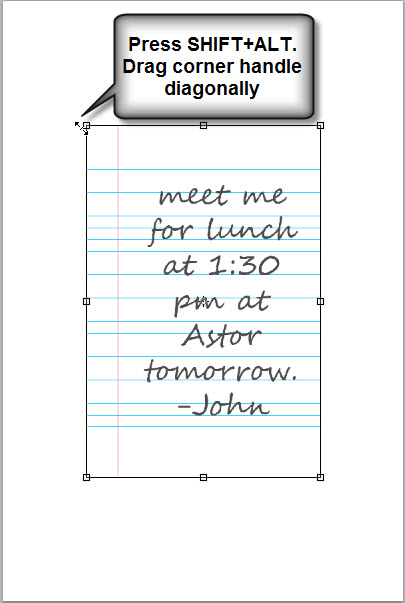 Step 113 : Press SHIFT+ALT and drag the top left corner diagonally down. The layer will decrease in size proportionately.

Step 114 : Hover the cursor over any of the corner handles. A small bent double headed arrow will appear. Use it to rotate the selection.
 Step 115 : Press ENTER. The selection disappears.
 Step 116 : Click on the Add Layer Style button. Click on Drop Shadow from the popup.
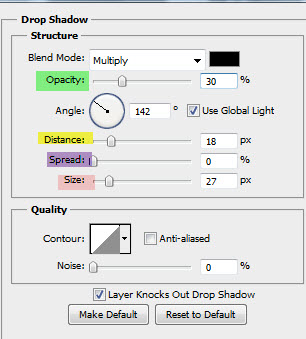 Step 117 : In the Drop Shadow controls I have first set the Distance, then Size, Spread and lastly the Opacity. These are my values. Click OK.
 This is how the Note paper looks.
 Step 118 : Now open the Pencil image.
 Step 119 : Press v (Move Tool). Drag the Pencil image to the Notepaper image.
 The Pencil has been move to the Notepaper.
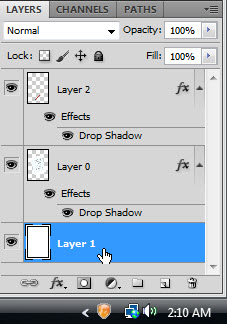
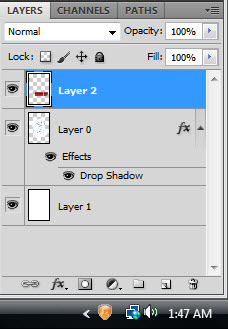 Step 120 : This is how the Layers palette looks. The top Layer (Layer2) is the Pencil. Layer 0 below it is the notepaper.
 Step 121 : Press CTRL+T. A selection forms around the Pencil.
 Step 122 : Press SHIFT+ALT and drag down diagonally. The selection will decrease proportionately. Drag the Pencil down to the bottom of the notepaper.
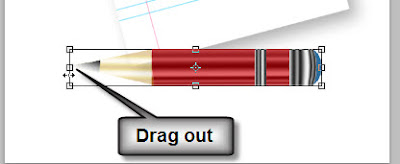 Step 123 : Drag the left middle handle outwards to increase the size of the Pencil.
 Step 124 : Rotate the selection and place it properly at the end of the Text. Press Enter.
 Step 125 : Click on Layer 0 and on Drop Shadow.
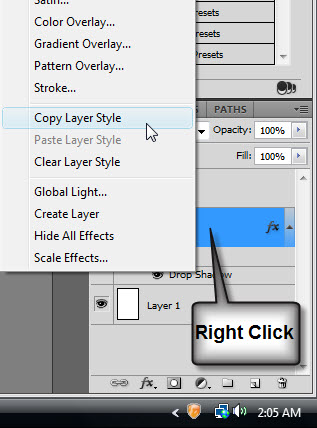 Step 126 : Right click and click on Copy Layer Style from pop up.
 Step 127 : Click on Layer 2. Right Click. From pop up click on Paste Layer Style.
 Step 128 : The Layer Style has been added to the Pencil.
 Step 129 : Click on Layer 1.
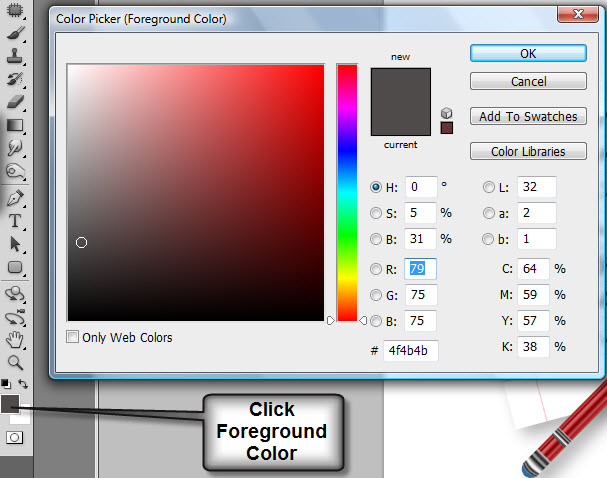
Step 130 : Click on the Foreground Color. The Color Picker opens.
 Step 131 : Click on a light shade of Gray. Its numerical value is d5d2d2. Click OK in the Color Picker.
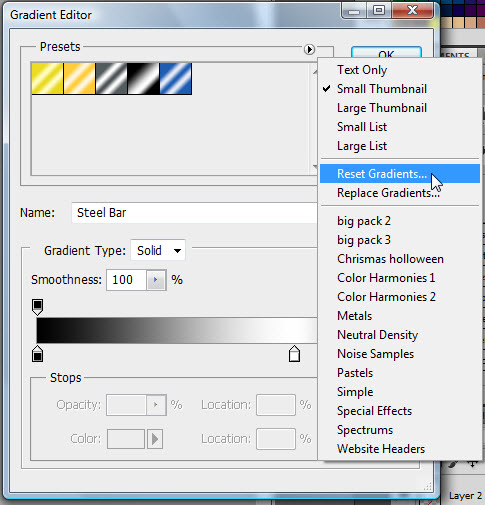 Step 132 : Bring up the Gradient Editor. Click the small arrow on top and click on Reset Gradients from the pop up.
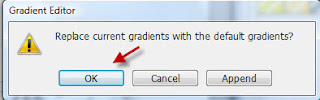 Step 133 : This dialogue box pops up. Click OK.
 The Gradients have been reset.
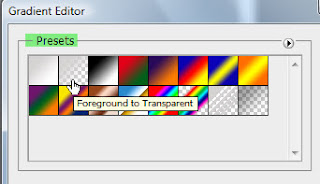 Step 134 : Click on Foreground to Transparent.
 Step 135 : Drag down from to top to bottom.
 The image looks like this.
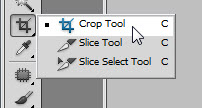 Step 136 : Click the Crop Tool.
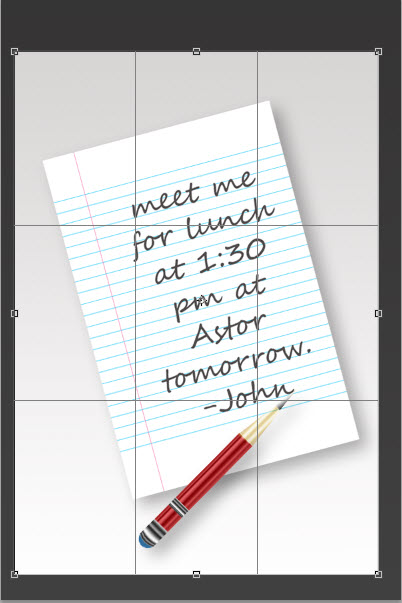 Step 137 : I am am cropping out part of the Background. Press ENTER to apply the Crop.
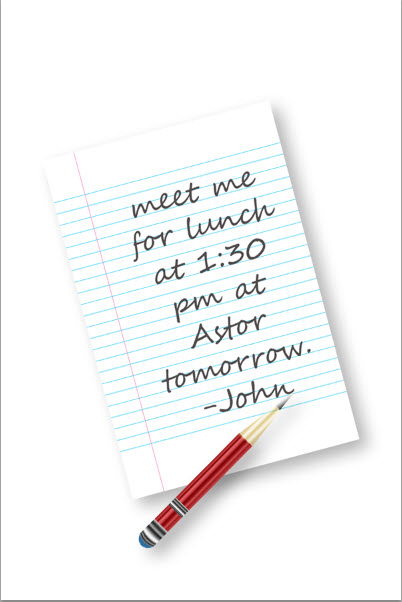
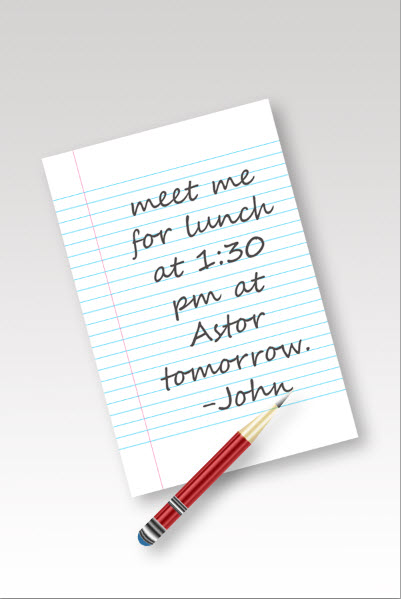
 The finished Notepaper and Pencil.
Other photoshop tutorials are here
This is the complete Pencil.


All the layers are highlighted.

Step 84 : Click the Single Row Marquee Tool.
Press CTRL+D to deselect after reaching the last line.
Step 95 : Click once with the Single Column Marquee.
Step 98 : The pink margin has been added.
You will only need to register. Registration is free. You can then download it. You can also use any font in your version of Photoshop.
Step 114 : Hover the cursor over any of the corner handles. A small bent double headed arrow will appear. Use it to rotate the selection.


Step 130 : Click on the Foreground Color. The Color Picker opens.


Other photoshop tutorials are here


