Monday, November 29, 2010

Text -- Grass Text

There may be a font that looks like as it has been made of grass, but I am unaware of it. You can create Grass Text in Photoshop in any version with a Brush that all versions have.
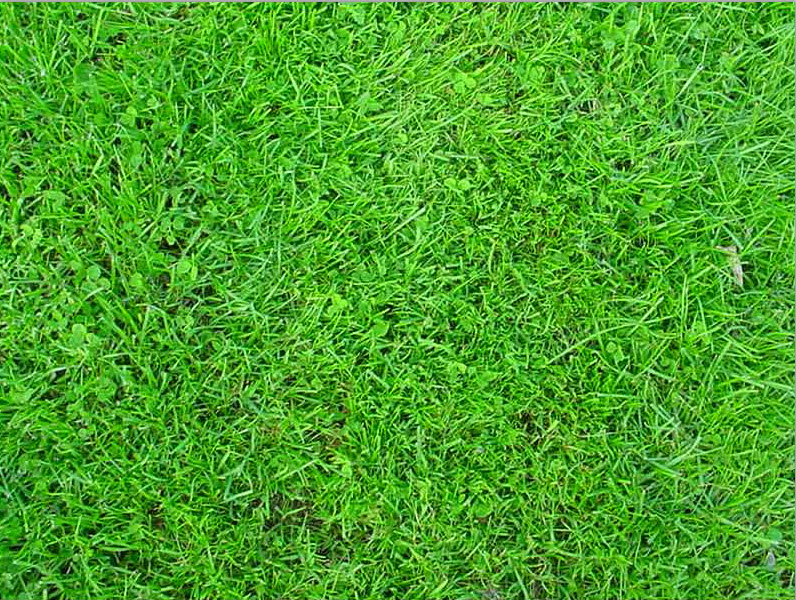
Step 1 : First we need a free stock image of grass. You will find the image here
It belongs to ~jonnymorris
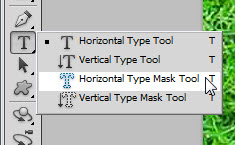
Step 2 : Click the Text Tool and select the Horizontal Type Mask Tool.
Step 3 : There is only the Background Layer in the Layers palette.
Step 4 : Select a thick font by clicking in the top panel to reveal those available in your version of Photoshop. Set the size of the Font by typing it into the box in the top panel.
Step 5 : I had set the size too large. I have reduced it to 130 points.
Step 6 : A red color covers the image as soon as you begin typing.
 
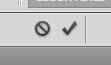
Step 7 : Click the Tick Mark in the top panel at right,
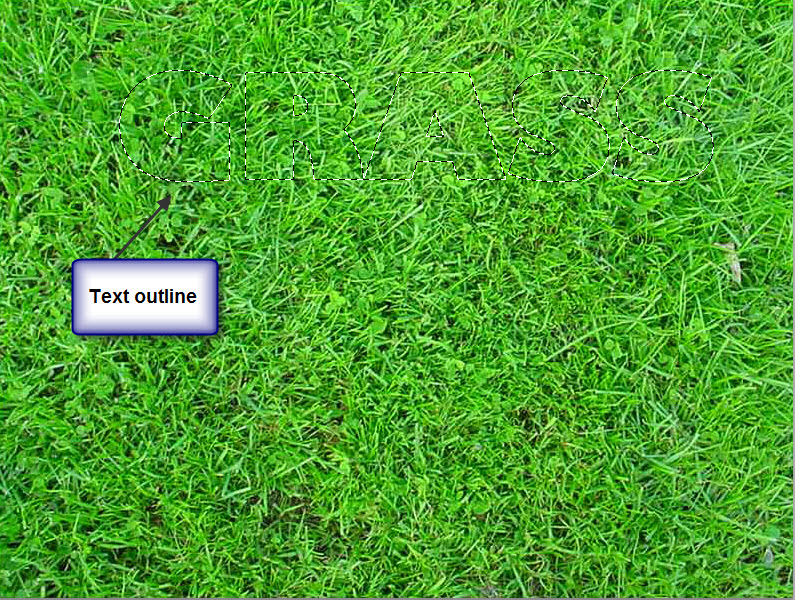
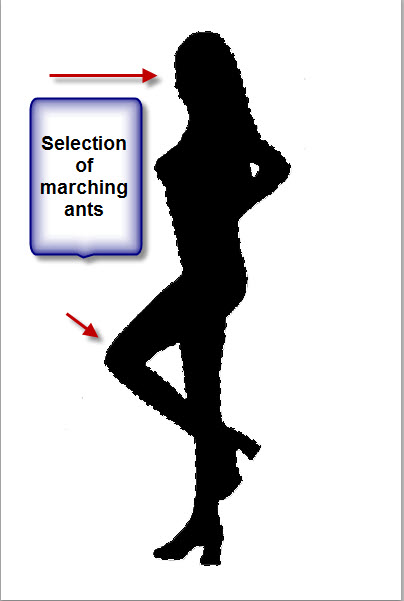
Step 8 : As soon as you click the Tick Mark the reddish color disappears. A selection of marching ants surrounds the Text.
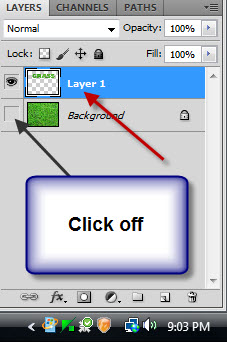
Step 9 : Press CTRL+J. The selection is cut and pasted onto Layer1. Click off the eye icon on the Background Layer.
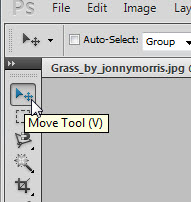
Step 10 : Click the Move Tool.
Step 11 : Use the Move Tool to the middle of the canvas.
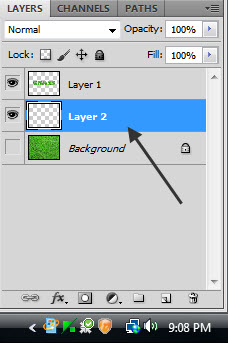
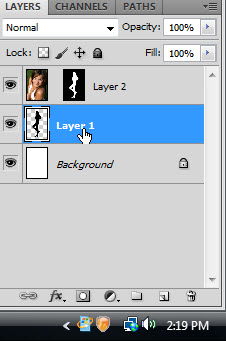
Step 12 : Press CTRL and click the New Layer icon (the second from the right at the bottom of the Layers palette). A new Layer 2 forms under Layer1.
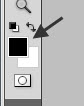
Step 13 : The Foreground/Background Colors should be set to the default Black/White. If it is not press x and then d on the keyboard.
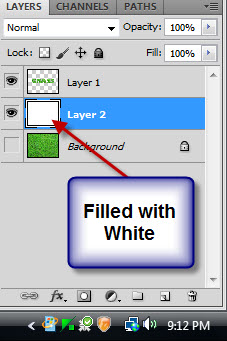
Step 14 : Press CTRL+BACKSPACE to fill Layer 2 with the Background Color which is White in this case.
The Text looks like this.
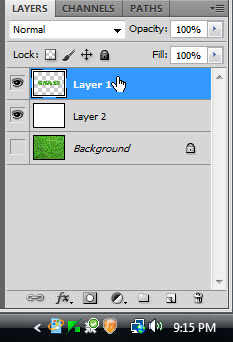
Step 15 : Click on Layer 1, the topmost layer.
Step 16 : Click on the New Layer icon. A new Layer 3 forms above Layer3.
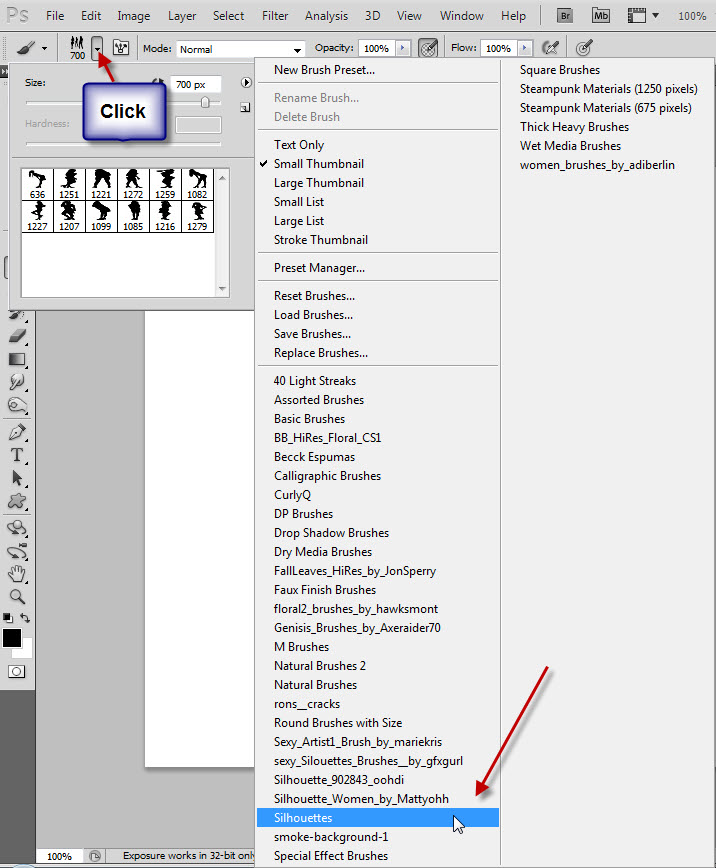
Step 17 : Click in the top panel to reveal the Brush Controls.
Next click the tiny black arrow at right.
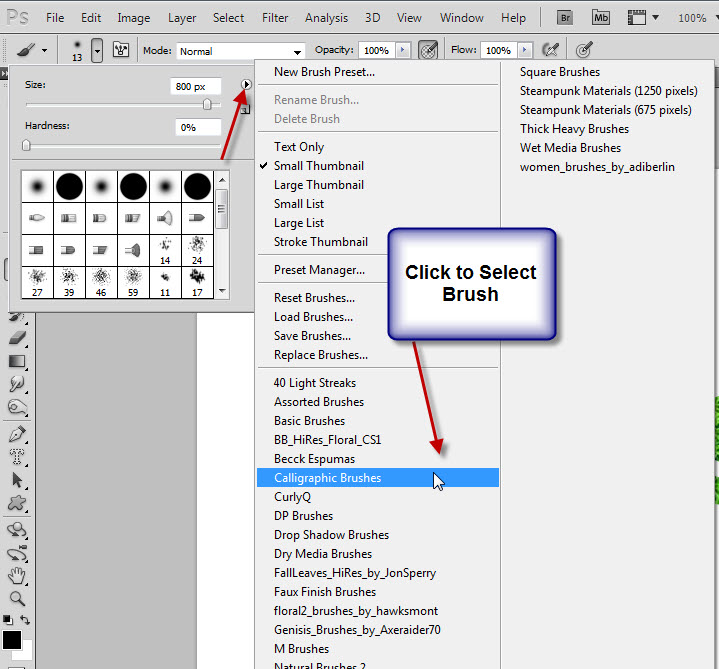
Step 18 From the drop down menu, click on Calligraphic Brushes.
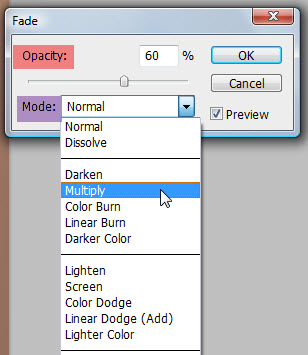
Step 19 : As soon as you click, this dialogue  opens. Click OK.
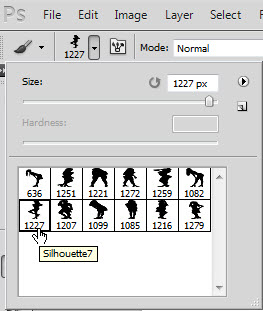
Step 20 : The Calligraphic Brushes are revealed.
Step 21 : I have clicked on the Flat 45 pixel Brush to select it.
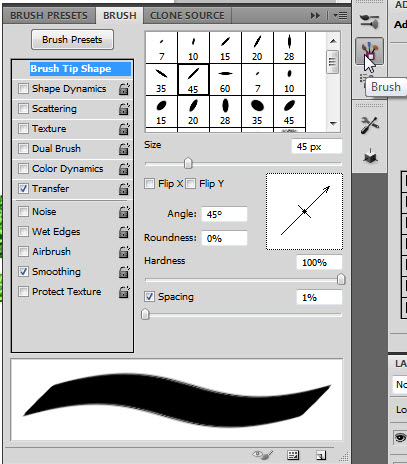
Step 22 : Click the Brush at the right. This is CS5. In earlier versions you will find a small square on the top panel. If you click it it will reveal this dialogue box.
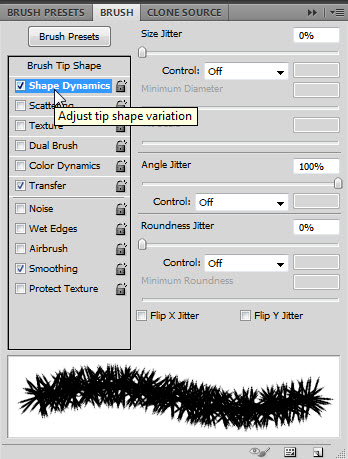
Step 23 : Click the Shape Dynamics. 
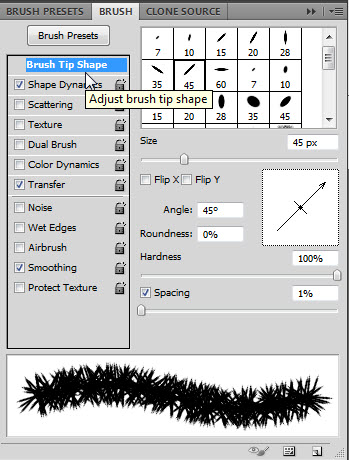
Step 24 : Click the Brush Tip Shape.
Step 25 : Drag the Spacing slider suitably.
Step 26 : Click the small double arrow at right top to make the Brush palette go away.
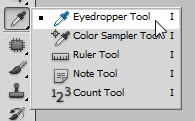
Step 27 : Click the Eyedropper Tool.

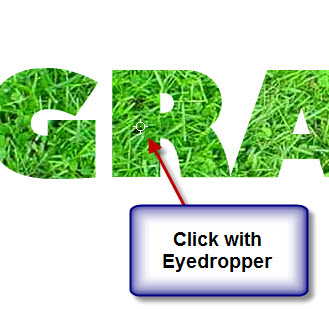
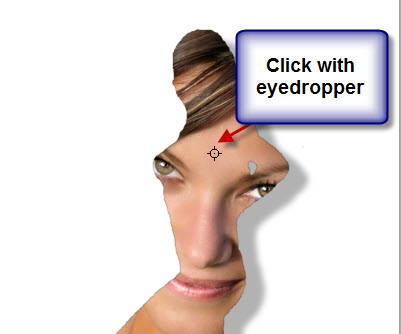
Step 28 : Click on a green in the grass.
Step 29 : The Foreground Color changes to the color picked.
Step 30 : Press b on the keyboard to bring up the Brush Tool. You can see how the Brush looks like.
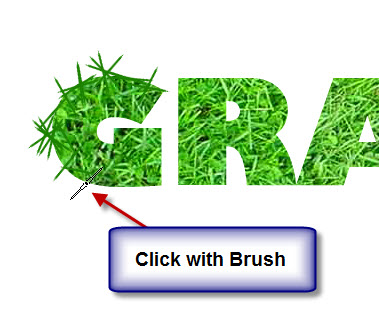
Step 31 : Click with the Brush around the letters. Do not apply pressure. Just click gently.
The Grass Text.
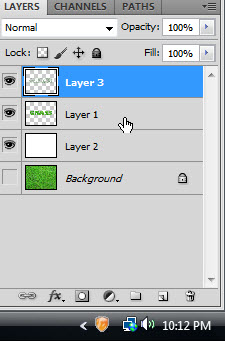
Step 32 : We are now on Layer 3. Press SHIFT and click on Layer1.
Step 33 : Keeping SHIFT pressed, click on Layer1. Both layers highlighted.
Step 34 : Press CTRL+E. Both the Layers merge into Layer3.
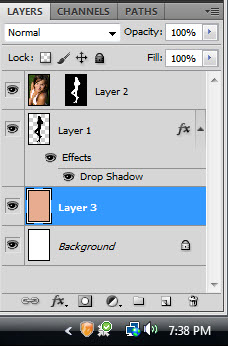
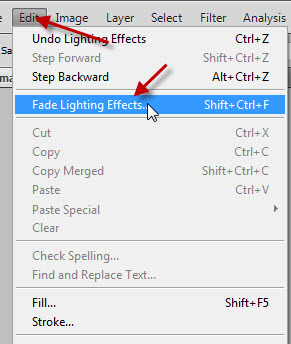
Step 35 : Click on Layer Style. From the popup click on Drop Shadow.
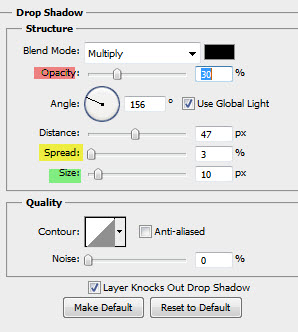
Step 36 : The Drop Shadow dialogue box opens. Place the cursor on the image. With the cursor you will be able to move the drop shadow anywhere you want to.
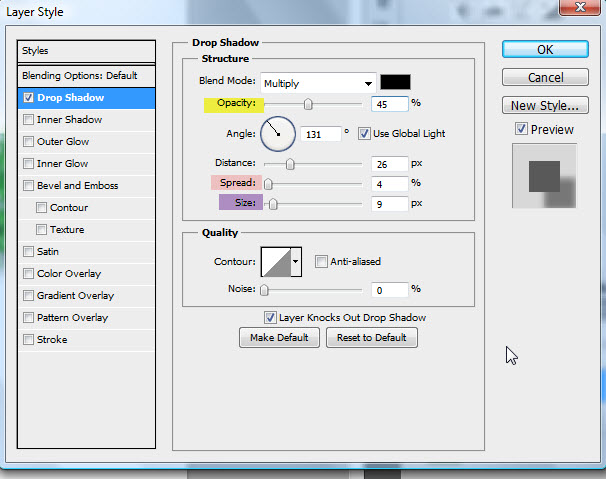
Step 37 : In the Drop Shadow Controls the Distance has already been set by dragging the Drop Shadow  with the cursor. I have set the Size at 9, Spread to 4 and lastly reduced the Opacity to 45 per cent. Click OK.
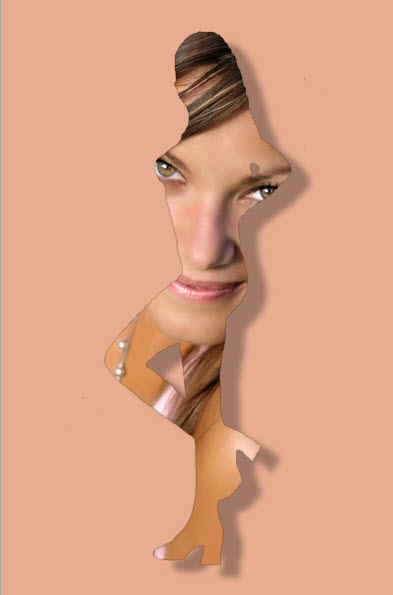
The Grass Text.
Other Photoshop tutorials are here


Sunday, November 28, 2010

Silhouette Paste Into

I have been asked to show how the image of a model (or anything) can be pasted into a silhouette in Photoshop. It should not be difficult. We need some brushes and a free stock photo. This will save time. If you want to make a perfect silhouette from an image, say a model please see here
I will be using this free Brush Set. It has been made by *Chris10
Download the brush  here
You will have to register to download the Brush. Registration is free as also the Brush. You have to install the Brush in Photoshop. If you do not know how to install a Brush, please see my tutorial here
Step 1 : Open a new white layer in Photoshop.
Step 2 : Click the New Layer button and a new Layer 1 forms over the Background Layer. You should use each Brush on a separate layer. This is because, should you not like a particular brush or effect, you can just delete the layer and the rest of your composition stays intact.
Step 3 : Press b on the keyboard to bring up the Brush Tool. Click in the top panel for the Brush settings. Scroll down to the selected Brush and click.
Step 4 : This dialogue Brush opens. Click OK.
Step 5 : The Brushes have been loaded.
Step 6 : I have clicked on a Brush. You can use any Brush you like.
Step 7 : The Brush as you can see is quite large. To decrease the size of a Brush press [ (left bracket), to increase the size press ] (right bracket).
Step 8 : Before using the Brush Go to Image>Image Rotation>90 degree CW.
Step 9 : The canvas has been rotated.
Step 10 : Make sure that the Foreground/Background colors are set the default Black/White. If it is not press x and then d on the keyboard.
Step 11 : Now click once with the Brush.
This is how the image looks.
This is how the Layers palette looks like. The Brush is on Layer1 above the White Background layer.
Step 12 : CTRL+CLICK the layer 1 thumbnail.
Step 13 : As soon as you CTRL+CLICK a selection of marching ants select the silhouette.
Step 14 : I have now opened this free stock image. You will find it here 
It belongs to ~Greeneagle777
Press CTRL+A (Select All) then CTRL+C (COPY) A selection of marching ants surrounds the image.
Step 15 : Click back on the silhouette. Go to Edit>Paste Special>Paste Into (in Photoshop CS5). In earlier versions you will find the paste into command directly under Edit.
Step 16 : After Pasting Into. Press CTRL+T. The image that I have pasted into is a huge one. Pressing CTRL+T brings up a selection.
Step 17 : Press SHIFT+ALT and drag the top left corner handle up and down diagonally. The image will be resized proportionately.
Step 18 : Keeping SHIFT+ALT pressed drag the right, bottom and top middle corner handles to resize suitably. Press ENTER after resizing.
This is how the image looks.
Step 19 : Click on Layer 1.
Step 20 : Click on Layer Styles button. Click on Drop Shadow.
Step 21 : Keeping the layer Styles  dialogue box open with the Drop Shadow selected, place the cursor on the image. You will be able to move the Drop Shadow anywhere you want.
Step 22 : In the Drop Shadow Controls, the Distance has already been set by dragging with the cursor. I have increased the Size to 10, Spread to 3 and lastly reduced the Opacity to 30%. There is nothing hard and fast about it. It will depend on your image and your liking. Click OK.
This is how the image looks.
Step 23 : Press CTRL+CLICK the new layer icon. A new Layer 3 forms under Layer 1.
Step 24 : Click the Eyedropper Tool.
Step 25 : I have clicked on a light shade in the image with the Eyedropper Tool.
Step 26 : The Foreground Color changes to the color picked.
Step 27 : Press ALT+ BACKSPACE. It will fill with the Foreground Color.
Step 28 : The Layers pallet looks like this. Layer 3 is filled with the Foreground Color.
Step 29 : Go to Filter>Render>Lighting Effects
 
Step 30 : In the Lighting dialogue box controls, set the Style at the top to Three Down.

This is the Three Down.
Step 31 : At left pull up the lights one by one by dragging on the arrows.
Step 32 : This is how the lights should looks.
Step 33 : Change the Light Type to Omni.
The Preview in the dialogue box looks like this. Click OK.
Step 34 : Go to Edit>Fade Lighting Effects
Step 35 : In the Fade dialogue box lower the Opacity to 60% and change the Mode to Multiply. Click OK.
This is how the image looks.
Step 36 : Go to Filter>Distort>Polar Coordinates.
Step 37 : The Polar Coordinates dialogue box opens. The Rectangular to Polar is checked by default.
Click OK.
The finished image.
Other photoshop tutorials are here


Share

Twitter Delicious Facebook Digg Stumbleupon Favorites