Sometimes an image may look all right, but needs a boost to make it it better. The easiest way is to used a Color Balance and Curves Adjustment layers. It is not difficult to do. To this a little bit of Light Shaping will add to the overall improvement of the image.

Step 1 : I have opened this free stock image. It looks OK, but could look better. You will find the image here


Step 2 : Click the New Fill or Adjustment Layer button at the bottom of the Layers palette. Click Color Balance from the pop up.

Step 3 : The Color Balance Adjustment dialogue box opens.
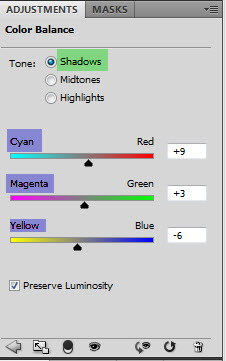
Step 4 : I have first clicked on Shadows. The adjustment will only affect the shadows or dark portions of the image. Remember every image is different. Therefore the settings will vary. You need to examine first what needs to be boosted in the shadows, whether it is red or Cyan, Magenta or Green or Yellow or Blue. It is not necessary that all the three adjustments are required
In this image I have increased the Red to +9 to bring up the reds, likewise Green which I have given a value of 3 to boost the greenery in the background. I have given an adjustment of -6 to the Blue (which increases the yellow in the image). There are two colors on the end of each scale you will notice. For example if you increase the Red, the Cyan is decreased. Therefore study the image and see where the color boost is to be applied, whether it be the Shadows, Midtones or Highlights. In the Shadows only the shadows are affected.

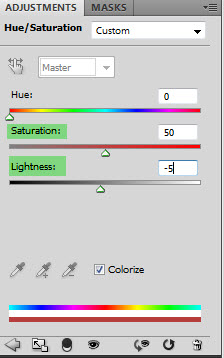
Step 5 : Click on the Midtones. The adjustments that you make will only affect the midtones and not the Shadows or Highlights.

Step 6 : You will notice that the image has a yellowish cast. In the Midtones I have given +1 for Red to counter the yellow, -8 for Green as there is no green in the image, which boosts the Magenta. Lastly I have given +5 for the Blue to decrease the yellow.

Step 7 : I have now clicked on the highlights. This will affect the skin tone largely. I have given +3 to Red, -12 for Green and +12 for Blue.

This is how the image looks. Now to give a Curves Adjustment.

Step 8 : Click on the New Fill or Adjustment layer button. Click on Curves from the popup.

Step 9 : The Curves dialogue box opens.

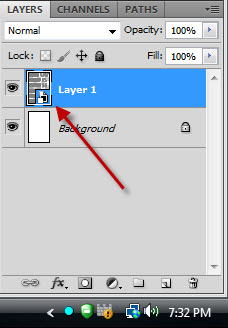
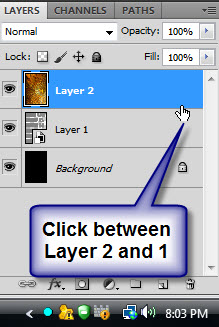
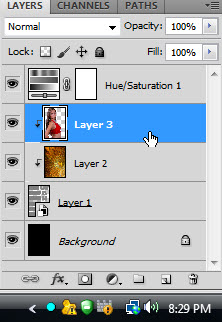
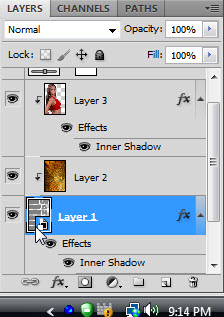
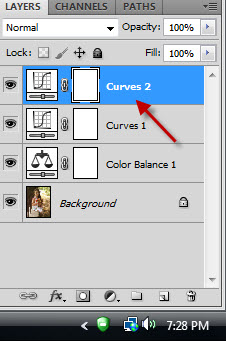
The Layers palette meanwhile looks like this.

Step 10 : In the Curves, click on the diagonal at the top approximately in the middle of the top right square. what you re doing is increasing the light.

Step 11 : Drag up slightly at the bottom. It decreases the shadows. The face of the girl has some shadows which need to be lightened.

The image looks like this.
.Step 12 : Make a second Curves Adjustment layer.

Step 13 : At the top drag the diagonal slightly upwards, at the bottom drag slightly inwards. Place the cursor in the middle of the diagonal and use the Up Arrow key to nudge it slightly up.
 The image looks like this.
 Step 14 : Press CTRL+SHIFT+E. All the layers merge into the Background layer. These are a few additional steps. It is called Light Shaping.
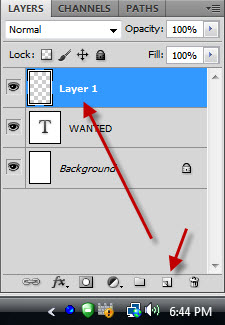
 Step 15 : Press CTRL+SHIFT+N to bring up the new layer dialogue box.
 Step 16 : Change the Mode to Overlay.
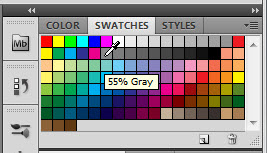
 Step 17 : Check the Fill with Overlay-neutral color (50% gray). Click OK.
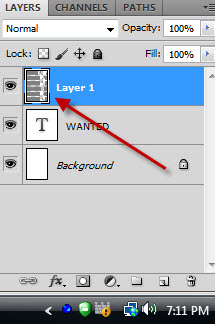
 The Layer palette looks like this.
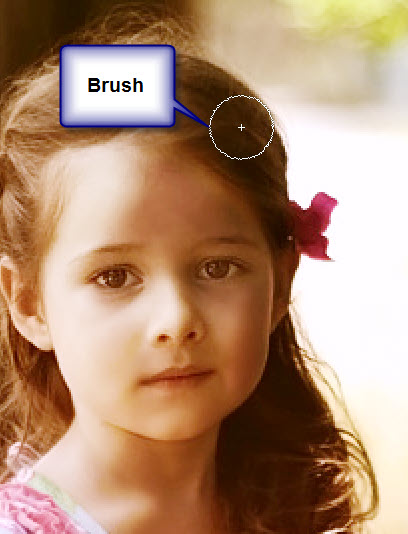
 Step 18 : Click the Brush Tool.
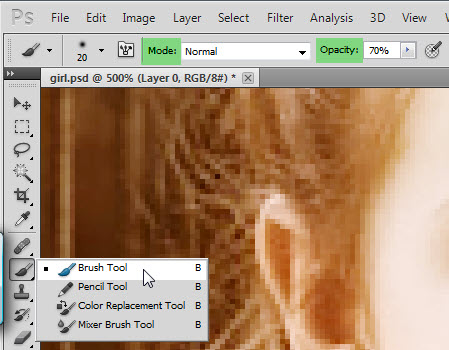
 Step 19 : In the top panel change the Mode of the Brush to Lighten.
 Step 20 : Reduce the Opacity to 10 to 15%. It will depend on your image.
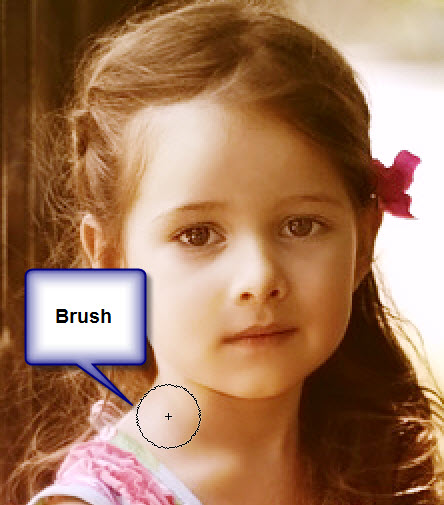
 Step 21 : You need to zoom into the image. You will have to click the Brush Tool again. To make the Brush tip big press ] (right square bracket) and to make it small ([ (left square bracket). To make the Brush hard press SHIFT+] and to make it soft SHIFT+[. We will be using a soft Brush.
 Step 22 : Press x on the keyboard to switch the Foreground Color to White.
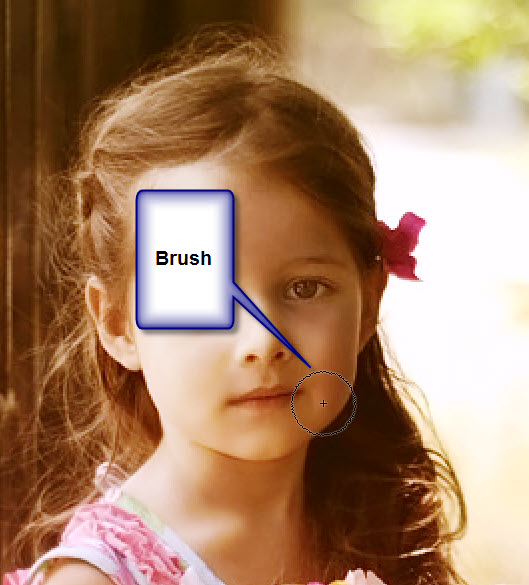
 Step 23 : Paint with the Brush on the highlights. The highlights will lighten. This is a small image. You will have to do it to see the subtle change.
 Step 24 : Paint the highlights on the arms.
 Step 25 : And on the legs.
 Step 26 : Now change the Mode in the top panel to Darken.
 Step 27 : Press x on the keyboard to change the Foreground Color to Black.
 Step 28 : Paint on the shadows with the Brush.
 Step 29 : Paint on the shadows in the arms.
 Step 30 : Paint the shadows in the hair.
 Step 31 : Paint on the shadowed hands.
 Step 32 : Press CTRL+SHIFT+E to Merge Visible. All the layers merge into the Background Layer.
 Step 33 : Drag the lock of the Background layer to the Trash Can at the bottom of the Layers palette.
 Step 34 : Click the New Layer icon and a new Layer 1 forms.
 Step 35 : I want to remove the dark circle under her eye.
 Step 36 : Click the Brush Tool. Change the Mode at the top to Normal. Increase the Opacity to 70%.
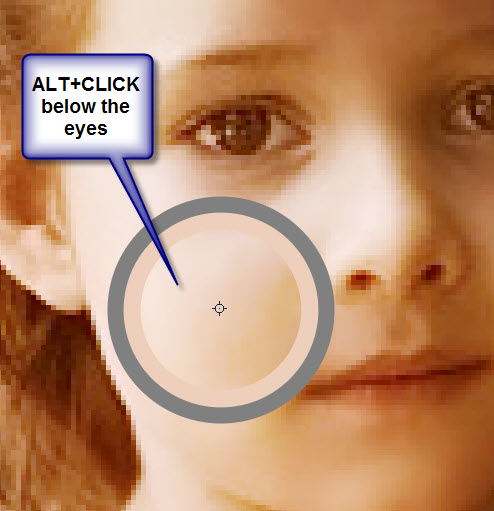 Step 37 : ALT+CLICK with the Brush Tool below the dark circles below the eyes.
 Step 38 : As you soon as you ALT+CLICK with the Brush the Foreground Color changes to the color clicked.
 Step 39 : Paint away gently below the eyes and the dark circles disappears.
 The finished image.
Other photoshop tutorials are here
Other photoshop tutorials are here