


I will be using a brush which is not found in Photoshop for a special effect. Don't worry you will be able to download and use it too. This will work with any image and can also be done in Photoshop7 as well as in Photoshop CS5, which means you can do it too whichever version of Photoshop you may be using.

This is effect I will achieve.

I will be using these brushes. You can download it from here
They belong to hannarb
I will show how you can load and use it in Photoshop..
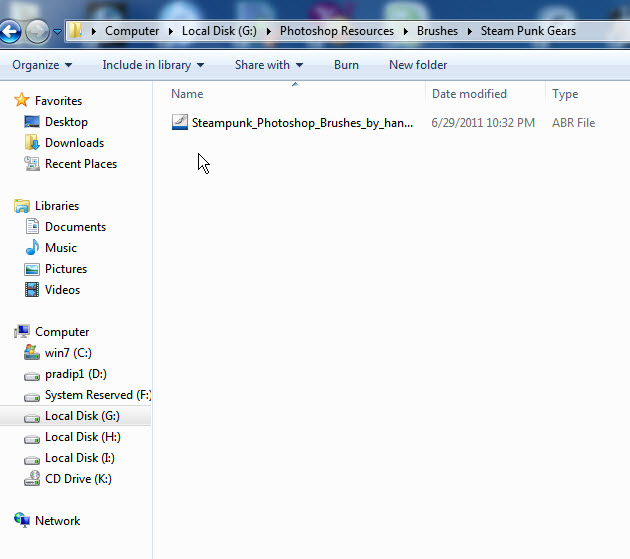
Step 1 : Download the Brush to a folder in your computer.

Step 2 : I will also use this free stock image. You will find it here
It belongs to kirill7117
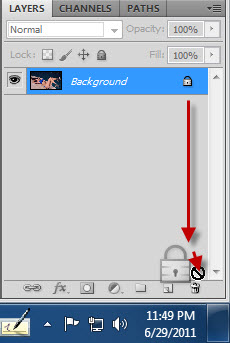
Step 3 : Drag the lock of the Background Layer to the Trash Can at the bottom of the Layers palette.

Step 4 : The Background Layer changes to Layer0. Press CTRL and click the New Layer icon. A new Layer 1 forms below Layer0.

Step 5 : The Foreground/Background Colors should be set to Black/White. If it is not press x and d on the keyboard to restore the default.

Step 6 : Press CTRL+BACKSPACE to fill with the Background Color which is White in this case. Layer 1 is filled with White.

Step 7 : Click on Layer0.

Step 8 : Press ALT and click the Layer Mask button. A Black Layer Mask forms next to the layer thumbnail on Layer0.

Step 9 : Layer 0 is hidden by the Black Layer Mask and you can only see the White Layer1.

Step 10 : Click the Brush Tool.
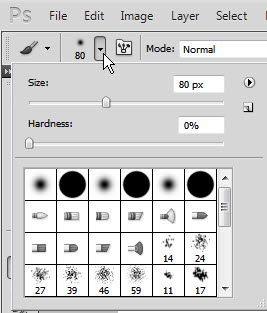
Step 11 : Click at the top panel where the arrow points to reveal the Brushes. These are the default Brushes. We are not going to use them. We will use the downloaded Brush.
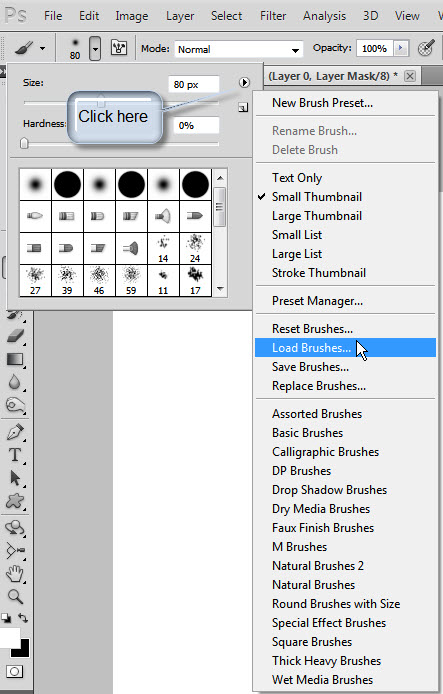
Step 12 : Click on the tiny black arrow. From the drop down menu that appears click on Load Brush.

Step 13 : Navigate to the folder on your computer where you downloaded the Brush. It is in an abr file. All brushes are abr files. Sometimes the Brushes are zipped and you have to unzip them. Here it is not zipped and it is just an abr file. Click the abr file. Click on Load.

Step 14 : Drag the slider in Brush controls panel and you will be able to see the Brushes in the two bottom rows(highlighted in green).
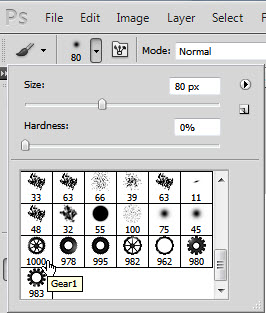
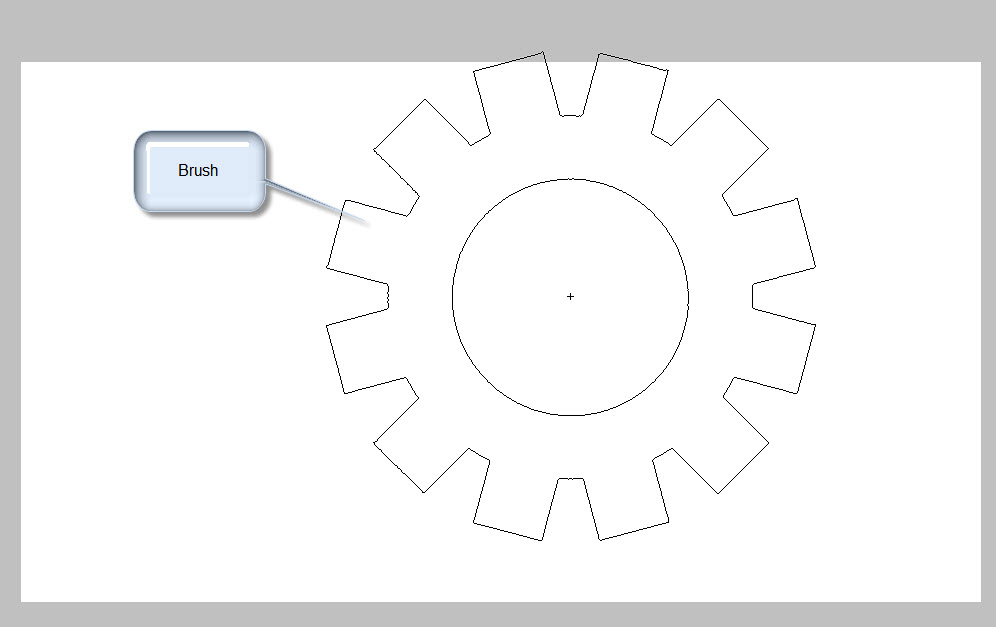
Step 15 : I am clicking on the first Brush. It has a name -- Gear1.

Step 16 : In the top panel reduce the Opacity of the Brush to 50%.
Step 17 : The Brush is a pretty large one.

Step 18 : Press [ (left square bracket) to decrease the size of the Brush.
Step 19 : To increase the Size of the Brush press ] (right square bracket). Remember these two shortcuts.
Step 20 : Make the Brush small by pressing the [ (left square bracket).

Step 21 : Click the icon on the right side in Photoshop Cs series. In Photoshop7 you will find a small square on the top panel at right which will bring up this dialogue box.

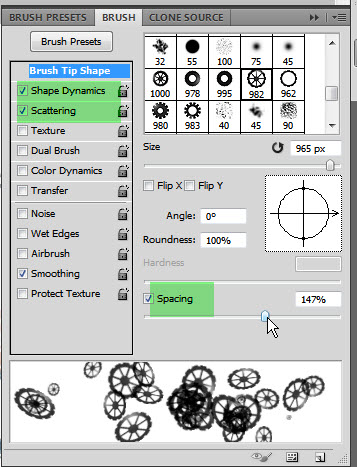
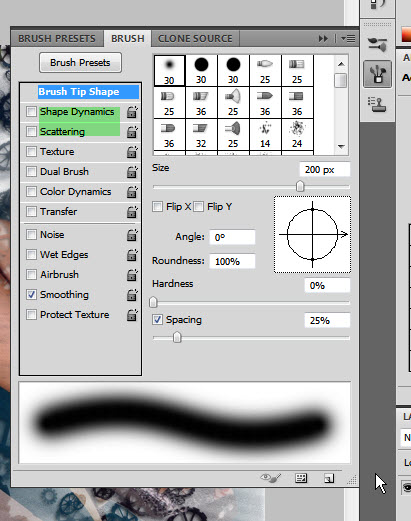
Step 22 : Click the Brush Tip shape at the top. Drag the Spacing slider quite high. I have dragged it to 120%.
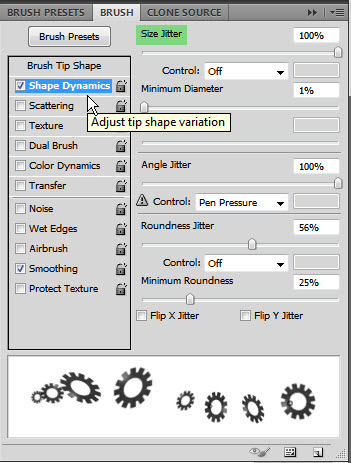
Step 23 : Click on Shape Dynamics. Make sure that the Size Jitter is set to 100%.
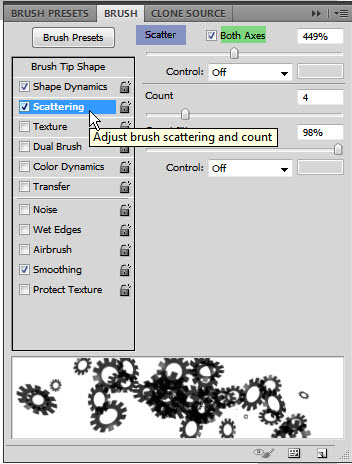
Step 24 : Next click on Scattering. Check Both Axes if it is not. Drag the slider midway.

Step 25 : Again click the Brush Tip Shape and drag the Spacing slider a bit more.

Step 26 : To make the Brush panel go away click the tiny double headed arrow.
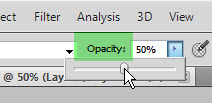
Step 27 : Make sure that the Opacity of the Brush is still set to 50%.
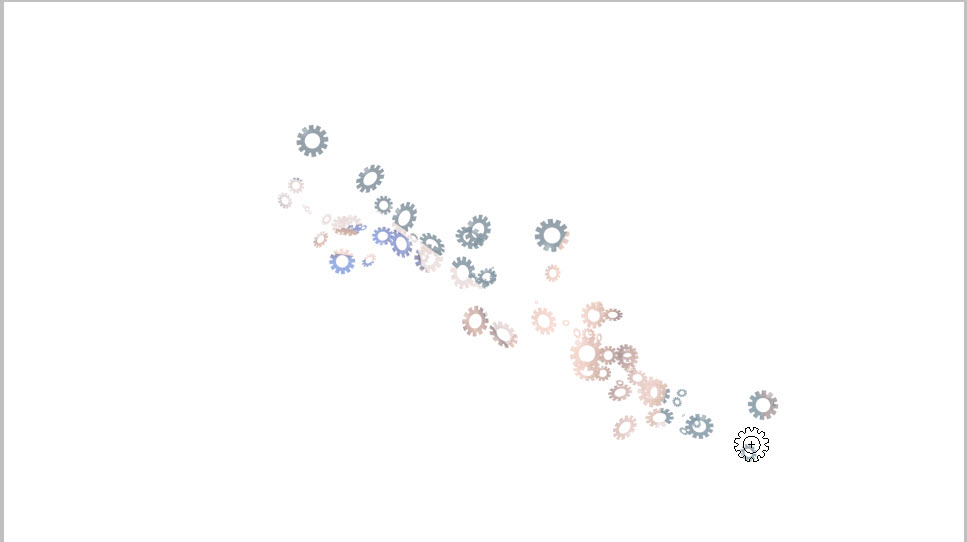
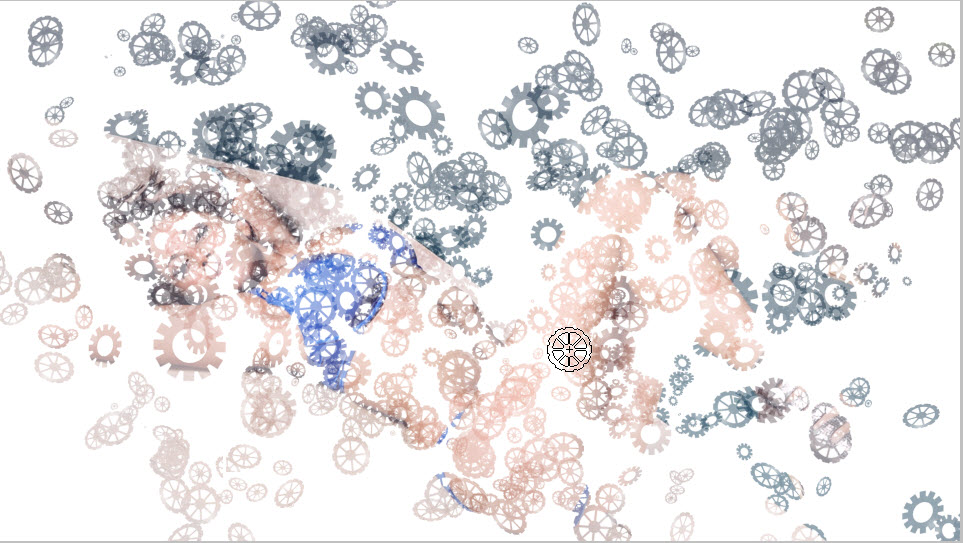
Step 28 : Begin painting randomly with the Brush.

Step 29 : Increase the size of the Brush a bit and continue to paint.

Step 30 : I have made four passes with the Brush, varying the size.

Step 31 : I have clicked on Gear 4 Brush.
Step 32 : Follow Steps 20 to 26 to set the Brush Tip Shape, Shape Dynamics and Scattering.
Step 33 : Make the Brush large and small and continue to paint. The girl's image is just visible.
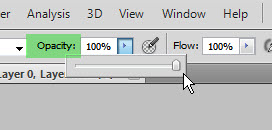
Step 34 : In the top panel increase the Opacity to 100%.
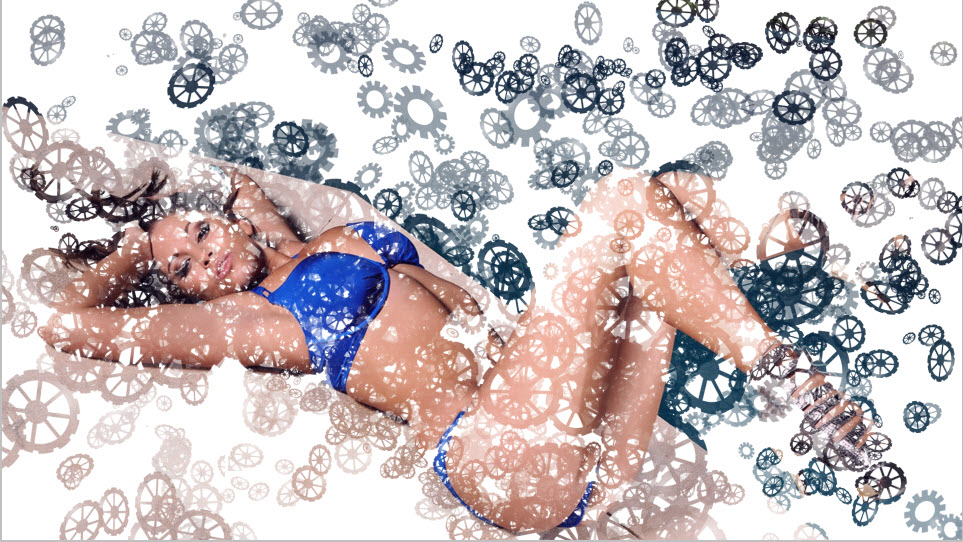
Step 35 : Make the Brush small and large as you paint. More of the image is revealed.

Step 36 : Press CTRL+J to duplicate Layer 0 into Layer 0 copy.
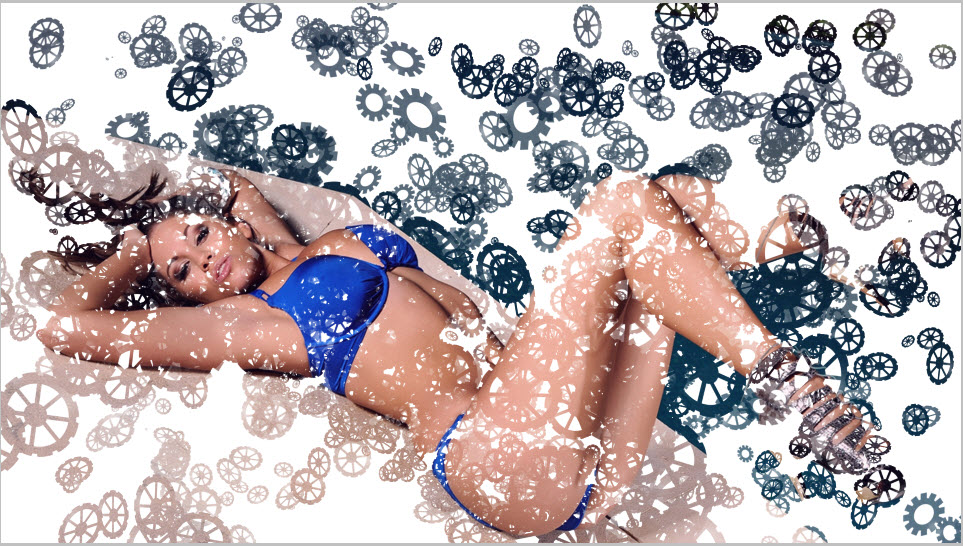
Step 37 : The girl's image looks more prominent.

Step 38 : Click on the Add Layer Style button. It looks a bit different in Photoshop7, but is found in the same place.
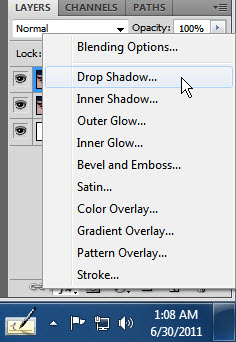
Step 39 : Click on Drop Shadow from the popup.

Step 40 : The Drop Shadow dialogue opens. Click OK without altering the settings.

Step 41 : You can see that that the Drop Shadow has been added to Layer 0 copy.
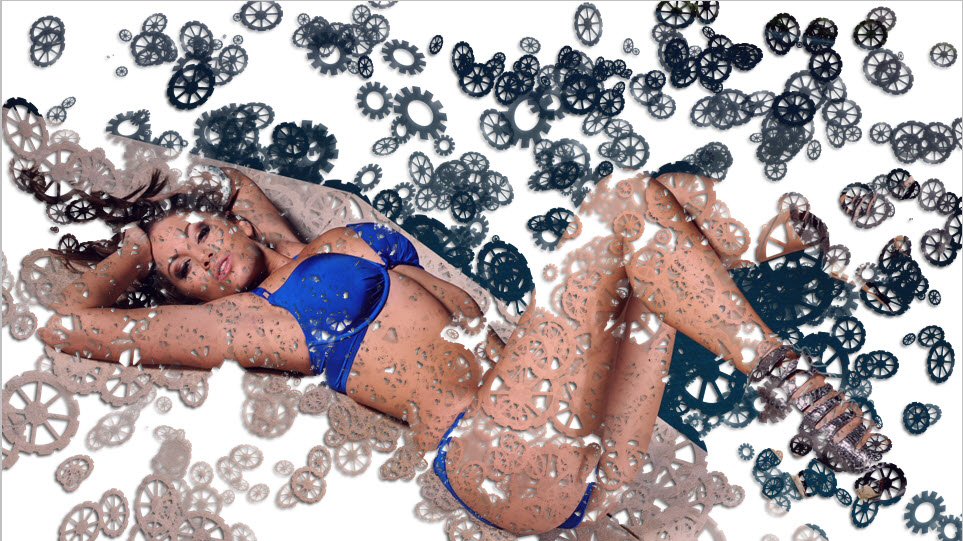
The image looks like this.

Step 42 : Press ALT and drag the fx icon to Layer 0.
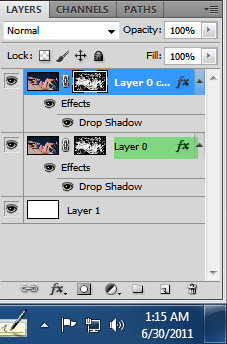
Layer 0 now has the fx icon which means the same Layer Style has been applied on this layer too. Note that Layer 0 copy is highlighted, which means that is the layer you are on.

The image looks like this.
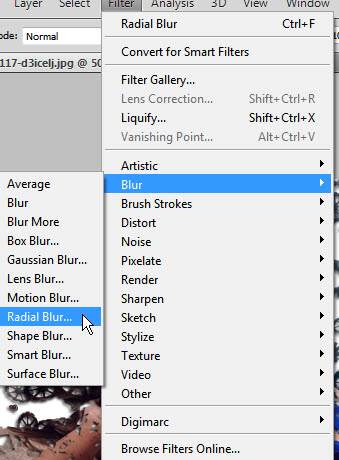
Step 43 : Go to Filter>Blur>Radial Blur.
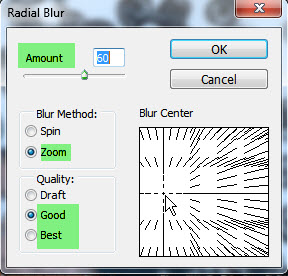
Step 44 : Set the Amount to 60 in the Radial Blur dialogue box. Set the Blur Method to Zoom. Set the Quality at Good or Best. Best takes a bit more time to process. Move the centre of the blur by moving the cross at the bottom right where the arrow points so that it is approximately lined up with the girl's face and click OK.
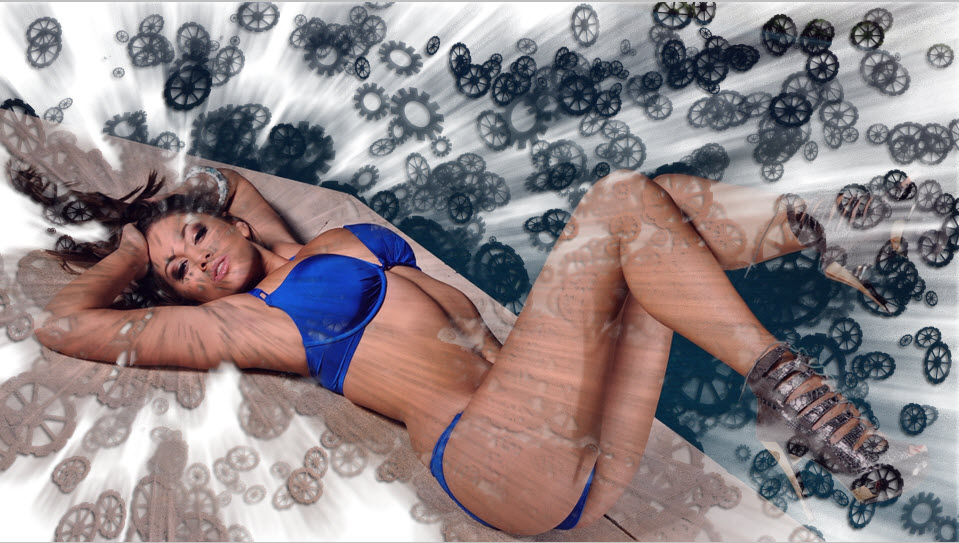
The finished image.

Before you close Photoshop, be careful to reset the Brushes.

This dialogue box opens. Click OK.
Open the Brush controls on the right panel and uncheck the Shape Dynamics and Scattering. That is all.
Other photoshop tutorials are here


