If you wish to carry out subtle tweaks to the complexion of the subject in your image without affecting the rest of the background the best way to proceed is to use Adjustment Masks. As its name says, these Adjustment Layers have Masks which you can manipulate to give an effect to a certain area and not the whole.
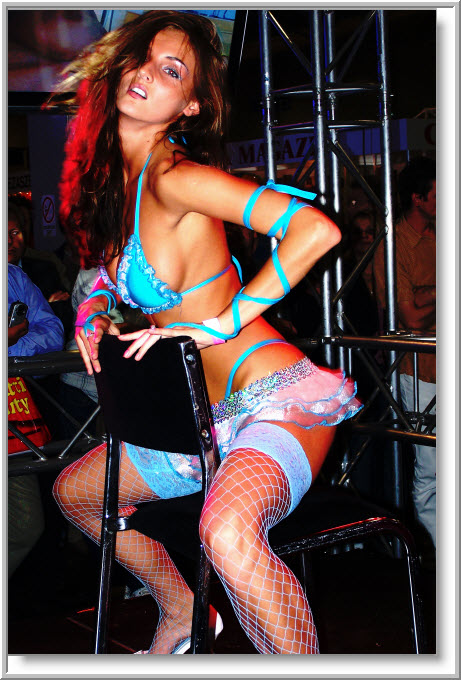
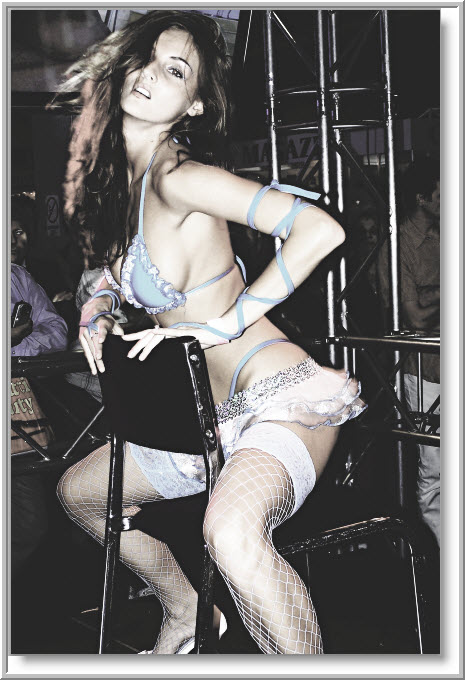
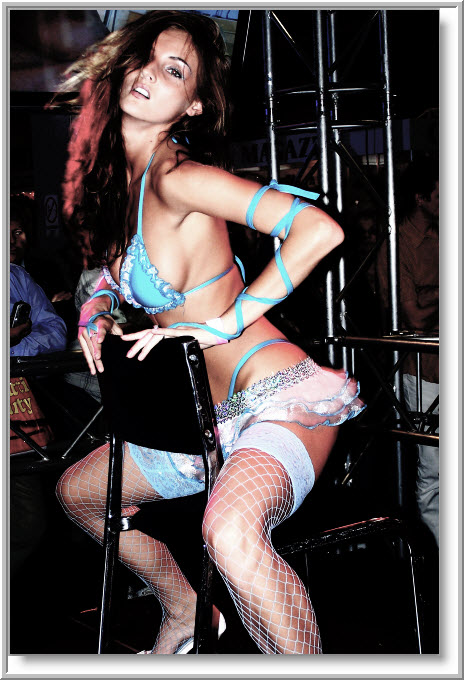
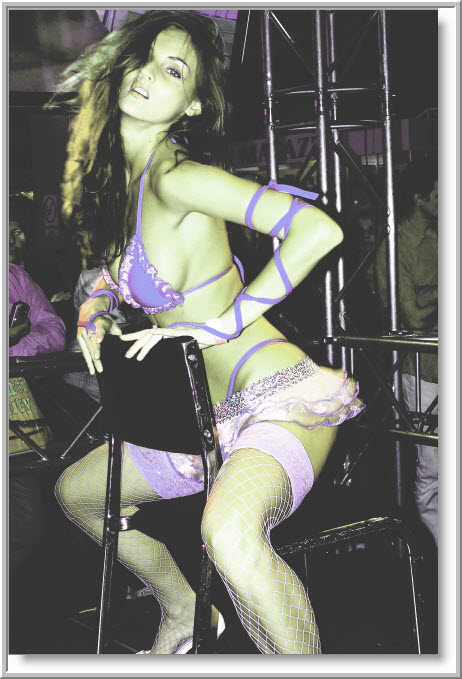
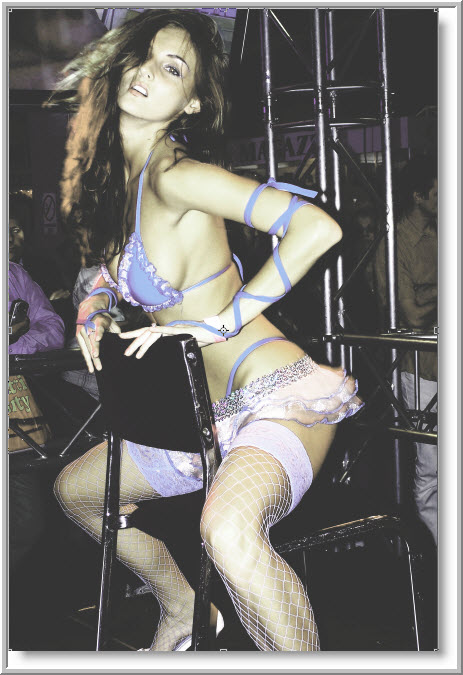
This is the effect I will achieve. The original image is below.
I will be using this free stock image which you will find
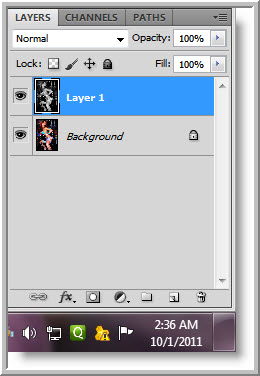
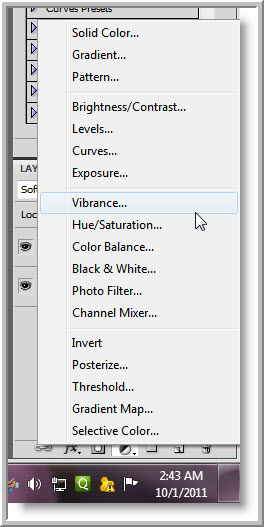
hereStep 1 : To begin, click the Create New Fill or adjustment Layer button.
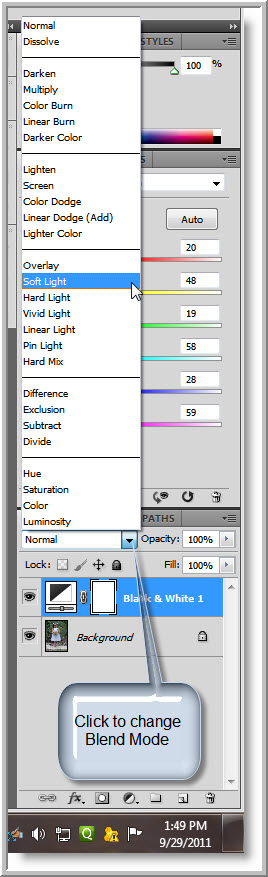
Step 2 : Click Black & White from the pop up menu.
Step 3 : The Black & White Adjustment Layer forms. At the top click the Auto button.
The image looks like this.
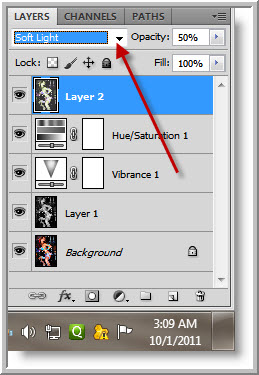
Step 4 : Change the Blend Mode to Soft Light.
The image looks like this.
ALT+CLICK the eye icon on the Background Layer to see the before and after effect. You can do this at all stages.
Step 5 : Click the Create New Fill or Adjustment Layer button and click on Color Balance.
Step 6 : The Color Balance 1 Layer forms. The Color Balance Adjustments are on top. Note that it is set to Midtones by default.
Step 7 : I have dragged the Red to +38, Green to +23 and Yellow to -13. These are not absolute values. They will vary from image to image. First study your image and determine which tones you will affect, then drag the sliders to achieve that effect. This is the rule of the thumb.
Step 8 : I have now clicked the Highlights and dragged the Red slider to +24, Green to +26 and Yellow to -2.
Step 9 : Lastly in the Highlights I have decreased the Red to -5, Green to -10 and Blue to -6.
The image looks like this. ALT+CLICK the eye icon on the Background layer to see the difference.
Make sure the Foreground/Background Colors are set to Black/White. If not press x and d on the keyboard to restore the default.
Step 10 : Click the Brush Tool.
Step 11 : Click in the top panel to open the Brush controls. Set the Hardness to 0. This makes the Brush soft. To increase the size of the Brush press ] (right square bracket) and to decrease it [ (left square bracket).
Step 12 : Make the Brush large and paint the background to reveal it.
Zoom into the image and paint portions left out. Use the Space Bar to navigate around the image.
Step 13 : Make the Brush small and paint between the arms.
Look at the Mask. You will be able to see where you have painted. It appears in white.
The image looks like this.
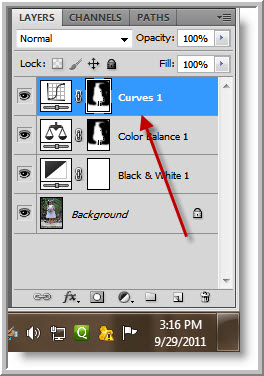
Step 14 : Click the Create New Fill or Adjustment Layer button and click on Curves from the pop up.
Step 15 : The Curves 1 Layer forms. The Curves dialogue box is on top.
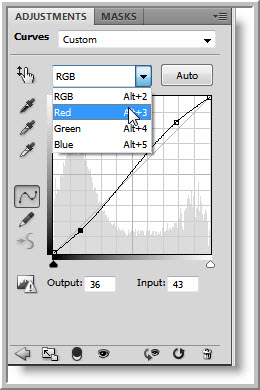
Step 16 : In the diagonal in the Curves click two points on the top and bottom. The top of the diagonal represents the light in the image and the bottom the shadows. The midpoint is the highlights. Drag the upward point slightly upwards and that at the bottom down so that the diagonal forms a gentle 's' curve. Note that you are on the RGB channel.
Step 17 : Next click the Red channel.
Step 18 : I have again clicked two points and made a shallower curve. If you drag the top point down you will add green and if you pull up you will add red.
Step 19 : Next go the Green Channel. If you pull the top point down you will increase the red and up will increase the Greens. I have increased the Greens slightly. I have also dragged the bottom of the diagonal down slightly.
Step 20 : In the Blue channel I have dragged the top point up to add a little Blue I have also dragged the bottom point down slightly.
Step 21 : Press ALT and drag the Layer Mask of the Color Balance Layer to the Curves 1 layer.
Step 22 : This dialogue box pops up. Click on Yes.
.The Layer Mask on Curves 1 layer has been replaced with the one on Color Balance 1 layer. It saved you time having to use the Brush on the Mask.
The image looks like this.
Step 23 : Click off the eye icons of Curves 1 and Color Balance 1 layers. Click on the Layer Mask of Black & White 1 layer.
Step 24 : With the Foreground Color set to Black paint over the dress.
Step 25 : Click on the eye icon on Color Balance 1 layer.
Step 26 : Paint the dress again with the Brush.
Step 27 : Click on the eye icon of Curves 1 layer.
Step 28 : Paint over the dress again.
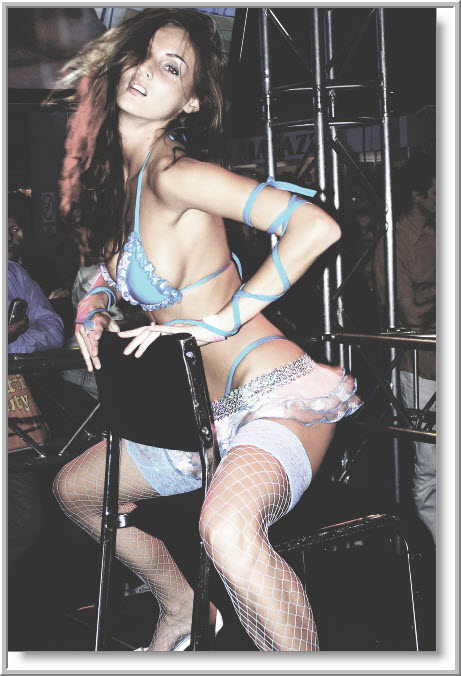
The finished image. ALT+CLICK the eye icon on the Background layer to see the difference. Only the complexion has been affected as also some parts of the background which were not isolated by masking.
Other photoshop tutorials are
here
.