A sketch can be made easily in Photoshop. If you look at the list of tutorials on the left side of my blog, you will be sure to find it. It is, as I said, easily achieved.But have you heard of Blend If? I have posted at least one tutorial with Blend If. We will be using Blend If, a couple of layers and a Layer Mask. You need not be an expert to be able to do this. This can also be done in any version of Photoshop. It works with all images and you will be surprised at the effects you can achieve in just a few steps.
This is the Sketch with Blend If which I will show can be done.
This is the Sketch with Blend If which I will show can be done.
Step 1 : I have opened this free stock image. You will find it here
It belongs to xn3ctz
Step 2 : Click the New Layer icon. A new Layer 1 forms.
Step 3 : The Foreground/Background colors are set to the default Black/White.
Step 4 : Press CTRL+BACKSPACE. Layer 1 fills with the Background Color White.
Layer1 is filled with White.
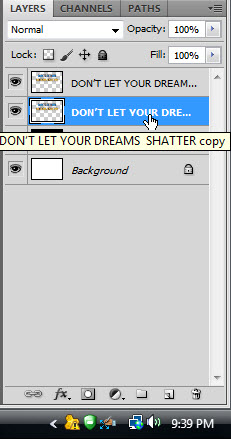
Step 5 : Double click Layer 1 where the hand points.
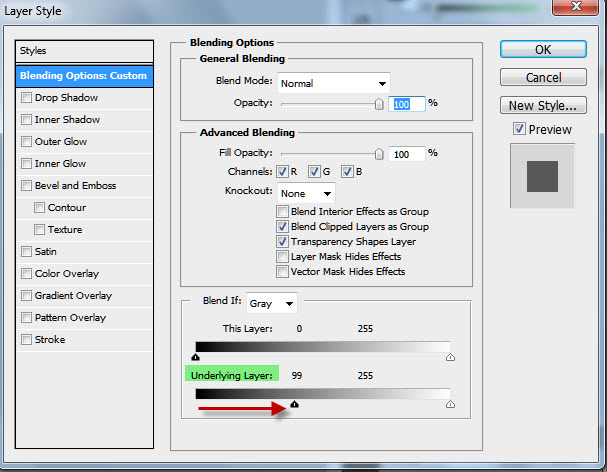
Step 6 : The Layer Styles dialogue box opens. we are not going to change any of the settings. We are only interested in Blend If at the bottom.
Step 7 : I have moved the Blend If Underlying Layer left slider just a trifle.
This is how the image begins to look.
Step 8 : I have dragged the slider a bit more keeping an eye on the image.
The image looks like this.
Step 9 : Click on the Layer Mask button. A Layer Mask forms next to the layer thumbnail on Layer 1.
Step 10 : The Foreground/Background colors are set to the default Black/White.
Step 11 : Click to open the Presets in the Gradient Editor. I have clicked on Foreground to Background.
Step 12 : Press SHIFT and drag straight up with the Gradient Tool. But not quite to the top.
The image looks like this.
I have pressed CTRL+Z to undo the effect. I have dragged from top to a little above midway for another effect.
And here is the effect.
I have dragged diagonally for another effect.
And here is the effect.
Drawing diagonally from the other way
Produces this result. So you can see how the effect can be given in different ways. I think I'm satisfied with this. That's all.
Other photoshop tutorials are here


