Gradient Map in Photoshop CS is a very handy tool to give a special effect from nothing very easily. You can make this in a trice with Gradient Map.
Step 1 : Open a new White Layer.
Step 2 : Go to Edit>Render>Lighting Effects.
Step 3 : The Lighting Effects dialogue box opens. I am just going to click OK.
This is how the image looks.
Step 4 : In the Layers palette click on Create New Fill Layer icon and from the pop up menu click on Gradient Map.
Step 5 : The Gradient Map opens. Click where the arrow points to, to open the Gradient Editor.
Step 6 : The Gradient Editor opens.
Step 7 : I have clicked on a Gradient. It is called Spectrum. You can read the names of the Gradients by hovering your cursor over them. Do NOT click OK.
This is how the image looks like.
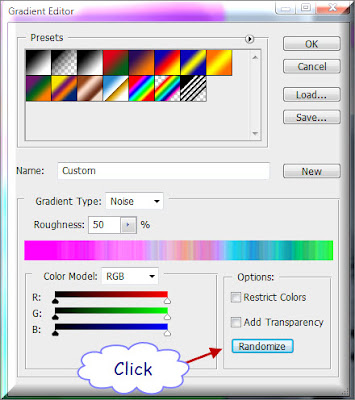
Step 8 : Change the Gradient Type to Noise.
Step 9 : After changing the Gradient Type to Noise, you can apply the Gradient or click the Randomize button, which will change the colors.
This is the effect I have settled for. Click OK.
Step 10 : I have opened this free stock image. You will find it here.
Press CTRL+A (Select All), CTRL+C (Copy).
Step 11 : I have brought it over the other image and pressed CTRL+V to Paste it on top of it. You will have to resize it to fit.
Step 12 : In the Layers Palette click where the arrow points to, to bring up the Blend Modes. I have clicked on Multiply. You can experiment whether the other Blend Modes work if you have selected your own image.
This is the finished effect.
This is a photo of a countryside that I have applied the effect to. You can download the photo here.
Other photoshop tutorials are here.


