


The Layer Mask can be used in conjunction with Radial Blur to create a special effect in Photoshop, which can also be done in Photoshop7. It is also very simple to do.

This is the effect I will achieve.

Step 1 : I will be using this free stock image. You will find it here
It belongs to

Step 2 : Duplicate the Background layer by pressing CTRL+J.

Step 3 : Go to Filter>Blur>Radial Blur.

Step 4 : In Radial Blur, set the Amount to 100, the Blur Method to Zoom and Quality to Good. You may also select Best. It will take a bit more time.
Click OK.

Step 5 : The image looks like this.

Step 6 : Click the Add Layer Mask button and a Layer Mask forms next to the layer thumbnail on Layer.

Step 7 : The Foreground/Background Colors should be set to the default Black/White. If it is not press x and d on the keyboard to restore the default.
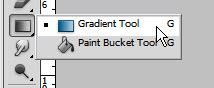
Step 8 : Click the Gradient Tool.

Step 9 : In the Gradient Editor bring up the Presets by clicking where shown. Click on Foreground to Background preset.

Step 10 : Drag down for a short distance from a little below the top as shown with the Gradient Tool.

The image looks like this.

Step 11 : Click the Brush Tool.

Step 12 : Click in the top panel to reveal the Brush settings. Set the Hardness to 0 and set a fairly large Size.

Step 13 : Click once with the Brush at the right of the image.

Step 14 : Click once at left with the Brush.

The finished image.


