Showing posts with label Motion Blur. Show all posts

Sunday, November 20, 2011

Motion Blur

Applying Motion Blur can be done in a jiffy, but what about using it in an unconventional way for a special effect?  We can also use Gradients, not the default ones, but those hidden away, but are there.
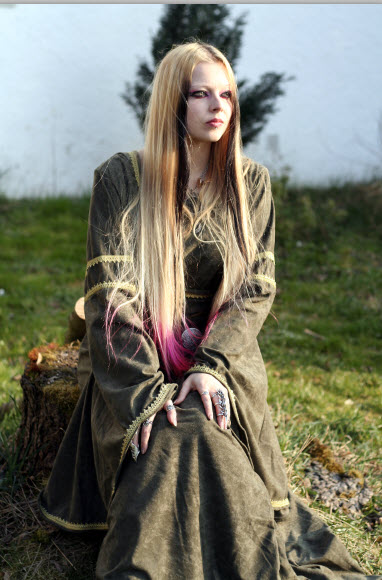
I have selected this free stock image for this tutorial. You can download it from here
It belongs to fetishfaerie-stock
The image as it will look.
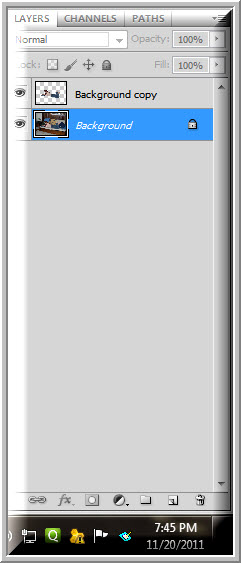
Step 1 : I have used the Quick Selection Tool to separate the girl's image from the Background Layer.You will find the Quick Selection tutorial here if you do know how to use it. You can also use the Pen Tool or the Magnetic Lasso to cut out the girl.
Step 2 : Go to Filter>Blur>Motion Blur.
Step 3 : In the Motion Blur dialogue box set the Angle at 0 and the Distance to the maximum. Click OK.
You have a super duper effect, depending on your image.
Step 4 : Click the New Layer icon and a Layer 1 forms over the Background layer.
Step 5 : Click the elliptical Marquee Tool.
Step 6 : Draw a selection. Nudge it into place by the UP, DOWN, LEFT and RIGHT ARROW keys.
Step 7 : Go to Select>Modify>Feather.
Step 8 : Set a Feather Radius of 100 pixels. Click OK.
Step 9 : Click the Gradient Tool and click on top to open the Gradient Editor.
Step 10 : Click the tiny black arrow and you will see the other Gradients that are hidden from view. I have clicked on Metals.
Step 11 : This dialogue box appears. Click on OK.
Step 12 : The Metal Gradients appear. I have clicked on Steel Blue.
Step 13 : Drag diagonally from top to bottom.
Step 14 : Press CTRL+D to deselect. The image looks like this.
Step 15 : Press the v key on the keyboard and then 5. The Opacity drops to 50%.
Step 16 : Click on the Blend Modes. When it is highlighted, use the DOWN ARROW key to cycle through the Blend Modes. I have selected Overlay.
The finished image.
Other photoshop tutorials are here


Sunday, December 19, 2010

Motion Blur, Radial Blur and Polar Coordinates

This is a fun tutorial on using the Motion Blur, Radial Blur, and Polar Coordinates filters  in Photoshop. You can use any image or use this image.
I will be using this free stock image. You will find it here
It belongs to ~kindledeath-stock

Step 1 : Use the Magnetic Lasso or the Pen Tool to cut out the image from its Background.
Step 2 : Press CTRL+J to copy the selection to a new Layer1.
Step 3 : Press CTRL+J to duplicate Layer 1 into Layer 1 copy.
Step 4 : Click back on layer 1.
Step 5 : Go to Filter>Blur>Motion Blur.
Step 6 : The Motion Blur dialogue box opens. I have set a Distance of 73 pixels. It will depend on your image.
Step 7 : Press CTRL+T. A selection forms.
Step 8 : Drag the middle handle on the left outwards. Press ENTER.
The image looks like this.
Step 9 : Press CTRL+J. Layer 1 duplicates into Layer 1 copy 2.
Step 10 : Drag Layer 1 copy 2 over Layer 1 copy.
The image looks like this.
Step 11 : Press CTRL+J. Layer 1 copy duplicates into Layer 1 copy 3.
Step 12 : Press V (shortcut for Move Tool) and move the layer to the right. The image looks like this.
Step 13 : Press SHIFT and click on Layer 1 copy2. Both layers are highlighted.
Step 14 : Press CTRL+E. Both the layer merge into Layer 1 copy 3.
Step 15 : Click the Layer Mask button and a Layer Mask forms next to layer thumbnail on Layer 1 copy3.
Step 16 : The Foreground should be set to Black. 
 Step 17 : Press B to bring up the Brush Tool. Press SHIFT+[ (left bracket) to make the Brush soft. To make the Brush large press ] (right bracket) and to make it small [ (left bracket).
Step 18 : Paint with the Brush to reveal the actual image on Layer 1 copy.
Step 19 : If you paint away a portion mistakenly. Press X to change the Foreground to White.Paint away the mistake.
Step 20 : Click on the Layer thumbnail.
Step 21 : Press V (Move Tool) and drag the layer slightly to the right to align with the original face.
Step 22 : Click on the Background layer.
Step 23 : Press CTRL+U to bring up Hue/Saturation. Drag the Hue, Saturation, lightness sliders till you get a desaturated and dark look. Click OK when satisfied.
The image looks like this.
Step 24 : Click on Layer 1 copy 3 and then on the layer thumbnail.
Step 25 : Go to Filter>Blur>Radial Blur.
Step 26 : When the Radial Blur appears, set the Amount to 100, Blur Method to Zoom and Quality to Best.Click OK.
Photoshop begins applying the filter.
The image looks like this.
Step 27 : Press CTRL+F to reapply the filter.
The image looks like this.
Step 28 : Go to Filters>Distort>Polar Coordinates.
Step 29 : The Polar Coordinates dialogue box opens. Rectangular to Polar is the default setting. Click OK.
The finished image. If you use a different image, you will get a different effect, but quite near this.


Share

Twitter Delicious Facebook Digg Stumbleupon Favorites