


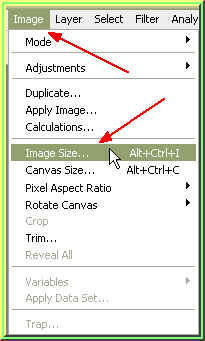
Step 2 : Go to Image>Image Size to see the size of the image.
Step 3 : Note the Width/Height/Resolution.

Step 4 : Open a New Layer and give the same dimensions to it.
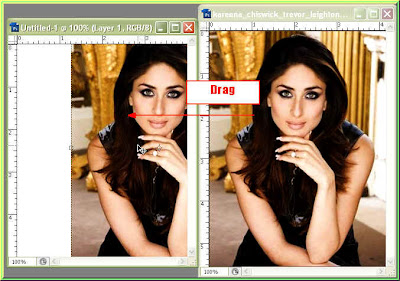
Step 5 : Drag the image to the new layer.
Step 6 : The image is now on top of the white layer.

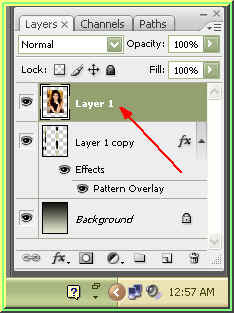
Step 7 : You can see in the Layers pallete the image is on top of the white layer.

Step 8 : Drag out the image so that the gray background is revealed.

Note that there is a selection around the image.

If you cannot see the selection the Show Transform Controls (Bounding Box in PS 7) is unchecked. Check it.

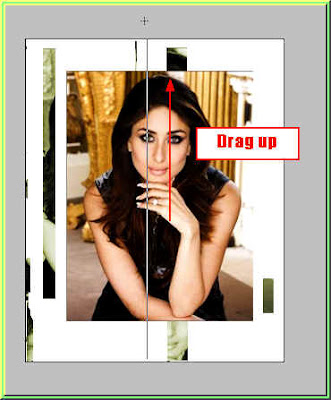
Step 9 : Press SHIFT+ALT and drag down from the top right hand corner of the image. This will proportionately resize the image.
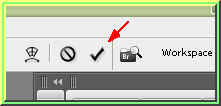
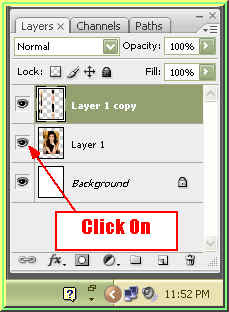
Step 10 : Click the tick mark on the top panel at right to apply the resizing. Step 11 : Press CTRL+J to duplicate Layer1. Layer 1 copy forms.
Step 12 : Click off the eye icon of the Layer 1 to hide it.
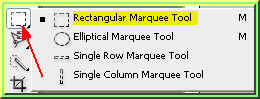
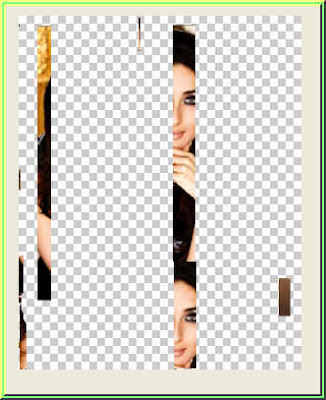
Step 13 : Click the Rectangular Marquee Tool to select it. Step 14 : Draw a selection with the Rectangular Marquee Tool. After drawing the first selection press Shift and you can draw the other selections. You will find that as soon as you press Shift a tiny + (plus) sign appears besides it.
Step 15 : Press delete and the selection portions are deleted.
Step 16 : Press CTRL+D and the selections disappear.
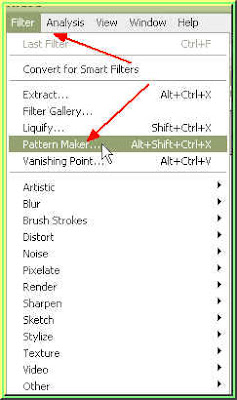
Step 17 : Go to Filter>Pattern Maker.
Step 18 : The Pattern Maker opens.

Step 19 : At the left top corner is the Marquee Tool to draw a selection.

Step 20 : Draw a selection around the image.

Step 21 : Click the Image Size button then the Generate button.
Step 22 : The pattern has been generated.
Step 23 : Look at the bottom right of the Pattern Maker. You will find the Tile History. I have generated a pattern just once, therefore it is showing 1 of 1. Every time you generate, the Pattern Maker saves it.

Step 24 : Click Generate Again.

Step 25 : The pattern has been generated again.

Step 26 : Look in the Tile History. The Pattern Maker has saved it as 2 of 2.

Step 27 : Click Generate Again.

Step 28 : The pattern has been generated again.
Step 29 : The Tile History records it as 3 of 3.

Step 30 : Click the Save Preset.

Step 31 : As soon as you press Save, this dialogue box opens. Give the pattern a name and click ok. I have names it as Kar 1.

Step 32 : Click the the arrow shown This scrolls to the patterns generated. You can go backward and forward through the patterns generated and save them..

Step 33 : I am saving this pattern as Kar 2.

Step 34 : I have scrolled to the first pattern generated.

Step 35 : I am saving it as Kar 1.

Step 36 : Click Ok in the Pattern Maker.

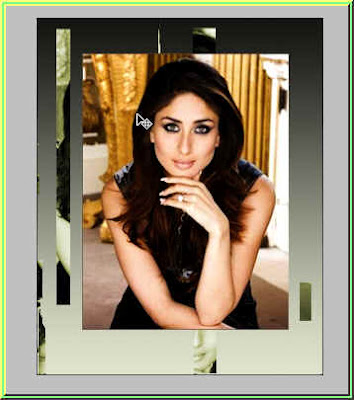
This is how the image looks.
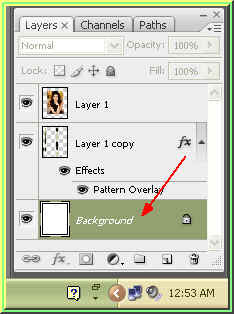
Step 37 : Click on the eye icon in Layer1. Step 38 : Drag Layer 1 to the top of the Layers palette.
Layer 1 is now on top the Layers palette.
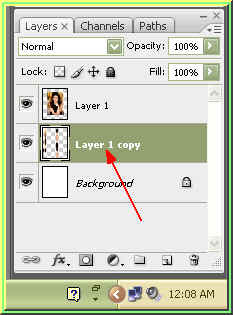
Step 39 : Click on Layer 1 copy.
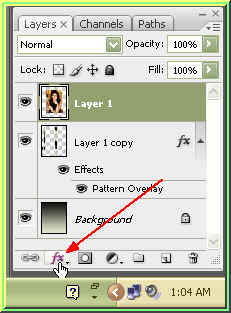
Step 40 : Click on the New Layer Style button.

Step 41 : Click on Pattern Overlay.

Step 42 : The Patterns Overlay dialogue box opens. Click Pattern and from the drop down I have found the patterns I created in the bottom last row. (See the red arrows).
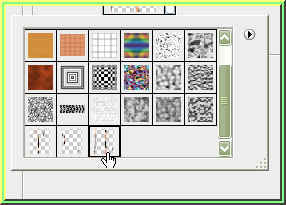
Step 43 : I am clicking on one of the patterns I made.
Step 44 : I am clicking ok in the Patterns Overlay dialogue box.
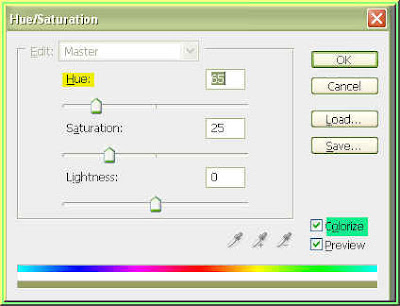
Step 45 : Press CTRL+U. This will bring up the Hue/Saturation dialogue box. Check Colorize. Then drag the Hue slider till the image turns green. Click ok.
Step 46 : Click the Eyedropper tool.

Step 47 : I have clicked on a greenish tinge (small black arrow). This will select the Fioreground color.

Step 48 : With the Eyedropper still selected press ALT on the keyboard. I have now selected a dark shade with the Eyedropper.

The Foreground and Background colors change to the colors I picked with the Eyedropper.
Step 49 : Click on the Background to select it.
Step 53 : Click on Add Layer Style button.
Step 54 : Click on Stroke from the pop up.

Step 55 : In the Stroke dialogue box click on the red box.

Step 56 : This brings up the Color Picker. In the Color Picker click on the White as shown. Click ok in the Color Picker.

Step 57 : In the Stroke dialogue box I have increased the Size slightly from the default 3 pixels. I have given 7 pixels. Click ok.

And there is the finished image.


