Some images are ruined by blown out highlights. Some give the blown out effect deliberately. That is the difference. You can selectively give a blown highlight to an image with photoshop. Not much skill is required.
Step 1 : Click the New Layer icon. A new Layer 1 forms above the Background layer.
Step 2 : Click the Elliptical Marquee Tool.
Step 3 : Draw a selection like this.
Step 4 : Use the Left, Right, Up and Down arrow keys to move the selection into place. If you compare with Step 3 you can see the selection has been moved.
Step 5 : Press CTRL+SHIFT+I to invert the selection.
Step 6 : Go to Select>Modify>Feather.
Step 7 : Put a Feather Radius of 100 pixels. Click OK.
Step 8 : Click the small bent arrow
To change the Foreground Color to White.
Step 9 : Click the Gradient Tool. Click at the top where shown to bring up the Gradient Editor.
Step 10 : In the Gradient Editor which opens click on Foreground to Transparent.
Step 11 : By default the Linear Gradient is selected. Click it if it is not selected.
Step 12 : Let us experiment. Drag the Gradient Tool from top to bottom in the middle.
This is the effect that I have got. Not quite what I wanted. Press CTRL+Z to undo it.
Let us drag the Gradient Tool a part of the way up.
Still not what I wanted. Press CTRL+Z again.
Let's try dragging it part of the way diagonally as shown.
This looks better. Press CTRL+Z to try again.
Let's draw the Gradient tool diagonally as shown.
This looks much better,
Step 13 : Drop the Opacity of the Layer to 90% or more if you like.
The image looks like this. To make the marching ants selection go away press CTR+D.
Step 14 : Click the Add New Fill or Adjustment Layer button.
Step 15 : From the pop up menu click on Curves.
The Curves dialogue box opens.
Step 16 : Click 2 points at the top and bottom of the diagonal.
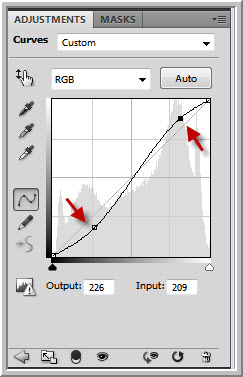
Step 17 : Drag the top point slightly up and the lower point slightly down.
The finished image.
Other photoshop tutorials are
here


