


Adding a Texture to an image can get some good effects depending on the one you use. Add a couple of Adjustment Layers and you may have find the effect more surprising.
 You can create a special effect like this. The original image is below

Step 1 : I have opened this free stock image. You will find it here
It belongs to Valik

Step 2 : I have also opened this free stock Rust Texture which you will find here
It belongs to julXart

Step 3 : Press CTRL+A (Select All) and the CTRL+C (Copy).
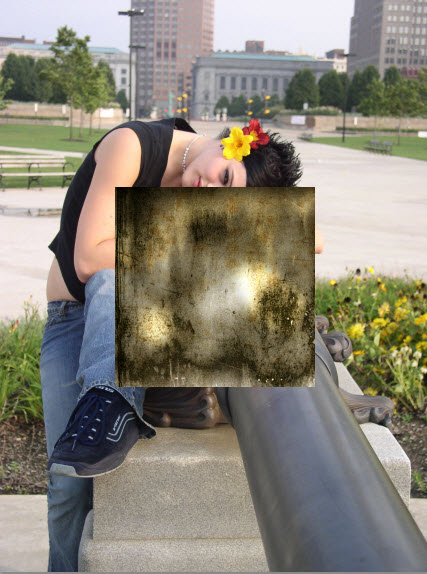
Step 4 : Go over to the other image and press CTRL+V to paste it.

Step 5 : Press CTRL+T and a selection forms on the pasted image.

Step 6 : Press SHIFT+ALT and drag a corner handle down diagonally till the Texture covers the image.
Press ENTER. The selection goes away.

Step 7 : Click to change the Blend Mode of Layer 1 to Hard LIght.

The image looks like this. I have used the Hard Light Blend Mode. With a different image and Texture another Blend Mode might work better. See which looks good to you.

Step 8 : Press v on the keyboard (shortcut for Move Tool) and press 9 and the Opacity reduces to 90%.

The image looks like this.

Step 9 : Go to Filter>Blur> Gaussian Blur.

Step 10 : I have given a Radius of 8 pixels and clicked OK. If you are using a different image something less or more may be required. The point is your own liking.

The image looks like this.


Step 11 : Click the Add Adjustment Layer button and click on Color Balance.

Step 12 : The Color Balance 1 Layer forms and the Color Balance dialogue is seen above it. The Color Balance is set to Midtones by default.

Step 13 : In the Midtones I have moved the Cyan slider to +15, the Magenta to +25 and Yellow to +15.

The image looks like this. What I have done is to increase the Reds, Green and Blues.

Step 14 : In the Highlights I have moved the Cyan slider to -15, Magenta to - 15 and Yellow to -10.

Step 15 : In the Shadows I have increased the Cyans to -25, Magenta to +5 and Yellow to +10.

The image looks like this.

Step 16 : Click the Rectangular Marquee Tool.

Step 17 : Draw a selection at the bottom of the image.

Step 18 : Go to Select>Modify>Feather.

Step 19 : Set a Feather Radius of 150 pixels and click OK.

Step 20 : Make sure that the Foreground/Background Colors are set to Black and White.

Step 21 : The selection fills with Black. You can see it on the Mask in Color Balance 1 Layer. Note that the Mask has a tiny border around it. It indicates that the Mask is selected and not the image.

The image looks like this. The selection is still in place.

Step 22 : Press CTRL+SHIFT+I. The selection inverts.

Step 23 : Click the Add Adjustment Layer button and click on Hue/Saturation.

Step 24 : The Hue/Saturation Layer forms. Check Colorize in the Hue/Saturation dialogue box above.

The image look like this with the default Hue/Saturation settings.

Step 25 : I have dragged the Hue slider to the Blue. You can pick any shade you want.

Step 26 : I have ragged the Saturation slider to15 and the Lightness to +15.

The image looks like this.

Step 27 : Press V on the keyboard and then 6. The Opacity of the Hue/Saturation Layer drops to 60%.

The completed image.
Other photoshop tutorials are here
You can request photoshop tutorials by emailing me at pradip.chowdhury@gmail.com


