Sometimes you have a photo that is underexposed or you are not happy because the lighting does not appeal to you, or you want to add bounce to your images. There are two tricks which I will demonstrate which can be used as a quick fix solution in any version of Photoshop. 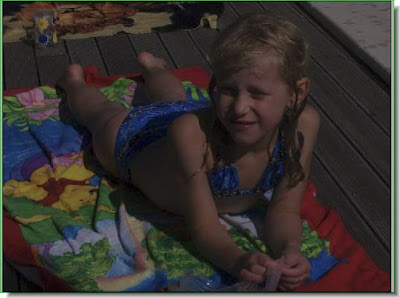

Step 1 : This is a photo I have opened in Photoshop. You can see at once that it is underexposed. How do you you fix this if you have little time to spare?
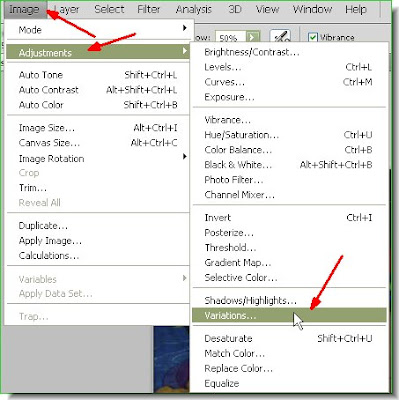
Step 2 : Go to Image>Adjustments>Variations.
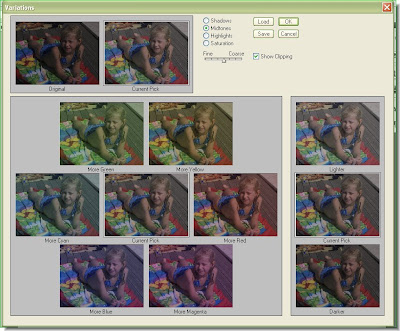
Step 3 : The Variations dialogue box opens.

Step 4 : At the top of the Variations dialogue box you will find the 'Original' and 'Current Pick' beside it. Also note that at the right the radio button is set to Midtones. These are default settings.
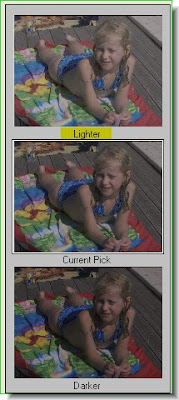
Step 5 : Look at the right panel. You will find 'Current Pick' in the Middle, 'Ligher' on top an 'Darker' at the bottom. I have clicked twice on Lighter. It will depend on your image.
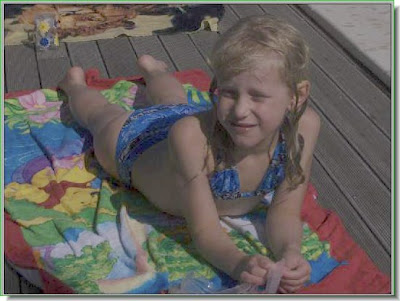
And there you are!! The photo is no longer underexposed. That is about all. How long did it take? Time yourself.
If you want to learn more about fixing underexposed photos and more uses of the Variations, please go here.
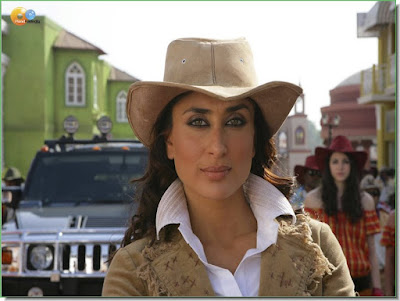 This is show how to brighten a part of an image, while leaving the rest untouched. I have opened this photo in Photoshop.
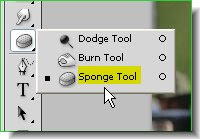 Step 1 : Click on the Sponge Tool from the flyout. You can see where it is found.
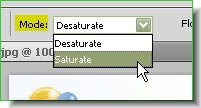 Step 2 : Look at the top panel. You will find the Mode set to 'Desaturate. Change it to 'Saturate' from the dropdown menu.
Step 3 : Again in the top panel set the Flow to 50%.
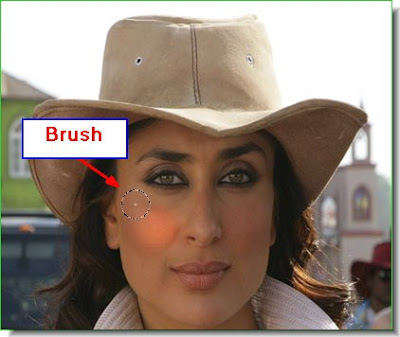
Step 4 : Now with the Sponge Tool click on the image. A blush seems to have appeared on the cheek where I have clicked. It is a Brush too. Let me show you a small trick with the Brush Tool.
 Step 5 : When you click on the Sponge Tool, you will find the 'Brush' in the left of the top panel. The Brush is a soft brush.
 To make the Brush hard. Press SHIFT and ] (right bracket) key. You will find it next to the letter 'P' on the keyboard. You will find the brush tip growing 'hard' as above when you press a number of times.
 To make the Brush soft, press Shift [left bracket) key a number of times, You will see that the Brush softens.
Also to make the Brush tip bigger press the ] (right bracket) key and to make it smaller the [ (left bracket) key. Remember these shortcuts. They can be applied whenever a Brush is used.
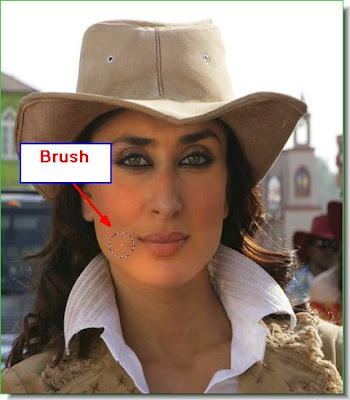
Step 6 : I have used a soft brush to work over the face, brightening it. I have not touched the neck as yet. Note the difference between the face and the neck,

Step 7 : Now I have brushed the neck.

Step 8 : Now I have worked on the hat.

Step 9 : I am now brightening her coat.


You can now compare between the original image on top and the 'brightened' image below. Happy editing! And should you want to darken the background to put the full focus on a figure, please go here.


