I am sure must know how to paint in Photoshop with Brushes. This is a demonstration of how you can create a special effect with a number of Brushes and layer masks. You will learn to control Opacity and Flow. We will be using a Gradient of our own choosing. You will also be using white as well as black layer masks.
This is the effect to be created.
This is the effect to be created.

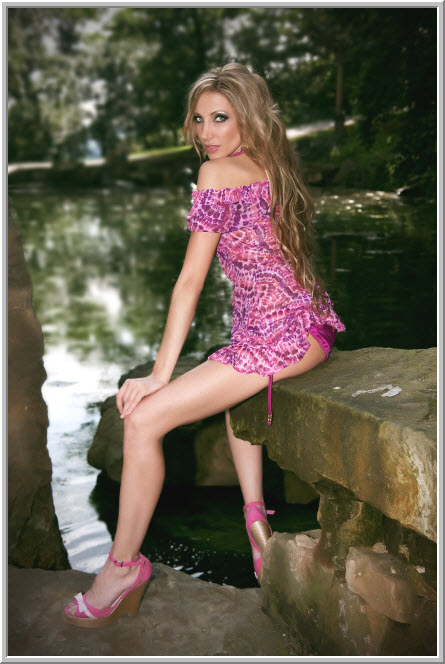
I will be using this image. You will find it here
It belongs to AngieStock
Step 1 : Click the Add New Layer button. A new Layer 1 forms.
Step 2 : Draw a rough selection like this close to the subject.
Step 3 : Go to Select>Modify>Feather.
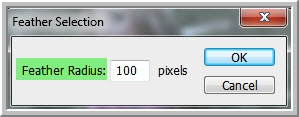
Step 4 : In this dialogue box that pops up set the Feather radius to 100 pixels. Click OK.
Step 5 : Press CTRL+SHIFT+I. The selection is inverted.
Step 6 : Click the Foreground Color which is Black by default.
Step 7 : The Color Picker comes up.
Step 8 : I have clicked on the shoulder area to select the color.
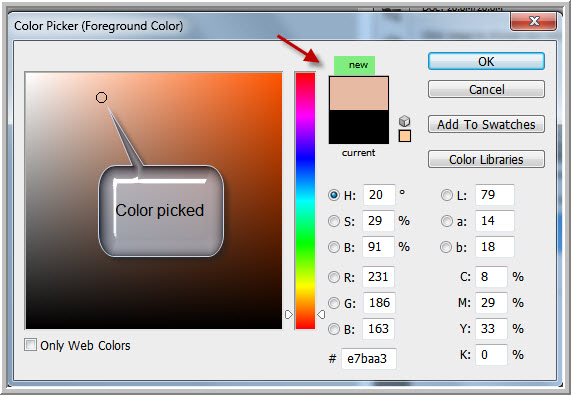
Step 9 : The color is automatically picked in the Color Picker. The 'new' shows the shade chosen. Click OK.
The Foreground changes to the color picked.
Step 10 : Click on the Background Color.
The Color Picker appears again.
Step 11 : I have clicked on the Color of the dress.
The color is selected automatically in the Color Picker. The 'new' shows the shade picked. Click OK.
The Foreground/Background colors have changed to the colors picked.
Step 12 : Click the Gradient Tool. Click in the top panel where shown to open the Gradient Editor. By default the Linear Gradient is selected in the top panel at right.. If it is not click to select it.
Step 13 : Click the Foreground to Background Gradient preset.
Step 14 : Drag diagonally from top to bottom with the Gradient Tool as shown.
The image looks like this.
There are now the Background Layer and Layer 1 where the Gradient has been applied.
Step 15 : Press CTRL+E to merge the two layers into the Background layer.
Step 16 : Click the Add New Layer button. A new Layer 1 forms.
Step 17 : Click the Brush Tool and click the tiny black arrow in the top panel to open the Brush controls.
Step 18 : Click the Splatter 59 pixels Brush.
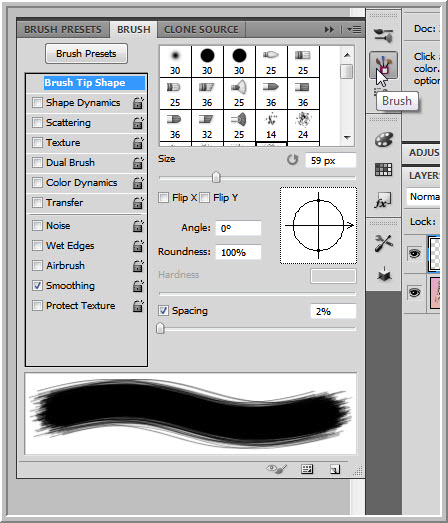
Step 19 : Go to Window>Brush or click the Brush icon at the right. The Brush Controls opens. Click on Brush Tip Shape.
Step 20 : Drag the Spacing slider to 100%.
Step 21 : Click on Scatter. Drag the slider to 100%. The Both Axes should be left unchecked. Leave the other controls alone. They are needed if you are using a Pen Tablet.
Step 22 : Click on the small double arrow to make the panel go away.
Step 23 : Decrease the Opacity and Flow in the top panel to 25%
Make sure that the Foreground Color is set to Black.
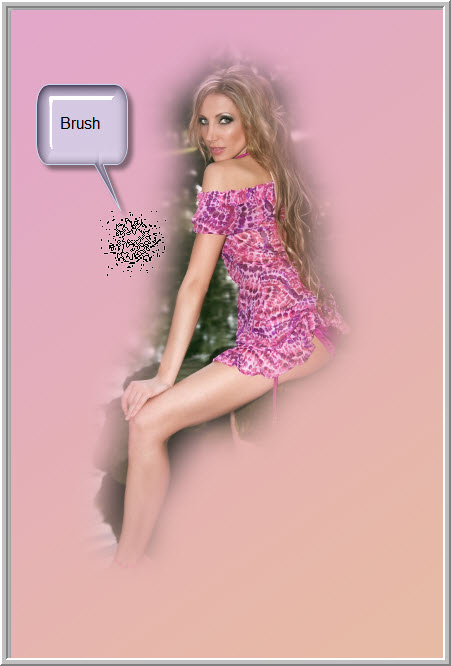
Step 24 : To make the Brush small press [ (left square bracket). To make it large press ] (right square bracket) Vary the size as you paint.
Vary the size of the Brush as you paint.
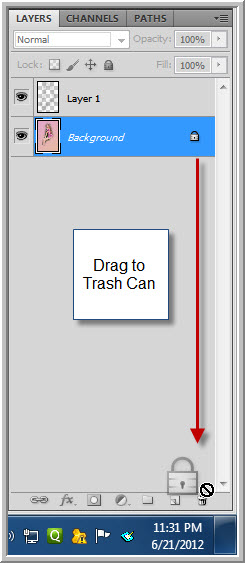
Step 25 : Click on the Background layer. Drag the lock on the layer to the Trash Can.
The Background Layer changes to Layer 0. It is now unlocked and can be edited.
Step 26 : I have opened this Texture in Photoshop. You will find this here
It belongs to MadamGrief-Stock
Step 27 : Press CTRL+A (Select All), then CTRL+C (Copy).
Step 28 : Go to the other image and press CTRL+V (Paste). You can see that the texture is smaller than the image. It has to be resized.
Step 29 : Press CTRL+T for free transform. A selection forms. Press SHIFT+ALT. Drag one of the corners to resize the image. Press ENTER after resizing.
Step 30 : The Texture layer (Layer2) is above Layer 0.
Step 31 : Press ALT+CLICK Add Layer Mask button. A Black layer Mask forms on Layer 2.
After adding the Texture layer, this image was hidden by it. After adding the Black Layer Mask, it is visible again.
Step 32 : Press b for the Brush Tool. The settings have been given earlier, so there is no need to change them. You can always use another brush. If you do change the settings as shown earlier before using it.
Step 33 : I have clicked on another Brush -- Flowing Stars.
Step 34 :Click the Brush Tip Shape. Drag the Spacing slider 100%.
Step 35 : Click on Scattering and drag the Scatter slider 100%. The new Brush is now ready to be used.
Step 36 : In the top panel increase the Opacity and Flow to 100%.
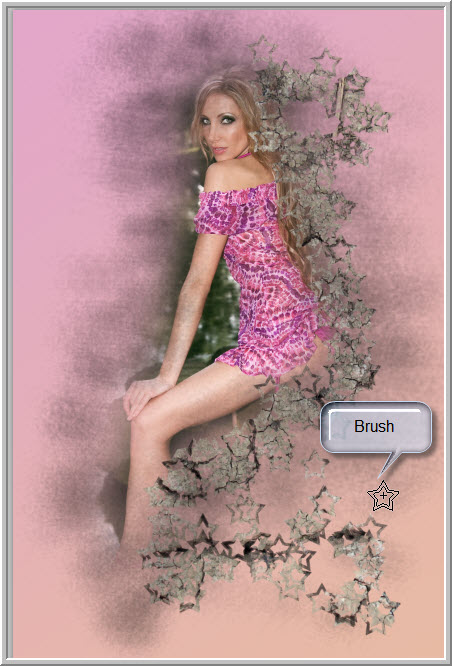
Step 37 : Begin painting with small strokes.
Step 38 : Vary the size of the Brush and paint or just click on some areas and you will get something like this.
Step 39 : Go over parts of the body, but sparingly. You should get an effect like this.
Step 40 : Click on Layer 1. Then click the New Layer icon. A new Layer 3 forms above Layer 1.
Step 41 : Press b for the Brush Tool. In the top panel open the Brush controls and click on Scattered Maple Leaf Brush.
Step 42 : In the Brush controls at the right click on Brush Tip Shape. Drag the Spacing slider to 100%.
Step 43 : Click on Scattering. Set the Scatter to 100%.
Step 44 : Click with the Brush or drag in small increments varying the size with the square brackets. You should end up with something like this. That is all.
Other Photoshop tutorials are here
Step 2 : Draw a rough selection like this close to the subject.
Step 3 : Go to Select>Modify>Feather.
Step 4 : In this dialogue box that pops up set the Feather radius to 100 pixels. Click OK.
Step 5 : Press CTRL+SHIFT+I. The selection is inverted.
Step 6 : Click the Foreground Color which is Black by default.
Step 7 : The Color Picker comes up.
Step 8 : I have clicked on the shoulder area to select the color.
Step 9 : The color is automatically picked in the Color Picker. The 'new' shows the shade chosen. Click OK.
The Foreground changes to the color picked.
Step 10 : Click on the Background Color.
The Color Picker appears again.
Step 11 : I have clicked on the Color of the dress.
The color is selected automatically in the Color Picker. The 'new' shows the shade picked. Click OK.
The Foreground/Background colors have changed to the colors picked.
Step 12 : Click the Gradient Tool. Click in the top panel where shown to open the Gradient Editor. By default the Linear Gradient is selected in the top panel at right.. If it is not click to select it.
Step 13 : Click the Foreground to Background Gradient preset.
Step 14 : Drag diagonally from top to bottom with the Gradient Tool as shown.
The image looks like this.
There are now the Background Layer and Layer 1 where the Gradient has been applied.
Step 15 : Press CTRL+E to merge the two layers into the Background layer.
Step 16 : Click the Add New Layer button. A new Layer 1 forms.
Step 17 : Click the Brush Tool and click the tiny black arrow in the top panel to open the Brush controls.
Step 18 : Click the Splatter 59 pixels Brush.

Step 19 : Go to Window>Brush or click the Brush icon at the right. The Brush Controls opens. Click on Brush Tip Shape.
Step 20 : Drag the Spacing slider to 100%.
Step 21 : Click on Scatter. Drag the slider to 100%. The Both Axes should be left unchecked. Leave the other controls alone. They are needed if you are using a Pen Tablet.
Step 22 : Click on the small double arrow to make the panel go away.
Step 23 : Decrease the Opacity and Flow in the top panel to 25%
Make sure that the Foreground Color is set to Black.

Step 24 : To make the Brush small press [ (left square bracket). To make it large press ] (right square bracket) Vary the size as you paint.
Vary the size of the Brush as you paint.

Step 25 : Click on the Background layer. Drag the lock on the layer to the Trash Can.
The Background Layer changes to Layer 0. It is now unlocked and can be edited.
Step 26 : I have opened this Texture in Photoshop. You will find this here
It belongs to MadamGrief-Stock
Step 27 : Press CTRL+A (Select All), then CTRL+C (Copy).
Step 28 : Go to the other image and press CTRL+V (Paste). You can see that the texture is smaller than the image. It has to be resized.
Step 29 : Press CTRL+T for free transform. A selection forms. Press SHIFT+ALT. Drag one of the corners to resize the image. Press ENTER after resizing.
Step 30 : The Texture layer (Layer2) is above Layer 0.
Step 31 : Press ALT+CLICK Add Layer Mask button. A Black layer Mask forms on Layer 2.
After adding the Texture layer, this image was hidden by it. After adding the Black Layer Mask, it is visible again.
Step 32 : Press b for the Brush Tool. The settings have been given earlier, so there is no need to change them. You can always use another brush. If you do change the settings as shown earlier before using it.
Step 33 : I have clicked on another Brush -- Flowing Stars.
Step 34 :Click the Brush Tip Shape. Drag the Spacing slider 100%.
Step 35 : Click on Scattering and drag the Scatter slider 100%. The new Brush is now ready to be used.
Step 36 : In the top panel increase the Opacity and Flow to 100%.

Step 37 : Begin painting with small strokes.
Step 38 : Vary the size of the Brush and paint or just click on some areas and you will get something like this.
Step 39 : Go over parts of the body, but sparingly. You should get an effect like this.
Step 40 : Click on Layer 1. Then click the New Layer icon. A new Layer 3 forms above Layer 1.
Step 41 : Press b for the Brush Tool. In the top panel open the Brush controls and click on Scattered Maple Leaf Brush.
Step 42 : In the Brush controls at the right click on Brush Tip Shape. Drag the Spacing slider to 100%.
Step 43 : Click on Scattering. Set the Scatter to 100%.
Step 44 : Click with the Brush or drag in small increments varying the size with the square brackets. You should end up with something like this. That is all.
Other Photoshop tutorials are here


