Saturday, November 13, 2010

Shatter Effect in Photoshop

This is a tutorial on shattering an image in any version of Photoshop. First we need an image.
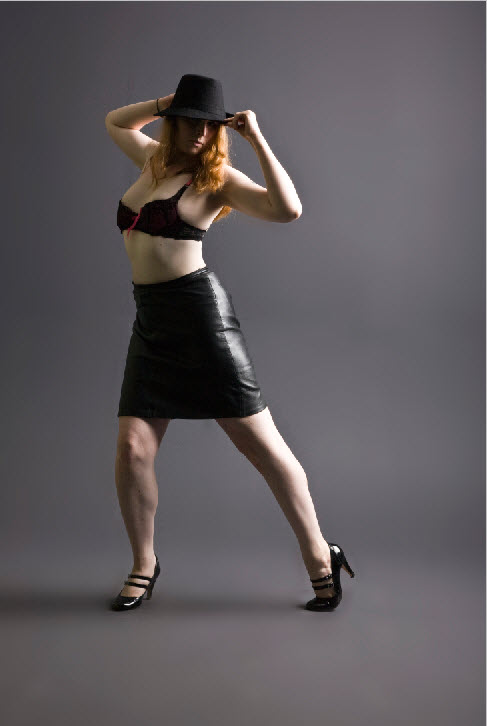
Step 1 : I have opened this image in photoshop. You will find it here
It belongs to =Tigg-stock

Step 2 : Either use the Magnetic Lasso or the Pen Tool to cut out the image from its background.
Step 3 : The Image has been cut out from the background. I have used the Pen Tool.
Step 3 : Click the Elliptical Marquee Tool.
Step 4 : Zoom into the image. Draw a small eclipse with the Marquee Tool.
 
 Step 5 : Press CTRL, place the cursor in the middle f the selection and drag out. 
Step 6 : Draw with the Marquee, press CTRL and keeping dragging out.
Step 7 : Just keep doing it.
Just keep doing it. It will take some time.
Step 8 : I have shattered the image from all sides.
Step 9 : Press CTRL+J. Layer 1 duplicates into Layer 2. Note I have kept the eye icon of the Background Layer switched off.
 Step 10 : Click back on Layer 1. Press CTRL+SHIFT+U to desaturate. You will not notice anything as the desaturated layer is hidden under Layer2.
Step 11 : Go to Filter>Distort>Polar Coordinates.
Step 12 : The Polar Coordinates dialogue box opens. By default Rectangular to Polar is checked. Click OK.
This is how the image looks.
Step 13 : Press CTRL+J. Layer 1 copy forms.
Step 14 : Click back on Layer1.
Step 15 : Go to Edit>Transform>Flip Vertical.
Step 16 : Click the Move Tool.
Step 17 : Press SHIFT and drag up.
Step 18 : Click on Layer2.
Step 19 : Press CTRL+U. The Hue/Saturation dialogue box comes up. Check Colorize. This is the default position.
Step 20 : This is how the image looks.
Step 21 : These are the settings I have given for Hue, Saturation and Lightness. Click OK.
Step 22 : Click on Layer1. 
Step 23 : Press CTRL and click on the New Layer icon. A new Layer 3 forms below Layer1.
Step 24 : Click the Eyedropper Tool.
Step 25 : Click with the Eyedropper on the blue on the body.
The Foregroumd Color changes to the color picked.
Step 26 : Press ALT+BACKSPACE. This will fill with the Foreground Color, which in this case is the Blue shade picked.
This is how the image looks.
Step 27 : Go to Filter>Render>Lighting Effects.
Step 28 : The Lighting Effects dialogue box comes up. Change the angle of the light at left by dragging around.
This is my finished image.
Other photoshop tutorials are here


Photoshop makeover tutorial

This is a step by step tutorial on makeover in photoshop, which experts employ. You will be able to do it too. Do one tutorial at a time. Save your work as a psd file or flatten the layers and go to the next tutorial. It should be possible in all versions of Photoshop.
This is the free stock image I will be using for the tutorial.
The same image after the makeover.
The first part on fixing the skin is here
The second part of the tutorial on adding a blush is here
The third part on touching up the eye is here
The fourth part on adding an eye shadow is here
The fifth part on adding eye lashes is here
The sixth part in adding eyebrows is here
The seventh part on contouring the face, fixing the nose and lips is here 


Sunday, November 7, 2010

Photoshop Makeover Part 1

This will be an effort to emulate makeovers done in photoshop by the experts. It will be helpful if you  use a high resolution image. 
I will be using this image. It belongs to ~Bina-Stock.
You will find it here
Step 1 : There is only a single layer in the Layer's palette -- the Background layer.
Step 2 : Click on the New Adjustment Layer button. From the popup click on Solid Color.
Step 3 : The Pick a Solid Color dialogue box comes up. It is the same as the Color Picker.
Click on Color Libraries.
Step 4 : I have clicked on a Pink. You will have to decide which color to select for the skin tone.
Step 5 : When you hover the cursor over the Spectrum in the middle, it turns into an eyedropper.
Step 6 : Clicking on the Pink brings up these shades.
Step 7 : I have clicked on the top shade of  pink.
Step 8 : Change the Blend Mode of the Color Fill 1 layer to Color.
The image looks like this after changing the Blend Mode to Color.
Step 9 : I have lowered the Opacity to 75%. This will depend on the effect you want.
Step 10 : Click on the Color Fill Mask.
Step 11 : Press CTRL+I. The Mask changes to Black.
Step 12 : The image looks as it did at the beginning because a Black Layer Mask hides the layer below.
Step 13 : Zoom in on the image. we must see the details.
Step 14 : Draw a selection around the actual skin area of the face with the Zoom Tool.
Step 15 : I have zoomed into the image.
Step 16 : Press b on the keyboard to bring up the Brush Tool. In the top click where the arrow points. Lower the Hardness to 0%. The size can be set by the [ (left bracket to make the brush small) and ] (right bracket to make the brush large).
Step 17 : In the top panel drop the Flow down to 50%.
Step 18 : I have begun painting with the Brush. Leave out details such as eyes, lips and the nostrils when you paint.

Make the Brush small by pressing the [ (left bracket) while painting areas such as under the
  eyebrows.
Zoom right in by pressing the right bracket key to make sure that you have not omitted any area of the skin. Use the Space Bar. A small white hand will appear to navigate around the image.
Step 19 : Drop the Opacity further. I have dropped it  to 40%.
This is how the image looks.
This is how the Mask looks after painting with the Brush.
To look at 'before' and 'after' at any stage, press ALT and click the eye icon off and on.
Step 20 : Click on the New Layer icon and a new Layer1 forms above the Color Fill 1 layer.
Step 21 : Click on the Healing Brush Tool.
Step 22 : In the top panel check the Aligned Sample and change it to Current & Below.
Step 23 : Click Mode in the top panel. Set the Hardness to a minimal amount. I have set it to 2%.
Step 24 : Click the Zoom Tool.
I have zoomed right in. This is to see the blemishes on the skin surface.
Click the Healing Brush Tool again.
Step 25 : Make the Brush small and ALT+click to the right of a blemish. The Brush tip should be slightly larger than the blemish to be fixed. You can use the [ (left bracket) and ] (right bracket) to make the tip smaller and larger just like a Brush.
Step 26 : Alt+Click to remove the blemish.
It will take awhile to fix the blemishes one by one. Now should you not want to do it so laboriously, though you should, there is a way.
Step 26 : Press CTRL+SHIFT+ALT+E. This will form a composite layer i.e. it will comprise all the information in the layers below. Layer 2 composite layer forms.
Step 27 : Press CTRL+J. Layer2 copy forms.
Step 28 : Go to Filter>Noise>Median.
Step 29 : The Median dialogue box comes up. The Radius is set to 3 pixels. Use the cursor in the box above. It will turn into a hand which you can use to scroll through the image and see how much is blurred. Reduce the Radius accordingly. Click OK.
Step 30 : Press ALT and click the Layer Mask button. A Black Layer Mask forms on Layer2 copy layer.
The Foreground Color changes to White.
Step 31 : Press b to bring up the Brush Tool. In the top panel reduce the Opacity to 70%.
The Brush Hardness setting is at 0 as set earlier.
Step 32 : Now wipe away the blemishes. Be careful not to wipe out the graininess of the skin texture too much or it will give a plastic, airbrushed look.
The skin has been fixed. I advise you to save your work as a psd. The eyes and the lips will also have to be fixed. You will need it to carry on with the lesson. I will post a tutorial on it shortly.
The next part of the tutorial is here
Other photoshop tutorials are here

Share

Twitter Delicious Facebook Digg Stumbleupon Favorites