


A crumpled and torn paper effect is possible with Textures. You will find plenty of good quality, free textures at http://www.deviantart.com/
You will need to register to download the Textures. Registration is free.

I have opened this image which I have scanned from a newspaper.

I have also opened this crumpled paper texture which I found on deviantart.

I will be attempting this effect.

Step 1 : Press v on the keyboard for the Move Tool. Press SHIFT and drag the paper texture onto the newspaper clipping.

Step 2 : The paper texture has been dragged onto the newspaper. Since the resolution of the scanned newspaper clipping is high, the texture appears small. Press CTRL+T. A selection forms around the texture.

Step 3 : Press SHIFT+ALT and drag the right top corner handle up diagonally. The texture will increase in size proportionately.

Step 4 : Click the Tick Mark in the top panel or press ENTER to apply the transformation.

Step 5 : Change the Blend Mode to Hard Light.

Step 6 : Lower the Opacity suitably. It will depend on our image. I have lowered it to 70%.

Step 7 : Press CTRL+E. Both the layers merge into the Background Layer.

The image looks like this.

Step 8 : Click the New Fill or Adjustment layer button. Click on Levels.

Step 9 : Drag the Black slider at left to the beginning of the Histogram.

The image looks like this.

Step 10 : Press CTRL+E. Both layers merge into the Background layer.

Step 11 : Drag the lock on the Background Layer to the Trash Can.

Step 12 : The Background Layer changes to Layer 0. The unlocked layer can now be edited.

Step 13 : Press CTRL+CLICK NEW LAYER icon. Layer 1 forms below Layer 0.

Step 14 : The Foreground/Background colors should be set to the default Black/White. If it is not press x and then d on the keyboard to restore the default.

Step 15 : Press CTRL+BACKSPACE to fill with the Background Color which is White in this case.

Step 16 : Click Back on Layer 0.

Step 17 : Click the Lasso Tool.

Step 18 : Drag out a rough selection as shown with the Lasso Tool.

Step 19 : Press CTRL+J. The selection is copied and pasted onto layer 2.

Step 20 : Click on Layer 0. CTRL+CLICK on layer thumbnail of Layer2.

Step 21 : A selection becomes visible. Press CTRL+X (Cut). Nothing apparently seems to change though the selection goes away.

Click off the eye icon on Layer 0.

The image looks like this.

Turn on the eye icon on Layer 0 and click off the eye icon in Layer2.
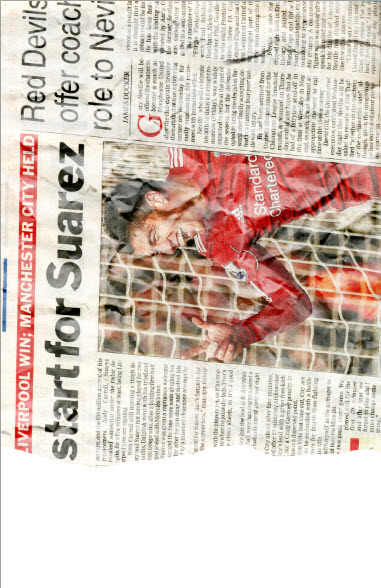
The image looks like this. It means that the two halves of the newspaper clipping are on Layer 2 and Layer 0.

Step 22 : Turn on the eye icon of Layer2 and click on it.

Step 23 : Press CTRL+T. A selection forms in the bottom half of the newspapers clipping.

Step 24 : Use the Down Arrow keys to move the selection down.
Press ENTER.

Step 25 : Go to Image>Image Rotation>90 degree CW.

The image is rotated.

I am on Layer 2 which is the fragment of the newspaper clipping at left.

Step 26 : Click the Lasso Tool.

Step 27 : Trace out an irregular selection with the Lasso Tool.

Step 28 : The selection turns into marching ants.

Step 29 : Press CTRL+SHIFT+I to invert the selection. Press DELETE.

Step 30 : Press CTRL+D to deselect. The sharp line of the cut has become irregular now.

Step 31 : Click on Layer 0. CTRL+CLICK the layer thumbnail.

Step 32 : Click on the Lasso Tool.

Step 33 : Draw an irregular line on the right side of the news clipping.

The selection turns into marching ants.

Step 34 : Press CTRL+SHIFT+I to invert the selection. Press DELETE.

Step 35 : Press CTRL+D to deselect.

Step 36 : Press CTRL+T. A selection forms. Right click inside the selection. Click on Warp.

Step 37 : Drag the corner handles and the handles to Warp as you please. Press ENTER.

The image looks like this.

Step 38 : Click on Layer 2.

Step 39 : Press CTRL+T. A selection forms. Right click inside the selection. Click on Warp.

Step 40 : Again Warp the selection as you please. Press ENTER.

The image looks like this.

Step 41 : Click on Layer1.

Step 42 : Press CTRL+T. A selection forms. use the LEFT ARROW and DOWN ARROW to respoisition the selection as you want. Press ENTER.

Step 43 : Click the Lasso Tool.

Step 44 : Trace out an irregular line all around the portion of clipping with the Lasso Tool.

Step 45 : A selection of marching ants form. Press CTRL+SHIFT+I to invert the selection. Press DELETE.

Step 46 : Press CTRL+D to deselect. The image looks like this.

Step 47 : Click on Layer 2.

Step 48 : Click on the Lasso Tool.

Step 49 : Draw out an irregular line with the Lasso Tool.

Step 50 : The irregular line changes to marching ants. Press CTRL+SHIFT+I to invert the selection. Press DELETE.

The image looks like this.

Step 51 : Click the Layer Styles button. Click on Drop Shadow.

Step 52 : With the Layer Styles dialogue box open, place your cursor on the image. You will be able to drag the Drop Shadow in any direction.

Step 53 : The Distance has already been set by dragging the Drop Shadow. I have dragged the Size to 84 and reduced the Opacity to 50%. There is nothing hard and fast about it. It will depend on your image. Click OK in the Layer Styles dialogue box.

The image looks like this.

Step 54 : Press ALT and drag the fx icon onto Layer0.

The finished crumpled and torn paper effect.
Other Photoshop tutorials are here


