The Single Line Marquee is not used much. It can be used to create a special effect, together with desaturation, Color Balance and Adjustment Layers and also quite a bit of time if you can spare it.

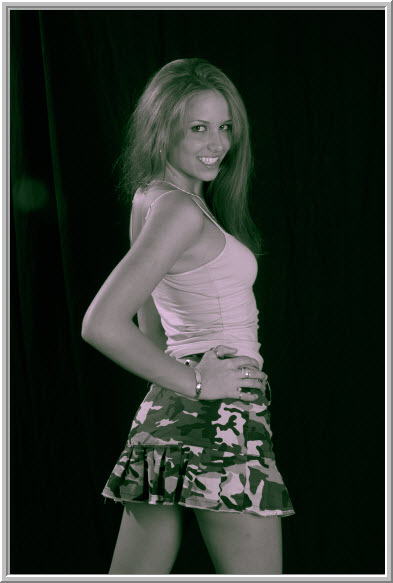
This is the effect I intend to create.

I will be using this free stock image for this tutorial. You will find it here
It belongs to azlimelightcom

Step 1 : Press CTRL+J to duplicate the Background Layer to Layer1. Press CTRL+SHIFT+U to desaturate the layer.

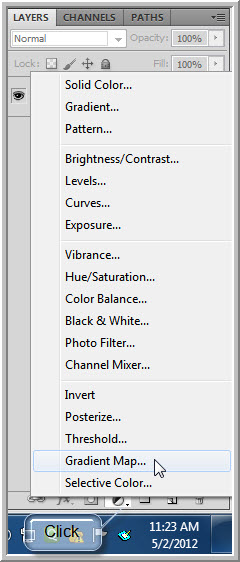
Step 2 : Click the Create New Fill or Adjustment Layer at the bottom of Layers palette. Click on Color Balance from the pop up menu.

Step 3 : In the Color Balance click on Highlights. Type -40 in the box in Yellow.

The image looks like this.

Step 4 : Click on Shadows. Type 70 in Cyan and -60 in Yellow.

The image looks like this.

Step 5 : Press CTRL+SHIFT+ALT+E to create a composite Layer2.

Step 6 : Click on the Marquee Tool and click on Single Column Marquee Tool.

Step 7 : Click with the Marquee tool so that it passes through the middle of the image.

Step 8 : Press CTRL+J. A new Layer 3 forms.

No change seems to occur. The Single Column Marquee also disappears.

Step 9 : Press CTRL+T. The Marquee does not reappear, but a vertical line like this does.

Step 10 : Drag the middle to the right.

Step 11 : Drag the middle handle completely to the right. Press ENTER.

Step 12 : Go to Filter>Blur>Gaussian Blur.

Step 13 : In the Gaussian Blur drag the Radius slider to something high like 20 pixels (if the image like this is a high resolution image). Use something considerably less for a low resolution image. Click OK.

The image looks like this.

Step 14 : Go to Filter>Distort>Polar Coordinates.

Step 15 : The Polar Coordinates dialogue box opens. The Rectangular to Polar is checked by default. Click OK.

The image looks like this.

Step 16 : Press CTRL+J. Layer 3 to duplicates into Layer3 copy.

Step 17 : Press CTRL+T for free transform. Right click inside the selection. In the pop up click on Flip horizontal. Press Enter.

The image looks like this.

Step 18 : With Layer 3 copy highlighted. Press CTRL and click on Layer3. Both layers are highlighted.

Step 19 : Press CTRL+E. The 2 layers are combined into Layer3 copy.

Step 20 : Go to Filter>Distort>Wave.

The Wave dialogue box opens.

Step 21 : Type 10 into Number of Generators. Drag the top slider of Wavelength and Amplitude till they are equal with the lower slider. Click OK.

The image looks like this.

Step 22 : Lower the Opacity to 50%. Change the Blend Mode to Darken (or whatever you like).

The image looks like this.

Step 23 : Press CTRL+F twice. Each time you press CTRL+F the doodles change shape.

Step 24 : Press CTRL+J to duplicate Layer 3 copy to Layer 3 copy 2.

Step 25 : Press CTRL+I to invert the Layer.

The image looks like this.

Step 26 : Grab the Single Column Marquee Tool again.

Step 27 : Click with it so that it passes through the middle of the figure.

Step 28 : Press CTRL+J. A new Layer 3 forms.

Step 29 : Press CTRL+T. The Marquee reappears.

Step 30 : Drag the middle handle to the right fully. Press ENTER.

Step 31 : Change the Blend Mode to Normal.

The image looks like this.

Step 32 : Click the Add Layer Mask button. A Layer Mask forms on Layer 3.

Step 33 : Press b for the Brush Tool. In the top panel lower the Opacity of the Brush to 25%. To increase the size of the Brush press ] (right square bracke)t and to decrease it [ (left square bracket).

Step 34 : Paint with the Brush on the face and body. It will seems that nothing much is happening. But remember you are painting only at 25% opacity.

Look at the Layer Mask. You can see some grey. It is where I have painted at 25% opacity with the Brush.

Step 35 : Increase the Opacity of the Brush to 35%.

Step 36 : Now paint again on the body face and background. Now the horizontal lines disappear slowly as you paint.

I have finished with the Brush work.

Step 37 : Go to Filter>Distort>Ocean Ripple.

Step 38 : The Ocean Ripple dialogue box opens. Click OK with the default settings.

This is how the image looks.

Step 39 : Click on the Create New Adjustment or New Fill Layer button and click on Hue/Saturation.

Step 40 : ALT+CLICK exactly between the Hue/Saturation Layer and the Layer below it to create a clipping layer. As soon as the layer is clipped you will find a bent arrow pointing downwards at the left.

Step 41 : I have dragged the Hue slider to -180.

The finished image.
Other photoshop tutorials are here