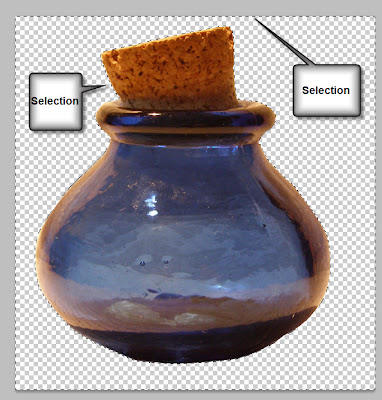
You can use Text as a shape i.e. you need a Shape into which you paste Text in Photoshop.
Step 1 : Click the Magic Wand.
Step 2 : Click the empty space with the Magic Wand. A selection of marching ants form.
Step 3 : Press CTRL+SHIFT+I to inverse the selection.
Step 4 : Click on the Paths palette. Click on the Make Work Path from Selection.
Step 5 : The Work Path has formed.
Step 6 : Go to Edit>Copy.
Step 7 : Open a New Document.
Step 8 : I am using Photo as Preset and Size as Portrait 4 x 6. Click OK.
Step 9 : The Foreground/Background Colors should be set to the default Black/White. If it is not press x and d to restore the default.
Step 10 : Press ALT+BACKSPACE to fill with Foreground Color which is Black in this case.
Step 11 : Go back to the image of the bottle. Go to Edit>Copy.
Step 12 : Click on the Black document. Go to Edit>Paste.
The Path has been pasted on the black document.
Step 13 : Press CTRL+T A selection forms. Press SHIFT+ALT and drag a corner handle to resize proportionately. Press ENTER to apply the transformation.
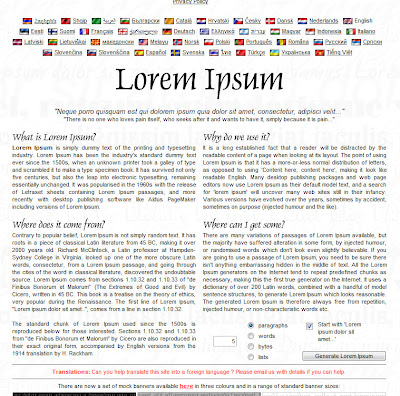
Now we need some Text. You will be able to generate text at http://lipsum.com/
Step 14 : You will be taken to this page when you click the link.
Step 15 : At the bottom right you will find the Text Generator. It is set to generate 5 paragraphs. Click Generate Lorem Ipsum.
It will take a moment or two to generate the text.
Step 16 : Right click and drag down to select the Text. Press CTRL+C to Copy.
Step 17 : Click the Horizontal Type Text Tool.
Step 18 : The Color of the Text should be set to White. To set the Color click where the small white hand points to.
Step 19 : The Select text color dialogue box opens. Type ffffff (6fs) in the highlighted box at the bottom.
Click OK.
Step 20 : Click the Direct selection Tool.
Step 21 : Click with the Direct Selection Tool on the path to select it.
Step 22 : Click the Horizontal Type Tool.
Step 23 : Click inside the selection with the Type Tool. The shape of cursor becomes rounded inside the selection
Step 24 : I am changing the Size of the Font to 8 points.
Step 25 : Go to Edit>Paste.
Step 26 : The Text is pasted inside the selection. There are some line breaks because of paragraphs.
Step 27 : Place the Cursor at the end of the line and press DELETE.
Step 28 ; The gap has been closed. There is another line break at the bottom.
Step 29 : Place the cursor at the end of the line. Press DELETE.
Step 30 : I have pressed DELETE twice to close the rest of the line breaks.
Some gaps nevertheless remain.
Step 31 : Right click and drag down with the Text to select all of it.
Step 32 : Go to Edit>Find and Replace Text.
Step 33 : The Find and Replace Text appears. In Find What: Press the Space bar once.
Step 34 : In change To: Leave it at zero.
Step 35 : Click on Change All. It will take take the computer awhile to process this. You have to wait.
Step 36 : This dialogue appears after processing. The number of replacements will vary from image to image.
Click OK.
The Text now replicates the shape of the bottle.
Step 37 : Click the Tick Mark in the top panel.
Step 38 : Click anywhere below the Work Path.
The path disappears.
Step 39 : Click back on the Layers palette and click on the Background Layer.
Step 40 : Click on the Foreground Color. The Color Picker comes up. I have clicked on a shade of red. If you want the exact shade type in e70606 in the highlighted box at the bottom.
Click OK in the Color Picker.
The 41 : The Foreground Color changes to the color picked.
Step 42 : Press ALT+BACKSPACE to fill with the Foreground Color.
The image looks like this.
Step 43 : Right click and copy the Text from Lorem Ipsum.
Step 44 : Click the Horizontal Type text Tool.
Step 45 : Click in the top panel to reset the color of the Text to Black.
Step 46 : In the Select Text Color type in 000000 (6 zeros) in the highlighted box. Click OK.
The Text Color has changed to Black.
Step 47 : I am increasing the font size to 9 points.
Step 48 : Click at the top with the Type Tool.
Step 49 : Go to Edit>Paste.
Step 50 : A few lines of text are pasted.
Step 51 : Press CTRL+V a number of times and Text is copied and pasted.
Step 52 : Click the Tick mark.
The image looks like this.
Step 53 : Press ALT and double click the Background layer. It changes to Layer0.
Step 54 : Click the Layer Styles button. Click on Inner shadow.
Step 55 : In the Inner Shadow I have moved the Distance slider to 9 and Size to 160.
The finished image.
Other photoshop tutorials are here


