This is a Text tutorial to manipulate Text and create a movie poster with an image. I will demonstrate some advanced techniques which you should be able to follow. For example I will show different effects you can achieve with Blend Modes, but not in the normal way they are used. Some of the effects can also be used on a standalone basis for application to other images.I have divided the tutorial into two parts for your convenience.
Part 1
Step 1 : I will be using this free stock photo. You will find it here
It belongs to darthangel2
Step 2 ; We have to extract the model from the background. It should be easy since it is a plain blue background. Click the magic Wand Tool.
Step 3 : Click with the Magic wand on the background and it is immediately selected by marching ants. Press SHIFT and click with the Magic Wand to also select the areas under the arms and hair.
Step 4 : Go to Select>Modify>Feather.
Step 5 : I have given a Feather Radius of 2 pixels. Click OK.
Step 6 : Press CTRL+SHIFT+I to inverse the selection.
Step 7 : Press CTRL+J. This copies the selection to Layer 1. Turn off the eye icon in the Background Layer.
Step 8 : Click the Erazer Tool.
Step 9 : The Erazer works just like a Brush. Press [ (left square bracket) to make the tip small. Press ] (right square bracket to make the tip large. Press SHIFT+[ to make the tip soft. Press SHIFT+] to make the tip hard. Use a soft tip. Clean up the bits and pieces of blue around the model and between her hair.
The image has been cleaned up. Minimize the image. we will require it later.
Step 10 : I am opening a New Document. I have given a Width of 1000 pixels and Height of 1500 pixels. The Resolution is 300 (if you want to print), Color Mode RGB and Background Contents White. Click OK.
The White Document opens.
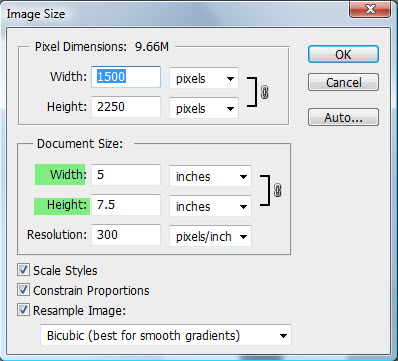
Press ALT+CTRL+I to bring up the Image Size dialogue box. Note that the Width and Height are inadequate for a poster. If you want to create a real poster, you will have to increase the Width and Height considerably.
I have changed my Width and Height. The Pixel Dimension changes accordingly.
Step 11 : Click the Text Tool and then the Vertical Type Tool.
Step 12 : Draw out a Text Box.
Ste 13 : At the top select your Font from the drop down menu. I have selected Impact because it is a thick font which is required here. Impact is found in all versions of Photoshop. Set the Font Size at the top left by typing in a value. I have set it at 85 points.
Step14 : Click on Top align text. The default font Color is set to Black.
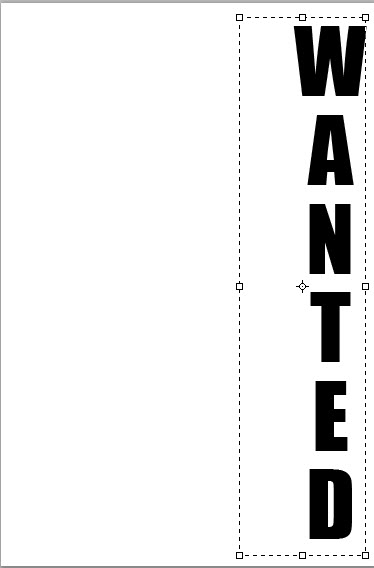
Step 15 : I have typed out my Text.
Step 16 : Move the right bottom corner in.
Step 17 : Click the Tick Mark in the top panel.
Step 18 : Press CTRL+T. A selection forms.
Step 19 : Use the right Arrow key to move the selection to the right edge.
Step 20 : Drag the middle handle out to make the Text thicker.
Step 21 : Pull the top middle handle and bottom middle handle out. Drag the right middle handle out.
Step 22 : Click the Tick Mark.
Step 23 : Click to open the Swatches panel. Click on 55% Gray.
Step 24 : Press ALT+BACKSPACE to fill the Text with the selected color.
Step 25 : Click the Rectangular Marquee Tool.
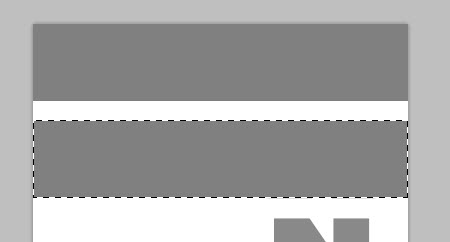
Step 26 : Drag out a selection carefully right from the edge so that it encompasses the letter W.
Step 27 : Click the New layer icon. A new layer 1 forms.
Step 28: Go to Edit>Fill.
Step 29 : In the Fill dialogue box change the Use to 50% Gray. Click OK.
The image looks like this.
Step 30 : Press CTRL+ALT+T.
Step 31 : Press SHIFT and drag down the selection over the letter A. Press ENTER.
The selection looks like this after pressing ENTER.
Step 32 : Press CTRL+SHIFT+ALT and press T again and again to cover each of the letters with the gray selection.
Step 33 : All the letters have been covered. Press CTRL+D to deselect. A bit of White appears on the left edge.
Step 34 : Click the Crop Tool.
Step 35 : Crop the left margin slightly to remove the White.
The image looks like this after cropping.
Layer 1 looks like this.
Step 36 : CTRL+CLICK the Text layer thumbnail.
Step 37 : A selection appears as soon as you CTRL+CLICK.
Step 38 : The thumbnail of Layer 1 looks like this.
The image looks like this. Press CTRL+D to deselect.
Step 39 : Click the Polygon Lasso Tool.
Step 40 : Click with the Polygon Lasso Tool from the bottom.
Step 41 : Go over the outside of the image after reaching the top and come back to the starting point as shown.
Step 42 : A selection forms. Press DELETE.
The Text Look like this.
Step 43 : Press v (shortcut for Move Tool). Press SHIFT. I have pressed the left Arrow key 8 times.
Step 44 : With Layer 1 highlighted, press SHIFT and click on the text layer. Both are highlighted.
Step 45 : Right click the highlighted layers. Click on Convert to Smart Object from the popup.
The layers have been converted into a Smart Object.
Step 46 : Click on the Background Layer.
Step 47 : Press CTRL+I to inverse it to Black.
The image looks like this.
Step 48 : Now we need a Texture. I found this free stock Texture here
It belongs to
Step 49 : Drag and drop the Texture on the other image.
Step 50 : The Texture is bigger than the other image. Press CTRL+T. A selection forms.
Step 51 : Right click inside the selection. Click on Rotate 90 degree CW.
Step 52 : Press SHIFT+ALT and drag a top corner handle inwards.
Step 53 : The Texture has been resized. Press ENTER.
The image looks like this.
Step 54 : Move the Texture Layer over the Text layer.
Step 55 : Press ALT and click between Layer 2 and 1. A small round circle forms. It means the layer will be clipped.
The Layer 2 thumbnail has a bent arrow pointing downwards. It means it has been clipped with the layer below.
The image looks like this.
Step 56 : Open the image of the model. Drag and drop it on the other image.
Step 57 : The image of the model does not fit properly over the Text. Press CTRL+T. A selection forms.
Step 58 : Drag the image into place. Press ENTER.
The image looks like this.
Part 2
Step 59 : With the topmost layer (model layer) selected, click on the Add New Adjustment or Fill Layer button. Click on Hue/Saturation.
Step 60 : In the Hue/Saturation check Colorize.
The image looks like this.
Step 61 : I will leave the Hue slider as it is. I am dragging the Saturation slider to 50 and Lightness to -5.
The image looks like this.
Step 62 : Click on Layer 3.
Step 63 : Click on Layer Style button. Click on Inner Shadow. We will be giving a light effect with Inner Shadow.
Step 64 : In the Inner Shadow, click on Set color of shadow.
Step 65 : The Select color of shadow opens. Click ffffff in the highlighted box at the bottom. It stands for White. Click OK.
Step 66 : Change the Blend Mode to Color Dodge.
Step 67 : Uncheck Us Global Light. Chnage the Angle to 0.
You can immediately see the effect. It seems a light is coming from the right and hitting the model's body.
Step 68 : I have dragged the Size slider to 40.
You can immediately see the light source from the right softening a bit. Click OK in Inner Shadow.
Step 69 : Click on Layer 2. It is the Texture layer.
Step 70 : Change the Blend Mode to Vivid Light.
The Texture can be seen more clearly.
Step 71 : Click on Layer 1 which contains the Smart Object.
Step 72 : Click on the Layer Styles button. Click on Gradient Overlay.
Step 73 : Change the Angle to 0. Change the Blend Mode to Hard Light, nothing hard and fast about it though.
Step 74 : With the Layer Styles dialogue box open, place the cursor on image left and drag to the left to lessen the dark effect.
Step 75 : With the Layer Styles dialogue box open click on Inner Shadow.
Step 76 : Uncheck Use Global Light. Change the Angle to 65.
Step 77 : With the Layer Styles dialogue open, drag with the cursor and the Text will take on some depth as can be seen here. Click OK in the Layer Styles.
Step 78 : Now I will double click on the Smart Object layer to edit it further.
Step 79 : This dialogue box opens.
Click OK.
Step 80 : Photoshop opens the original Smart Object (seen at right).
Step 81 : I will now use this free Grunge Texture. You will find it here
It belongs to fabricate-stock
Step 82 : Drag the Texture onto the Text.
It's a bit too small for the Text.
Step 83 : Press SHIFT+ALT and drag upwards diagonally to resize proportionately. Press ENTER.
Step 84 : In the Layers palette, the Grunge texture is above the Text Layer.
Step 85 : Place the cursor between Layer2 and Layer1, press ALT and click to clip the two layers.
Step 86 : Layer 2 has been clipped with Layer 1.
The image looks like this.
Step 87 : Go to File>Save.
Step 88 : Change the Blend Mode to Hard Light.
This is how the image looks.
Step 89 : Click the Horizontal Type Tool.
Step 90 : I have chosen Arial as my Font. I have set the size of the font at 50 and chosen White for the color of the Text.
Step 91 : I have typed out my Text.
Step 92 : Click the Tick Mark.
Step 93: Press v for Move Tool. Move the Text into position. Resize it. That is all.
Other photoshop tutorials are here


