The basics of Layer masks are simple but powerful. Layer Masks are editable selections that play an important role in non destructive editing. The color black in a layer mask hides the corresponding pixels in the linked layer (actually makes those pixels transparent).The color white leaves the corresponding in the linked layer intact; it doesn't do anything with them. But I will show you what more you can do more to make something different. This is the effect I will achieve.
Step 1 : I will be using this free stock image. You can download it from
hereStep 2 : Open the photo in photoshop. Drag the lock of the Background layer to the Trash Can at the bottom of the Layers palette.
Step 3 : The Background Layer changes to Layer 0.
Step 4 : The next is to create a new layer beneath layer 0. To do this press CTRL and click the New Layer icon. A new Layer 1 forms below layer 0.
Step 5 : Click the Gradient Tool. As soon as you click the Gradient Tool you will find the Gradient Editor in the top bar. Click it.
Step 6 : Clicking the Gradient Editor brings up these presets. I have clicked on Red, Green. Click OK in the Gradient Editor.
Step 7 : Press SHIFT and you will be able to drag straight up with the Gradient Tool.
Step 8 : You will not notice any change in the image, but if you look at the Layers palette you will find that the Gradient has been applied. Now to make it visible.
Step 9 : Click on Layer0.
Step 10 : Click the Lasso Tool.
Step 11 : Begin drawing with the Lasso Tool. You need not be too careful. Just keep away from the edge of the girl's image.
Step 12 : Once you come back to the original point which you clicked with the Lasso Tool the selection turns into marching ants.
Step 13 : Click the Layer Mask button. A Layer Mask forms next to the layer thumbnail on Layer 0.
The image looks like this.
Step 14 : Click on he Zoom Tool or use the shortcut z on your keyboard. Click the Zoom in icon in the top bar to zoom in.
I have zoomed into the image to see clearly what I am doing.
Step 15 : Click the Brush Tool.
Step 16 : Click where the white arrow point to reveal the Brush Controls. You can set the Size and Hardness. Set the Hardness to around 10-60%. To set the Size use the keyboard shortcut. Press ] (right square bracket) to increase the size of the Brush and [ (left square bracket) to decrease it. To make the Brush HARD press SHIFT+] and to make it soft SHIFT+[. Here I have set the Hardness. The Brush is neither soft nor hard.
Make sure that the Layer Mask and not the layer thumbnail is selected. When the Layer Mask is selected you will find a tiny border around it as shown here.
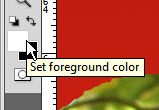
The Foreground Color is set to Black.
Step 17 : Make the Brush small or big depending on where you are painting. When you are painting at the edge, for example near the hair, make the Brush small. Use a bigger brush when painting away from the edge.
Use a bigger Brush when painting away from the edge. Paint all around the girl.
If you make a mistake, press x on the keyboard to switch the Foreground Color to White. Paint out the mistake. Press x again. Resume painting with Black.
The image looks like this after painting with Brush.
The Layers palette looks like this.
Step 18 : Click on Layer 1.
Step 19 : Download this free Texture from
hereIt belongs to
Falln-StockStep 20 : Press v (shortcut for Move Tool). Press SHIFT and drag the Texture onto the image.
Step 21 : The Texture lands right in the middle of the image because the SHIFT key was kept pressed. But the Texture is much smaller than the other image.
Step 22 : Press CTRL+T for Free Transform. A selection forms.
Step 23 : Drag out each of the corner handles till the Gradient is covered. Press ENTER to apply the transformation.
The Texture covers the Gradient Layer.
Step 24 : This is how the Layers palette looks. The Texture is on Layer 2.
Step 25 : Change the Blend Mode of Layer 2 to Linear Light. If you are using this Texture then apply this Blend Mode. You can also try Multiply, Darken and Hard Light.
The image looks like this.
Step 26 : Click the New Layer icon. A new Layer 3 forms above Layer 2.
Step 27 : Use the small arrow to change the Foreground Color to White.
Step 28 : Click the Gradient Tool.
Step 29 : Click where shown to reveal the Presets in the Gradient Editor and click on the first one -- Foreground to Background.
Step 30 : Click the Radial Gradient in the top panel.
Step 31 : Drag the Gradient Tool from about the middle to a little distance below the top.
This is the effect you will get.
Step 32 : Change the Blend Mode of the Layer 3 to Multiply.
This is the effect you will get.
Step 33 : Click on Layer 0.
Step 34 : Press CTRL+U to bring up Hue/Saturation. Check Colorize.
Step 35 : These are the settings I have given for Hue, Saturation and Lightness. By all means play around with the settings to get different effects by first moving the Hue slider to select the color and then the Saturation and Lightness. Click OK when satisfied.
Step 36 : Click the Crop Tool.
Step 37 : Crop the image eliminating the black background at the sides. Press ENTER to apply the Crop.
The image looks like this.
Step 38 : Click the New Layer icon. A new Layer 4 forms.
Step 39 : Change the Foreground Color to Black.
Click the Gradient Tool.
Step 40 : Click on Foreground To Background Preset.
Step 41 : Click the Linear Gradient.
Step 42 : Press SHIFT and draw he Gradient Tool from the bottom to the top.
The image looks like this.
Step 43 : Change the Blend Mode to Color Burn.
And, here is the finished image.
Other photoshop tutorials are
here 


 This is the effect I will achieve.