Saturday, August 13, 2011

Cross Processing -- Lightening images

You may have noticed those washed out look images and wondered how to do them in photoshop. It does not take a great deal of expertise. Just follow along. 
Step 1 : I have opened this image in Photoshop. This is a free stock photo. You will find it here
It belongs to dzlr123

This is the effect I will achieve. The central portion retains the original color. The color in the rest of the image has been deliberately given a faded look. This process will work on any kind of image.
There is only the Background Layer in the Layers palette.
Step 2 : Press CTRL+J twice. The Background Layer triplicates into Layer 1 and Layer 1 copy.
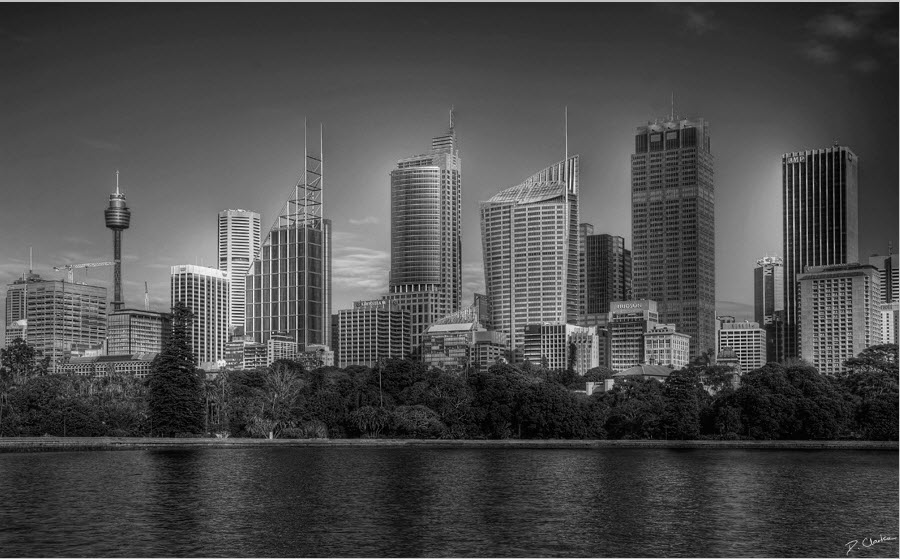
Step 3 : Layer 1 copy is the topmotst layer. Press CTRL+SHIFT+U to desaturate it.
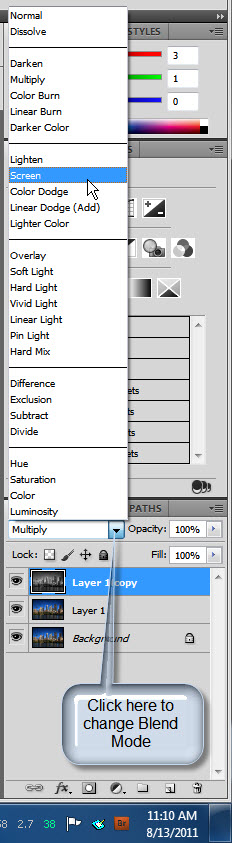
Step 4 : Change the Blend Mode of Layer 1 copy to Screen.
The image looks like this. It is much lighter.
Step 5 : Click on Layer 1.
Step 6 : Click the New Layer icon and a new Layer 2 forms above Layer1.
Step 7 : Make sure that the Foreground/Background Colors are set to Black/White. If it is not press x and d on the keyboard to restore the default.
Step 8 : Press ALT+BACKSPACE to fill with the Foreground Color which is Black. The new layer 2 fills with Black.
The image looks like this.
Step 9 : Change the Blend Mode of Layer 2 to Saturation.
The image looks like this.
Step 10 : Click on Layer 1 copy and reduce the Opacity to 80% by dragging the slider to the left.
Step 11 : Click on Layer 2 and reduce the Opacity to 60%.
The image looks like this.
Step 12 : Click on the fx button.
Step 13 : Click on Blending Options from the pop up menu.
Step 14 : In the Blend If portion of the Blending Options you will find a black slider at left and a white slider at the right at the very bottom. Press ALT and click the black slider. It separates into two. Drag the right portion of the slider till the value is 80 as shown.
Step 15 : ALT+Click the the white slider above. Drag the left portion of the slider till the value reads 250. Click OK in Blending Options.
Step 16 : SHIFT+CLICK on Layer 1 copy. Both Layer 2 and Layer 1 copy are highlighted.
Step 17 : Press CTRL+G. The two Layers are grouped into Group 1 layer.
Step 18 :  Click the Erazer Tool.
Step 19 : In the top panel lower the Opacity to 80%.
Step 20 : Click the tiny triangle in the Group 1 Layer. The two layers grouped under it are revealed. Click on Layer 1 copy which is the one which was desaturated.
I have clicked on Layer 1 copy.
Step 21 : The Erazer Tool works just like a Brush. Click in the top panel and lower the Hardness to around 40. To make the Brush large press ] (right square bracket) to make the Brush small press [ (left square bracket).
Step 22 : I am using the Erazer on the foliage by increasing and decreasing the size of the Brush.
Step 23 : I have used the Erazer on the trees. It helps if you zoom in. You can use this step to eraze the eyes if you are using a human figure.
Step 24 : Click the arrow beside the Group 1 Layer. The grouped layers are hidden again.
Step 25 : Click on Layer 1.
Step 26 : Click the Dodge Tool.
Step 27 : In the top panel change the Range to Midtones. The Exposure is set to 5%.
Step 28 : Use the Dodge Tool in the same way as you used the Erazer. It also works like a Brush.
Step 29 : Click on Group 1 Layer. Click the Layer Mask button. A Layer Mask forms on Group 1 Layer.
Step 30 : Click on the Elliptical Marquee.
Step 31 : Press SHIFT and you will be able to draw a perfect circle with the Elliptical Marquee. Your selection may not be at dead center. Use the LEFT, DOWN, RIGHT, UP arrow keys to move the circle approximately to the middle.
Step 32 : Go to Select>Modify>Feather.
Step 33 : Select a  Feather Radius of 50. Click OK.
Step 34 : Make sure that the Foreground Color is set to Black.
Step 35 : Press ALT+BACKSPACE. The selection fills with the Foreground Color which is Black.
Step 36 : Press CTRL+D to deselect. The middle portion now retains the original color, while the rest of the image outside of the feathered circle has a washed out look.
Other photoshop tutorials are here


Wednesday, August 10, 2011

Content Aware Fill in Photoshop CS5

Content Aware Fill is a powerful tool in Photoshop which cloning sometimes cannot achieve. For example if you want to remove a figure from one part of the image to another cloning the background in would be a difficult task and may not be up to the task., Content Aware Fill makes it easy to do. You should know how to use the Pen Tool for this tutorial. If you don't please see it here first.
The Pen Tool is not difficult to use if you follow my tutorial.
This is free stock image which you will find here
It has been uploaded by me
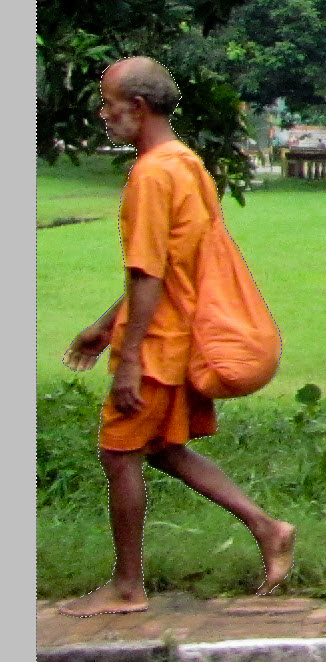
I was told that the figure of the sadhu in saffron walking on the Kolkata Maidan would have looked better if  it was near the middle. This can be done using the Pen Tool and the Content Aware Fill.
The image of the sadhu has been moved to centre without affecting the background.
Step1 : Make a selection with the Pen Tool.
Step 2 : Click on the Paths palette. You will find the Work Path. Right click it. From the pop up menu click on Make Selection.
Step 3 : In the Make Selection dialogue box set the Feather Radius to 0. The Operation is set by default to New Selection. Click OK.
Step 4 : A column of marching ants selection forms around the figure and also the edges.
Step 5 : Press CTRL+SHIFT+I to inverse the selection. Now only the figure in saffron is selected.
Step 6 : Press CTRL+J. The figure of the sadhu is copied and pasted onto Layer1. The selection of marching ants go away.
Step 7 : CTRL+CLICK the layer thumbnail on Layer1.
Step 8 : The selection of marching ants reappear.
Step 9 : Click on the Background Layer.
Step 10 : Go to Select>Modify>Expand.
Step 11 : In the Expand Selection dialogue box set the Expand by 10 pixels.
Step 12 : The selection of marching ants around the figure has expanded.
Step 13 : Click off the eye icon on Layer 1.
Step 14 : Go to Edit>Fill.
Step 15 : In the Fill dialogue box change the Use to Content Aware. Click OK.
Step 16 : The image has disappeared and only the marching ants remain.
Step 17 : Press CTRL+D to deselect. The marching ants go away. 
Step 18 : Click on Layer1. Click on the eye icon on Layer1.
Step 19 : The sadu's figure reappears. 
Step 20 : Press v (shortcut for Move Tool) and place the figure of the sadhu wherever you want to. I have moved him to the middle.
Step 21 : If you zoom into the image it is possible that you may notice a slight fringing around the edges of the image.
Step 22 : Go to Layer>Matting>Defringe.
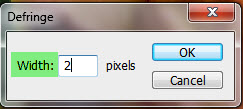
Step 23 : Set the Width to 2. Click OK.
Step 24 : Go to Layer>Matting>Remove White Matte.
The fringing is removed.
 The figure of the sadhu has been moved around, but the background has not been affected.
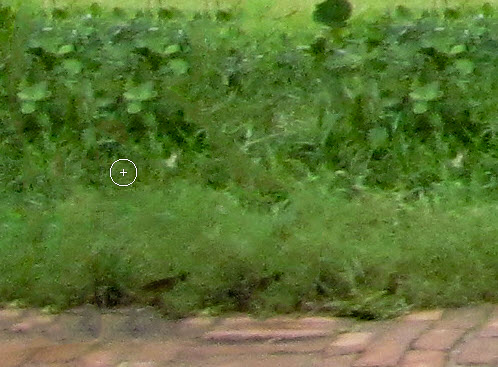
If you zoom into the area where the figure originally was you may find some traces of an outline.
Step 25 : Click the Spot Healing Brush Tool.
Step 26 : Click in the top panel. Set the Hardness to 0 and Spacing to 1.
Step 27 : In the tp panel make sure that Content Aware is selected as also Sample All Layers.
Step 28 : Make the Brush size bigger by pressing the ] (right square bracket key) to cover the portion you wish to be removed.
Step 29 : Make the Brush Bigger or smaller (by pressing the [ left square bracket key) and clone away. Unlike the Clone Tool you don't have to ALT+CLICK to select an area. The Healing Brush Tool automatically picks up pixels from the surrounding area and clones them in. That is all.
The finished image.
Other Photoshop tutorials are here


Share

Twitter Delicious Facebook Digg Stumbleupon Favorites