

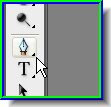
Step 2 : Use the Magnetic Lasso or the Pen Tool to cut out the egg from the background.
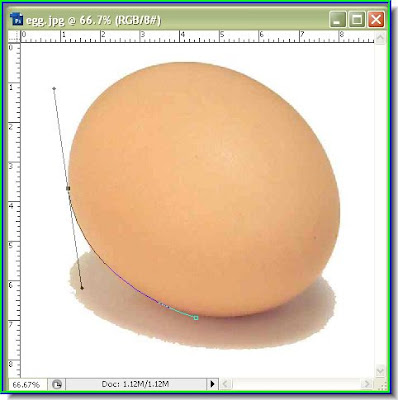
Step 3 : I am using the Pen Tool to make the selection. If you do not not how to use the Pen Tool click here. If you want to know how the Magnetic Lasso works click here.
Step 4 : The egg has been selected.
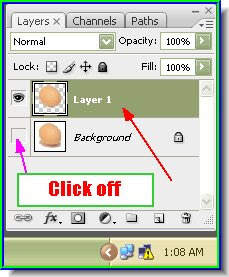
Step 5 : Press CTRL+J on the keyboard. The selection will be copied and pasted on a New layer. The new Layer is Layer 1 (red arrow). Now click off the eye icon on the Background layer (mauve arrow). Step 6 : The background has been deleted. This is how the image looks.
 Step 7 : Click the Move Tool to select it.
Step 8 : Open a new white l;ayer. Keeping SHIFT pressed drag the egg onto the new white layer.
 Step 9 : After dragging the egg, hover the cursor near a corner of the selection and a small bent two-headed arrow will appear. Use it to rotate the egg still it appears to be standing vertically.
Step 10 : Now click the Move Tool or any other tool to apply the transformation. The Apply Transformation dialogue box opens. Click apply.
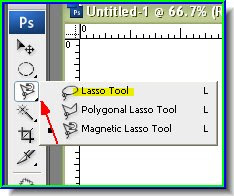
Step 12 : Click on the Lasso Tool to select it.
Step 13 : Use the Lasso Tool to draw the crack as shown above.
Step 14 : The selection has been made of the portion which will be the cracked portion of the egg.
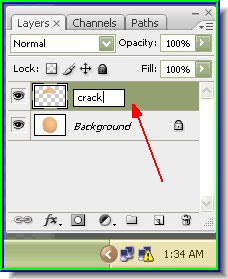
Step 15 : Press CTRL+J and the selection or the 'cracked' part will be copied and pasted onto a new layer Layer 1. Double click where the red arrow points and a small box will open. Type 'crack' or any other name you prefer. The click the layer again. It will be renamed 'Crack'. Step 16 : CTRL+CLICK the layer thumbnail of Crack.
Step 17 : The selection of the crack reappears.

Step 18 : With the selection in place in the Crack layer, click on the Background layer.
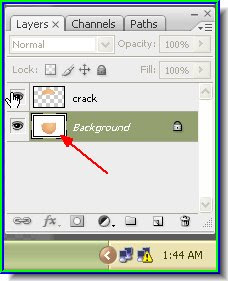
Step 19 : The upper part of the egg shell disappears in the layer thumbnail.
Step 20 : Click back on the Crack layer.

Step 21 : Click the Move Tool.
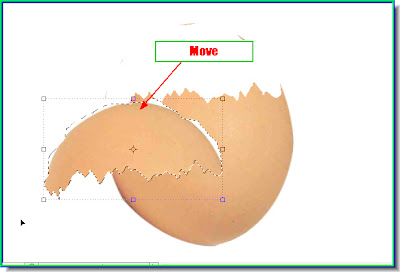
Step 22 : Use it to move the crack layer.
Step 23 : You will find a small double headed arrow appear when you hover the cursor on a corner of the selection. Rotate and reposition it.

Step 24 : I have repositioned the crack layer. Click on the Move Tool to apply the transformation as in Steps 8 and 9. Press CTRL+D to deselect. The selection goes away.
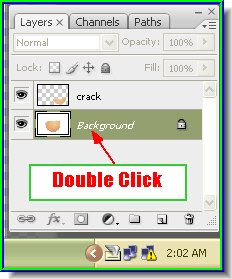
Step 25 : Double click the Background.
Step 26 : The New Layer dialogue box opens. Click ok.

Step 27 : The Background layer changes to Layer 0.

Step 28 : Click the Magic Wand Tool to select it and click the white background of Layer 0.

You can see the selection.

Step 29 : Hit the DELETE key and the white background disappears. Press CTRL+D to deselect.
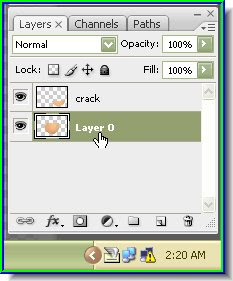
Step 30 : Click back on Layer 0.
Step 31 : Use the Move Tool to reposition the larger shell (the background).
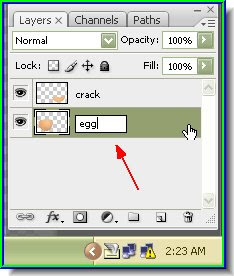
Step 32 : Also rename the Background as egg. This is for convenience.
Step 33 : Pres CTRL+J. This will duplicate the egg layer. A new layer egg copy layer will form.
Step 34 : Click back on the egg layer.
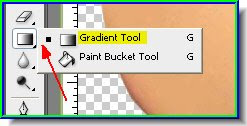
Step 35 : Click on the Gradient Tool to select it.
Step 36 : Make sure the Foreground color is set to Black and Foreground to White.

Step 37 : Before applying the Gradient, CTRL+CLICK on the egg layer thumbnail.

Step 38 : A selection appears around the shell. Now to apply the gradient.
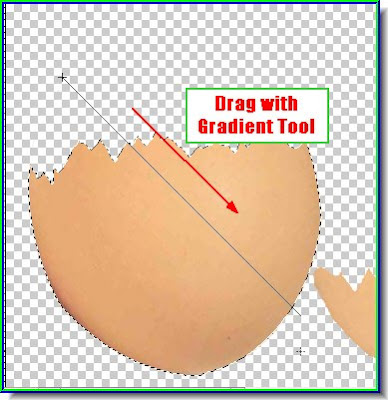
Step 39 : Now use the Gradient Tool to drag dagonally across the shell.

Step 40 : Though you will not notice any change in the image, you will find that the Gradient has been applied on the egg. You cannot see the Gradient because it is hidden below the egg copy layer. Let us reveal it.
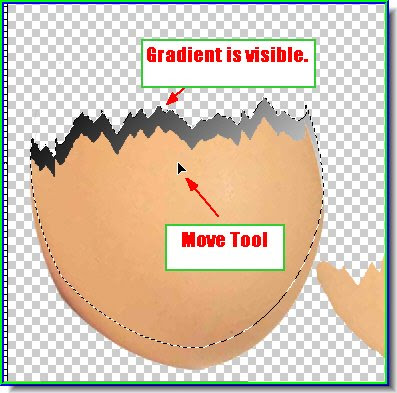
Step 41 : Use the Move Tool to drag the egg layer up. It becomes visible behind the egg copy layer. Press CTRL+D to deselect. Step 42 : Click on the crack layer.
 Step 43 : Press CTRL+J on the keyboard and the crack layer will be copied and now appears as crack copy layer.

Step 44 : Now click back on the crack layer, then CTRL+CLICK in the layer thumbnail.

Step 45 : A selection appears around the crack layer. Now apply the Gradient as in Step 39. Then push it up with the Move Tool in Step 41.
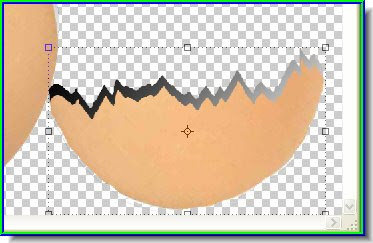
And there you are. Step 46 : I have opened this photo of a baby and have deleted the background. If you do not know how to remove the background Click Here
But I have a problem. My computer crashed and I had to reformat it. Therefore I lost the earlier illustrations of this tutorial. The remaining illustrations make look a bit different as I had to redo them. But they were made using the same steps as described above. Step 37 : I have moved the baby onto the composition.
 Step 38 : I have placed the baby layer just above the egg layer. This is done simply by dragging the layer down in the Layers/Channels/Paths pallette.
 Step 39 : Go to Layer>Arrange>Send Backwards.
 And there you are.
 Step 40 : For some additional steps, click on the white background layer. (Create a new white layer and drag it into the background). We will add a Gradient to it. To match the composition colors correctly it will be easier if we use those used in the composition.

Step 41 : Click the eyedropper Tool.

Step 42 : I have clicked on the egg shell with the Eyedropper Tool.

Step 43 : Keeping ALT pressed, I have now click on the body of the baby with the eyedropper Tool.

You will find that the Background and Foreground colors have automatically changed to the two colors picked with the Eyedropper.

Step 44 : Click the Gradient Tool.

Step 45 : Drag diagonally with the Gradient Tool.

The gradient has been added.

You can add some text. For this particular text effect see here.
There is another tutorial on cracked egg here. It is a bit more elaborate.


