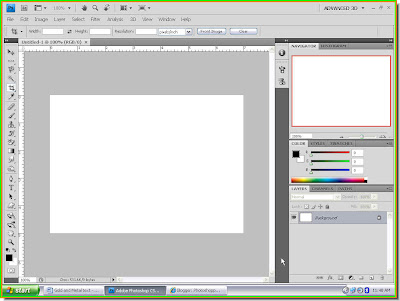
 Step 1 : Open a blank white layer in Photoshop.
 Step 2 : Click on the Foreground Color.
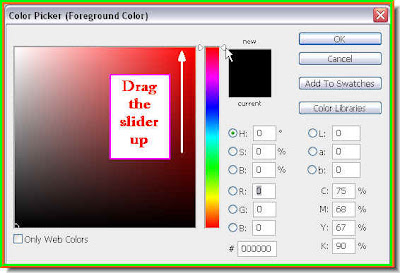 Step 3 : The Color Picker opens. Look at the column of colors in the middle. It is called the Spectrum. Note that there is a slider. Drag the slider up to the top. At least that is what I have done since I want to choose Red.
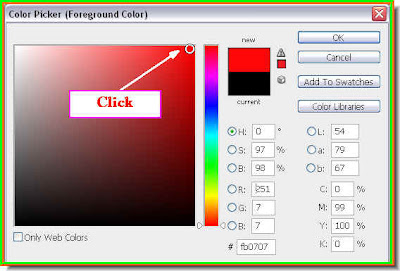 Step 4 : I have clicked on a shade of the Red and clicked ok and exited the Color Picker.
 Note that the Foreground Color changes to the color I picked.
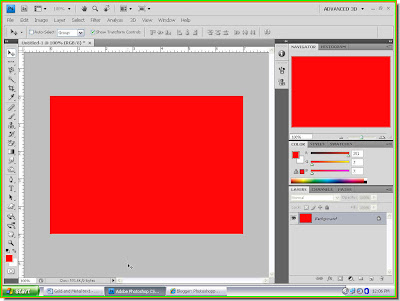 Step 5 : Press ALT+BACKSPACE. This will fill the layer with the Foreground Color. In this case the Foreground Color is Red. The White layer is filled with Red.
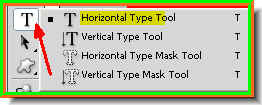 Step 6 : Click the Text Tool.
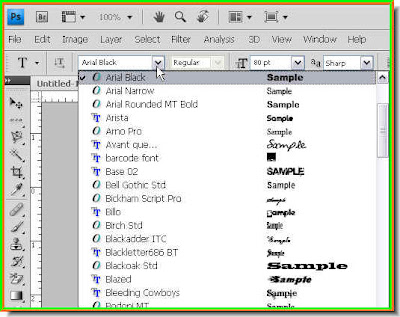 Step 7 : In the top panel click where the white arrow points to, to reveal the dropdown menu which shows the fonts available. I have chosen Impact. You will find it also.
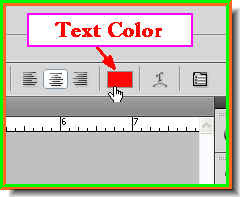 Step 8 : The text color has to be changed. Look in the top panel. Click where the small white hand points to.
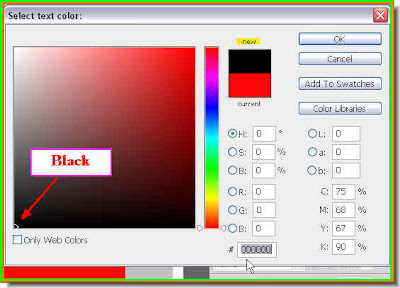 Step 9 : Clicking brings up the Select Text Color dialogue box. Type 000000 (six zeroes) into the box where the small white arrow points to. The six zeroes stand for Black.
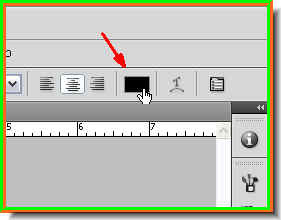 Look at the top panel. The text color has changed to Black.
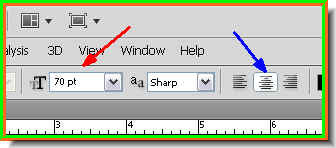 Step 10 : On the top panel set the points i.e. how large your letters are going to be (red arrow) by entering a value in the box. Also set the margin. I have set it as centrally aligned (blue arrow).
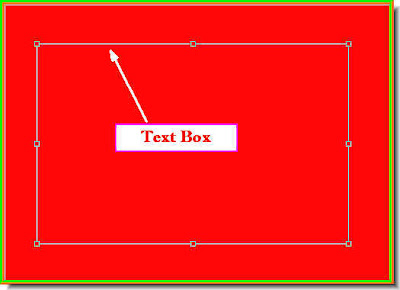 Step 11 : Now draw out the text box with the cursor. The text will go inside the text box.
 Step 12 : I have typed in the text.
 Step 13 : Click the tick mark on the right of the top panel to apply the Text.
 Step 14 : The text has been applied. The bounding box has disappeared.
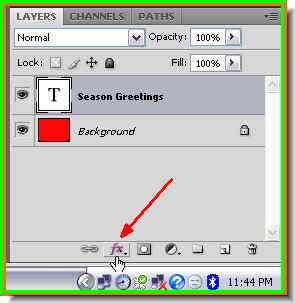 Step 15 : Click the Add Layer Style button. It looks a bit different in PS7, but is in the same place.
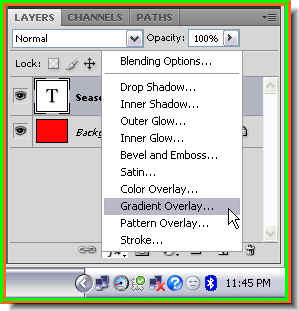 Step 16 : From the popup menu click on Gradient Overlay.
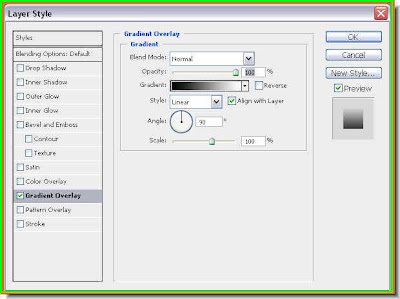 Step 17 : The Gradient Overlay layer style dialogue box opens. Look at the left panel. The Gradient Overlay is checked.
 The black color of the letters immediately change and look as above.
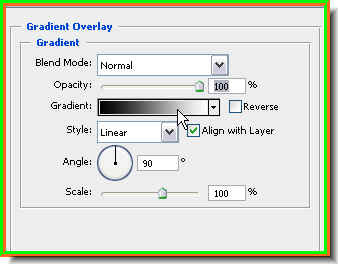 Step 18 : Click where the arrow points to.
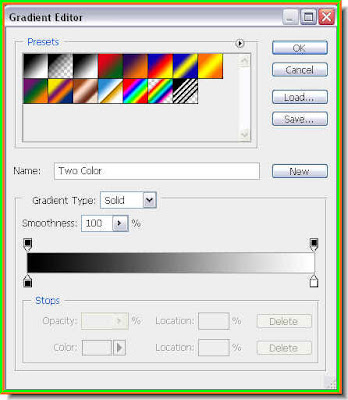 Step 19 : The Gradient Editor opens.
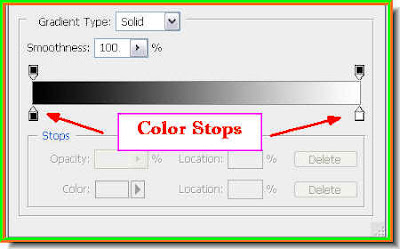 Step 20 : The red arrows point to Color Stops. You will learn their use in the next step.
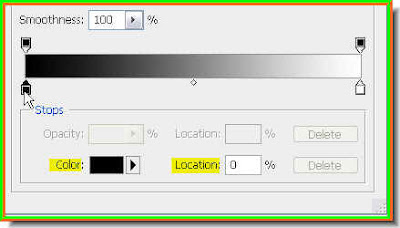 Step 21: Click on the Black Color Stop on the left. The color changes to Black.
 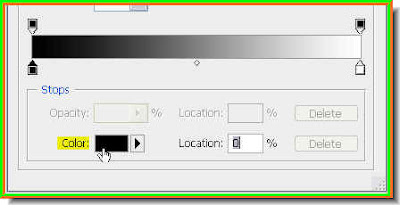 Step 22 : Click on Color.
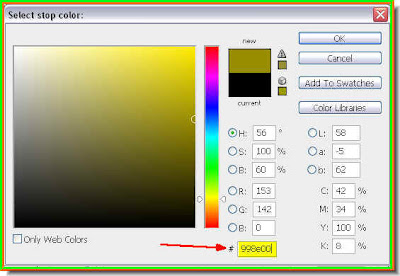 Step 23 : The Select Stop Color dialogue box opens. Type 998e00 in the box where the arrow points to. Click ok.
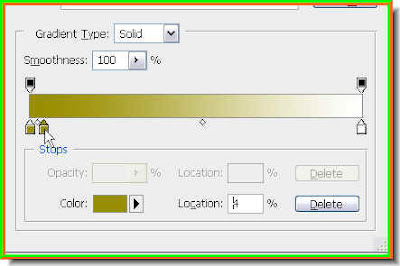 Step 24 : Press ALT, click on the Left Stop an drag to the right. Another stop emerges.
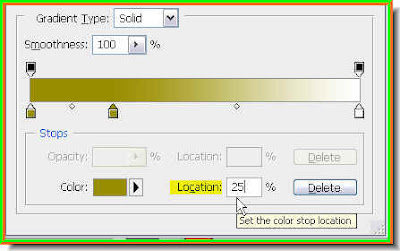 Step 25 : Now type 25% into the Location box and the second stop moves 25 % to the right.
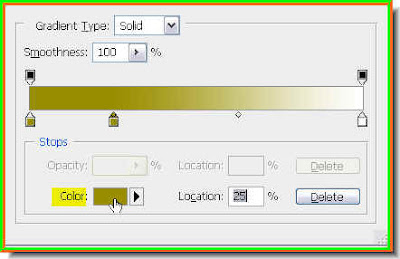 Step 26 : Again click on Color.
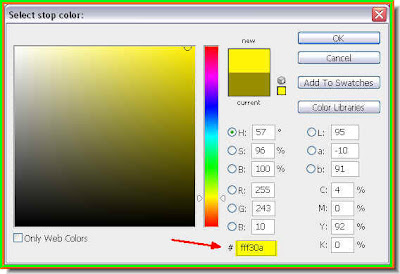 Step 27 : The Select Stop Color dialogue box opens. Type fff30a into the box. Click ok.
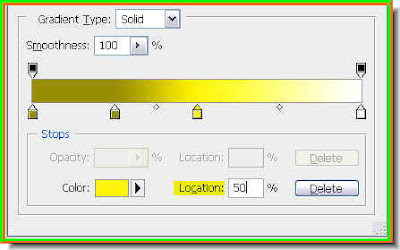 Step 28 : Now press ALT and drag the second stop. A new third stop forms. Type 50% in the Location. The third stop moves 50% to the right from the first stop.
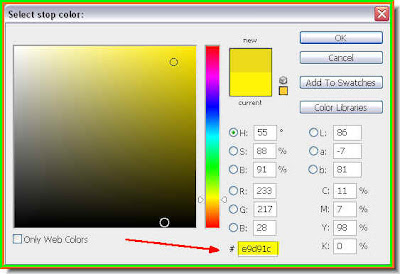 Step 29 : Again click Color and in the Select Stop Color dialogue box type e9d91c.
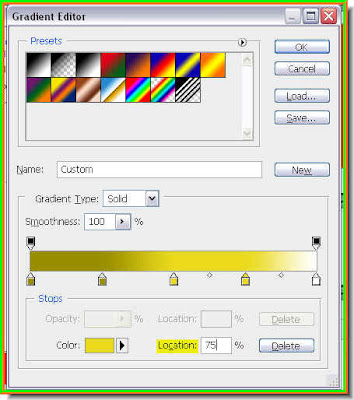 Step 30 : Now just as earlier, press ALT and a fourth color stop forms. Type 75 % in Location and it moves 75% to the right from the first stop.
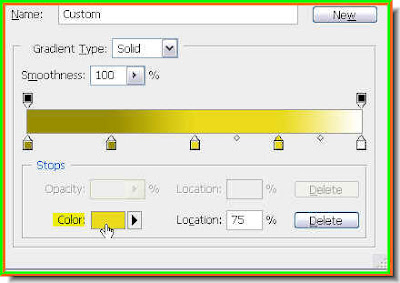 Step 31 : Click on the fourth stop and click on Color again.
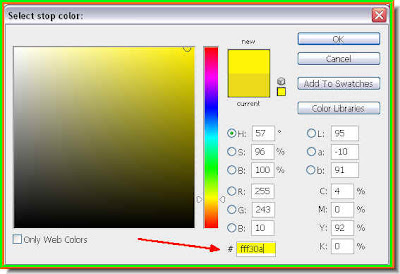 Step 32 : In the Select Stop Color dialogue box type in fff30a. Click ok.
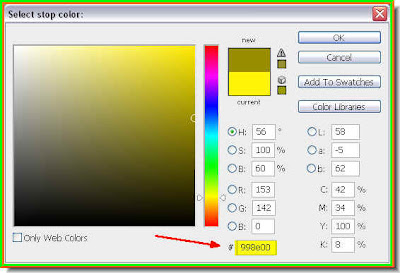 Step 33 : Now click on the white color stop on the extreme right and type in Stop Color 998e00. Click ok in Select Stop Color.
 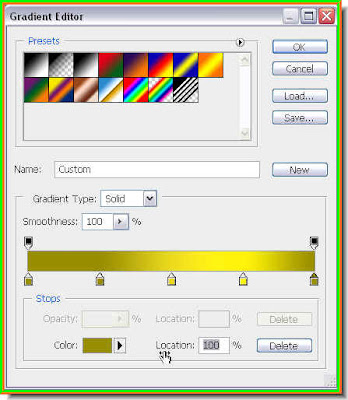 Step 34 : This is how the Gradient Editor looks like. Click ok. Click ok in The Layer Style dialogue box.
 This is how the Text looks like.
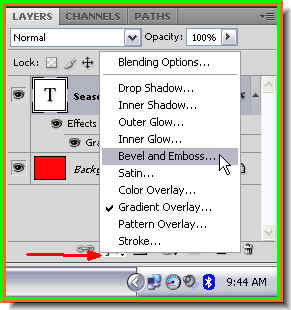 Step 35 : Click the Add Layer Style button and from the popup click on Bevel and Emboss.
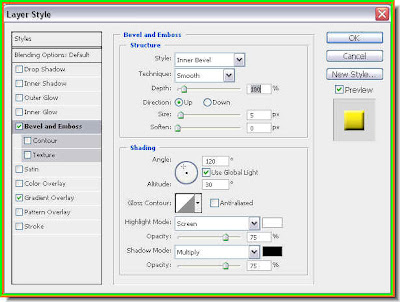 Step 36 : The Bevel and Emboss Layer Style dialogue box opens.
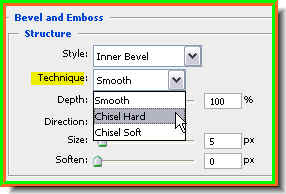 Step 37 : Change the Technique to Chisel Hard.
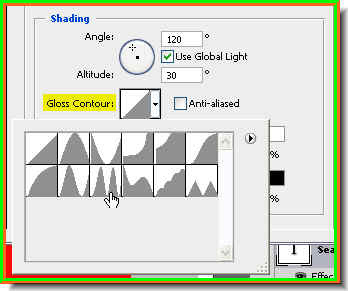

This is how the image looks after the application of the last two settings.

Step 39 : In the left hand panel check Contour and also the Anti-Alias on the right.

Step 40 : Now drag the Depth slider gradually to the right while noting the change in the bevel effect, then the Size slider. There is no hard and fast rule about the amount as it will depend on the size of your text. Click ok.

This is how Gold Text looks like.

Note that the Text layer is highlighted. This is because we are working on it. Also Text is always on a new layer.
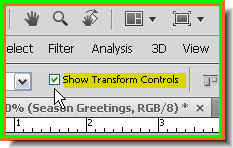 Step 42 : In the top panel tha Show Transform Controls is checked. It is called Bounding Box in PS7 and is in the same place.

Step 43 : As soon as you click on the Move Tool a selection appears around the text.

Step 44 : Press SHIFT+ALT and drag on a corner handle. This will increase the size of the text. Press Enter to apply the transformation. Step 45 : Note that the text is not in the centre. It can be done manually, but it will not be exact. To keep the text in the centre of the image press CTRL+A. A selection appears. Look at the white arrows.
 Step 46 : Look in the top panel. The arrows point to two of the six aligment controls. Click on the second and fifth icons.
 Step 47 : Now the text is centrally aligned.
Step 48 : Now use the cursor to drag the text into the middle.

Step 49 : Click on the Add Layer Style button and from the popup menu click on Drop Shadow.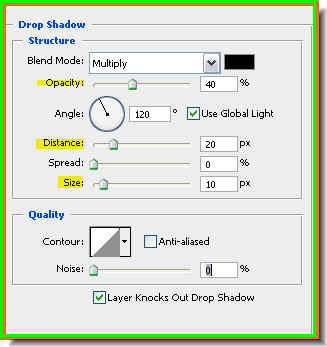 Step 50 : In the Drop Shadow controls I have first dragged the Distance slider to 20 pixels, the Size slider to 10 pixels and lastly reduced the Opacity to 40 %. Click ok.
 This is how the text looks like. It is complete. But then, I do not know if you have noticed, it should be 'Season's Greetings' and not 'Season Greeting' as I have written. That is a mistake. It has to be corrected. Or supposing you decide that 'Merry Christmas' would have been more appropriate. What is to be done? Do you have to do the text and effects again? No. You can simply change the text.

Step 51 : Double click on the Text layer thumbnail. The text is highlighted.
 Step 52 : Just retype the text.
 Step 53 : Click the tick mark on the right side of the top panel to apply the transformation.
 You can change the entire text if you want. The text changes, but not the style.

You can even change the font and the size, but the Layer Style will remain unaffected.

I think this font looks better. For gold text a thick font is required. Step 54 : Click on the Eyedropper Tool.
 Step 55 : Click on a color in the text with the Eyedropper Tool.
 The Foreground Color changes to the color I picked.
 Step 56 : Click on the Brush Tool.
 Step 57 : Click on the icon on the right of the top panel to open the Brushes pallete.
 Step 58 : The Brush presets opens. Click where the small white arrow on the top right points to. Note there is a tiny black arrow.
 Step 59 : It opens the Brushes pallette. All brushes available in your version of are shown here. Click on Assorted Brushes.
 Step 60 : This dialogue box opens. Click ok.
 Step 61 : The Assorted Brushes dialogue box opens. Click on Brush 48.
 Step 62 : Now click on the New Layer icon and a new layer forms above the text layer.

Step 63 : Now with the brush tool add the 'sparkles' by clicking sparingly on the text like I am doing.

I have finished adding the sparkles.

Step 64 : Now click on the Background layer to select it.

Step 65 : Go to Filter>Render>Lens Flare.

Step 66 : The Lens Flare dialogue box opens. I have selected the last one. It is not available in PS7. You can select any of the others. They will do just as well. You can place the flare where you want it by clicking with the cursor.

And that is the effect you get. Try it out. I am sure you will be able to do it.


