Creating 3D Text is not at all difficult. You can create it for a card or for anything that you wish. I will show you how to create the Text, changing its color, rasterize it, duplicate layers with a shortcut, the Blending Options, the Gradient Editor and many more things. Even newbies can attempt it. So let us get started,


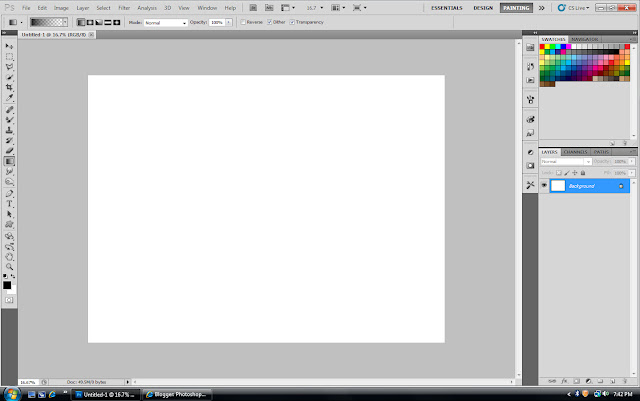
Step 1 : Open a blank White Layer in Photoshop.
Step 2 : Make sure that the Background Color is set to Black and the Background to White. If it is not press X and then D on your keyboard to restore the default.
Step 3 : Press ALT+BACKSPACE to fill the document with Black. It is a shortcut for the Fill command.
Step 4 : Click the Text Tool and then click on Horizontal Text Tool.
Step 5 : In the top panel you will find the Text Color Box. Click it to set the Color.
Step 6 : The Select Text Color dialogue box opens.. I have clicked on a shade of gray. If you want to select the exact shade type in bfb9b9 in the highlighted box at the bottom and click OK.
Step 7 : The Color of the Text has changed to the color I picked. This is how you can change the color of the Text from the default Black.
Step 8 : Click the first arrow to reveal the fonts available in your version of Photoshop and select a thick one. Next set the Font size in the top panel next to it by typing in a figure i.e. how large you want your text to be.
Step 9 : Draw out a Text Box where your Text will go.
Step 10 : The Font Size that I have chosen is a bit large. I have typed in 3D TEXT, but all of it does not show. You may face this problem.
Step 11 : Just draw out the right bottom corner handle of the Text Box to reveal the Text.
Step 12 : Click the Tick mark in the top panel to apply the Text.
Step 13 : This is how the Text looks like.
Step 14 : This is how the Layers panel looks. The Background is what has been filled by Black. The Text layer is on top of it. The Text is always on a separate layer.
Step 15 : Right click the Text Layer. From the menu select Rasterize Text.
Step 16 : The Text has been rasterized or been made editable.
Step 17 : Press CTRL+T. A selection forms around the Text. Drag the right corner handle down keeping SHIFT+ALT pressed.
Step 18 : The Text has become larger. Press ENTTER to apply the transformation.
Step 19 : Go to Edit>Transform>Perspective.
Step 20 : Again a selection forms.
Step 21 : Press CTRL+SHIFT and drag up the left bottom corner handle up suitably.
Step 22 : Then keeping SHIFT+ALT pressed again drag the bottom right corner handle down. Press Enter.
Step 23 : Press CTRL+J. A 3D TEXT copy forms.
Step 24 : Click the Move Tool.
Step 25 : Press CTRL+RIGHT ARROW key. A 3D TEXT copy 2 layer forms.
Step 26 : Keeping ALT pressed press the right arrow again and again. A duplicate layer will form each time. You can see I have made 12 copies. You can make any number of copies of the layer. How many copies you do will depend on the canvas size and font size chosen by you.
Step 27 : Press SHIFT and click on the topmost layer.
Step 28 : After shift+clicking the topmost layer scroll down and click on the first copy above the 3D TEXT layer. All the layer will be highlighted.
Step 29 : All the Layers will be merged with the topmost layer.
Step 30 : Drag the 3D Text Layer above the 3D Text copy 12 layer.
Step 31 : The Text looks like this.
Step 32 : Click on the Add Layer Style button and from the pop up click on Blending Options.
Step 33 : Click the Gradient Overlay. By default this is the Gradient that you will see. Look beneath Opacity at the top. DO NOT CLICK OK.
Step 34 : The Text looks like this after applying the Gradient Overlay.
Step 35 : Next click on Bevel and Emboss. Also tick the Contour just below it.
Step 36 : Check the Anti-alias. Click on the Gloss Counter. Click the arrow at the right side to reveal the drop down. Click on Ring Double. It is the one the hand points to.
Step 37 : Drag the Depth slider fully to the right.
Step 38 : The Text looks like this.
Step 39 : Drag the Size slider slowly to the right, while keeping a watch on your Text.
Step 40 : My Text look like this after pulling the Size slider to the right.
Step 41 : Now click OK in the Blending Options.
Step 42 : I have now clicked on 3D Text copy 12 layer.
Step 43 : Click on Add Layer Style button and again go to Blending Options.
Step 44 : Again click on Gradient Overlay.
Step 45 : The Text now looks like this.
Step 46 : Next click on Bevel and Emboss. Tick the Contour. Drag the Depth slider fully to the right. Drag the Size slider while watching your Text.
Step 47 : Change the Technique to Chisel Hard.
Step 48 : Check the Anti-alias. Change the Gloss Counter to Cone Inverted. You can choose any of the Gloss Counters. It will depend on your Text. Click OK in Blending Options when you are satisfied.
Step 49 : My Text looks like this.
Step 50 : Click on 3D Text layer. Press SHIFT. Click on 3D Text copy 12 layer. Both are highlighted.
Step 51 : Both the Layers merge into the 3D Text layer.
Step 52 : Press CTRL+J. The 3D Text layer duplicates into 3D text layer copy.
Step 53 : Go to Edit>Transform>Flip Vertical.
Step 54 : The Text is flipped vertically. Drag the flipped layer down as shown.
Step 55 : Press CTRL+T. A selection forms around the flipped Text.
Step 56 : Hover the cursor near the top right edge. A small two-headed bent arrow appears. You can rotate he Text with this.
Step 57 : Rotate the Text till it aligns with the one above.
Step 58 : Rotate the left top corner to bring it up.
Step 59 : Now you will have to do some fine tuning to align the Text at the bottom with the one at the top. Keeping the selection in place use the top, right and left arrow keys to move the selection in place. You may need to rotate the selection further also. Once it is aligned press ENTER.
Step 60 : The Text has been aligned.
Step 61 : Click on the Lasso Tools and select the Polygon Lasso Tool.
Step 62 : Click between the Text on the left and drag to the right in a straight line. If you get it wrong press ESC and start again.
Step 63 : Drag with the Lasso around the Text till you return to the first point.
Step 64 : When you click on the point you started from the selection changes into marching ants.
Step 65 : Click on the Add Layer Mask button. A Layer mask forms next to the layer thumbnail on 3D TEXT copy layer. The selection of marching ants disappear.
Step 66 : Click the Gradient Editor. You can see the Gradient selected in the top panel. If you do not see it click the Gradient Editor where the top arrow points to.
Step 67 : The Gradient Editor opens. Click the second Preset in the top row. Click OK in the Gradient Editor.
Step 68 : Press SHIFT and drag from top to bottom from around the middle.
Step 69 : This is how the Text looks like.
Step 70 : Click on the Background layer.
Step 71 : Click on the Foreground Color.
Step 72 : The Color Picker comes up. The column of color in the middle is the Spectrum. Note there are a pair of tiny sliders. You can drag it up or down to select a color. I have selected a Blue, then clicked on a shade in the left box. Click OK in the Color Picker.
Step 73 : The Foreground Color changes to the color picked.
Step 75 : Go to Filter>Texture>Texturizer.
Step 76 : The texturizer dialogue box opens filling up your screen.
Step 77 : At the right top corner you will find the controls. I have selected Brick from the drop down. You can select any. Click OK.
Step 78 : This is how the Text looks with the Texture added. That is all.
Other Photoshop tutorials are here.


