Wednesday, August 1, 2012

Light Leak Photoshop tutorial

 A light leak is a hole or gap in the body of a camera where light is able to "leak" into the normally light-tight chamber, exposing the film or sensor with extra light. This light is diffuse, although parts within the camera may cast shadows or reflect it in a particular way. For most purposes this is considered a problem. Within the lomography movement it is seen as a positive effect, giving photos character. (Wikipedia)
This effect liked by some can be replicated in Photoshop.
This is the processed image. The original image is below.
I will be using this image for the tutorial. You will find it here
It belongs to Aconyte-Stock
Step 1 : Click the Create New Fill or Adjustment Layer button.
Step 2 : From the pop up menu click on Hue/Saturation.
Step 3 : In the Hue/Saturation drag the Saturation to -100.
Step 4 : Change the Blend Mode of Hue/Saturation layer to Screen. Reduce the Opacity to 75%.
The image looks like this.
Step 5 : Click on the New Fill or Adjustment Layer button (as in Step1)  and click on Levels.
Step 6 : Drag the Black slider shown to 20%.
The image looks like this.
Step 7 : Now click on a Curves Adjustment.
Step 8 : In the Curves diagonal drag the top and bottom of the diagonal in the middle slightly at the top and bottom as shown.
The image looks like this.
Step 9 : Click the New Layer icon. A New Layer 1 forms.
Step 10 : The Foreground/Background colors are set to Black/White.
Step 11 : Click the Gradient Tool. The Linear Gradient is checked by default. Click at the top to bring up the Gradient Editor.
Step 12 : In the Gradient Editor click on Foreground to Transparent Preset.
Step 13 : The Blend Mode is set to Normal. Lower the Opacity to 60%.
Step 14 : Drag the Gradient Tool down in the bottom of the image.
The bottom of the image darkens slightly.
Step 15 : Click the New Layer icon and a new Layer 2 forms.
Step 16 : Press x on the keyboard to change the Foreground Color to White.
Step 17 Click the Gradient Tool again.
Step 18 : Drag up with the Gradient Tool.
The finished image,
Other Photoshop tutorials are here


Sunday, July 15, 2012

Shadow Removal with Photoshop

Sometimes shadows can spoil an image and pose a challenge to restore. But with  little bit of patience the problems can be tackled in Photoshop. It is not difficult to do.
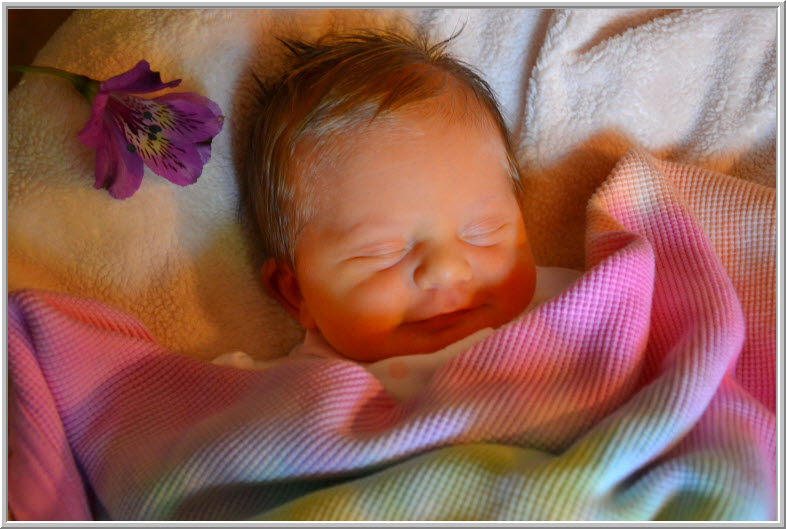
This is the image with shadows removed from the face. The original image is below.
I have been sent this image of a baby. As you can notice that there are a lot of shadows on the face. This will be removed.
Step 1 : Press CTRL+J to duplicate the Background Layer.
Click the Add Layer Mask button. A Layer Mask is added on Layer 1.
Step 2 : Go to Image>Apply image.
Step 3 : The Apply Image dialogue box opens. These are the default settings. Invert should be checked. Click OK.
Step 4 : Change the Blend Moe to Screen. Note that the Layer mask now has the image of the baby in B&W.
Step 5 : Press CTRL+J to duplicate the layer a number of times till the shadows are gone. I have duplicated it 1 time. For other images it may require a number of more duplication.
The image looks like this.
Step 6 : With Layer 1 copy Layer highlighted press SHIFT and  click on Layer 1.
All the Layers are highlighted.
Step 7 : Right click the highlighted layers and click on Link Layers from the pop up menu.
Both the Layers are now linked.
Step 8 : Press  CTRL+E to merge the linked layers.
Step 9 : Click the Add Layer Mask button. A layer Mask appears on Layer 1 copy.
Step 10 : Ensure that the Foreground Color is set to Black. Click on Brush Tool.
Step 11 : In the top panel open the Brush controls and set the Hardness to 0%. Increase the size of the Brush by pressing ] (right square bracket) and decrease it by pressing [ (left square bracket).
Step 12 : Paint avoiding the rest of the image besides the baby's face.
The Layer Mask looks like this after painting.
Step 13 : Click the Layer Mask to select it. A tiny border appears around the Layer Mask when it is selected. In fact it was already selected in the earlier step.
Step 14 : Go to Image>Apply Image.
The image looks like this.
Step 15 : Change the Blend Mode to Screen and lower the Opacity to 75%.
The finished image.
Other photoshop tutorials are here


Selective Blur in Photoshop

Telephoto lenses in cameras can keep the object in sharp focus and blur out the background or areas which are not in focus. The same effect can be done with any version of photoshop and requires no great skill.
This is the effect I will create
I will be using this full body stock. You will find it here
It belongs to caseykitten
Study the image. Both the model and the wall are in sharp focus.  If we want our eyes to focus on the model only we can blur the brick wall. There is a very simple way to do it.
Step 1 : Duplicate the Background Layer by pressing CTRL+J. Actually it is not required and can be done on a single layer. But I am using a new Layer 1.
Step 2 : Click the Edit in Quick Mask Mode button. In some versions of photoshop there are two buttons. The other button is the Edit in Standard Mode button. Here a single one doubles up for both.
Step 3 : Click the Brush Tool.
Step 4 : Click where the arrow points to open the Brush controls in the top panel. Set the Hardness to 0%. For increasing the Size use the [ (left square bracket) to decrease the size and ] (right square bracket) to increase it.
Step 5 : In the top panel I am leaving the Mode, Opacity and Flow at the default settings.
Step 6 : Increase the Brush size by pressing the ] (right square bracket).
Step 7 : Ensure that Black is set as the Foreground color.
Step 8 : Begin painting with the Brush. It seems you are painting with Red. I am not only painting the model but some of the background also.
Step 9 : I have finished painting. I have not only painted the model but also some of the wall.
Step 10 : Click the button again. 
Step 11 : As soon you click the button. A selection appears.
Step 12 : Go to Select>Modify>Feather.
Step 13 : Set the Feather Radius to 100 pixels. Click OK.
Step 14 : Go to Filter>Blur>Gaussian. Advanced versions have Box Blur, Shape Blur, Smart Blur and Surface Blur. Photoshop7 does not have them. So I am using Gaussian Blur.
Step 15 : In the Gaussian Blur I have set the Radius to 15. Nothing hard and fast about it. It will depend whether you are using a high or a low resolution image.
Click OK.
Step 16 : The model has remained in sharp focus and also the wall immediately behind her. The other portions have been blurred and are no longer in sharp focus. That's it. It is as simple as that.
Step 17 : This is just an additional part just to add an effect to this image.
Click the New Layer icon and a new Layer 2 forms.
Step 18 :  Make sure that the Foreground/Background are set to the default Black/White.
Step19 : Click the Gradient Tool. Click in the top panel to open the Gradient Editor.
Step 20 : In the Gradient Editor click the Foreground to Transparent. In the top panel the Linear Gradient is set by default, If it is not click it.
Step 21 : Drag the Gradient diagonally as shown. It is not drawn across the entire image.
Step 22 : The left top corner darkens like a shadow. You can reapply the Gradient if you wish to make to it darker still. But I am not doing it.
Step 23 : Drag the Gradient Tool partly downwards as shown.
The right bottom corner darkens. That is all.
Other photoshop tutorials are here


Share

Twitter Delicious Facebook Digg Stumbleupon Favorites