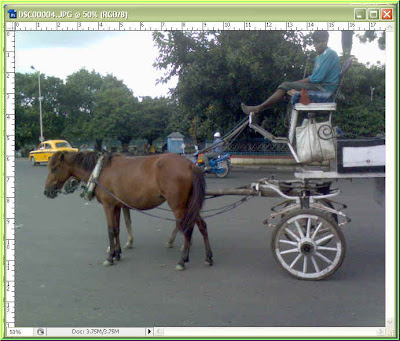


Step1 : I have opened these three photos in photoshop. They are all exactly the same size. (You will have to ensure this.) 
Step 2 : To make sure all the photos are of the same size go to Image>Image Size.
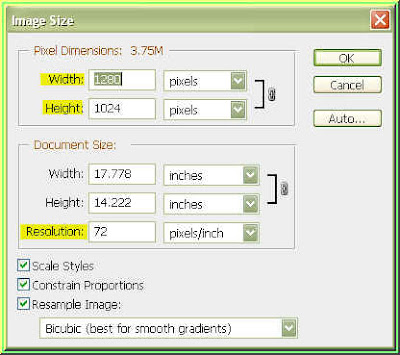
Step 3 : The Image Size dialogue box opens. Take one photo as the benchmark then see its Image Size (Width/Height/Resolution). Open the other photos and make sure that they have the same Image size. Step 4 : Go to Window>Actions.
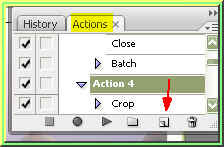 Step 5 : Click on the icon shown by the arrow. It is is the New Action button.
 Step 6 : Give the Action a Name. Here I have named it Action 5. It does not matter what name you give. Now click on the Record button on the right. The recording of the Action will then begin. Now to begin the work on the white border.
Step 7 : Press CTRL+J on the keyboard. This will duplicate the Background layer. The duplicate layer i.e. Layer 1 is now above the Background.
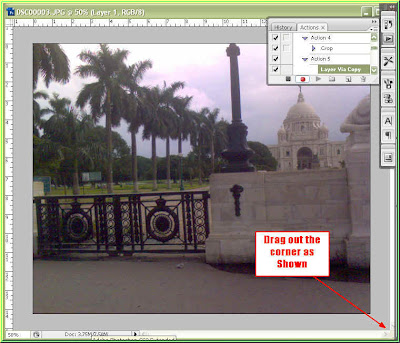
Step 8 : Drag out the corner as shown. It will reveal a greyish background. Step 9 : Click the Crop Tool to select it.
Step 10 : Drag out from the top left corner to the bottom right corner with the Crop Tool.
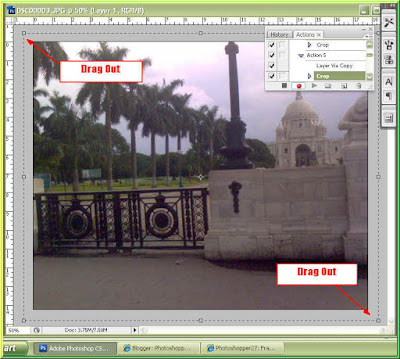
Step 11 : Drag out the selection propotionately on all the sides. Step 12 : On the top right hand side of the panel click the Tick mark to apply the Crop.
Step 13 : The Border is visible.
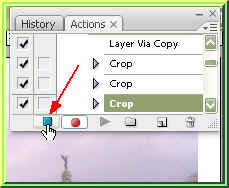
Step 14 : Now click the Stop Recording button shown. Step 15 : Go to File>Automate>Batch
Step 16 : The Batch dialogue box opens. Change the Source to Opened Files. Choose the Destination as Folder. You should create a folder beforehand. Click on the Choose button and navigate to the folder. Save as Jpeg.
Step 17 : Click the Ok button. I have reopened the Photos in Photoshop from the destination folder. They now have a white border.
One of the photos with the white border. This is just one of things that can be done. Aactions can be applied for something as simple as applying Crop to a number of photos etc. That is all.


