


 Step 1 : I have downloaded this royalty free photo free from http://www.sxc.hu/ You can download it here.
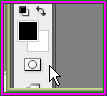 Step 2 : Click the Edit in Quick Mask Mode button. This is Photoshop CS 3 Extended, but you will find it in CS 2 and Photoshop 7 versions also in the same place.
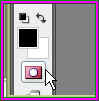
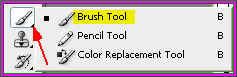
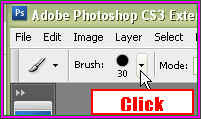
Step 4 : On the top panel click where the white arrow points to.
Step 5 : This opens up the Brush pallette. Set the hardness at 50 % by dragging the slider. The Master Diameter can be set by the Bracket keys [ ]. Use this bracket key [ to decrease the brush tip and this ] to increase it.
Step 6 : It will be advisable to zoom in and out with the Zoom Tool as you work so that you do not miss details, which you would otherwise. You can use the bracket [ ] keys just like the Brush Tool to zoom in or out.
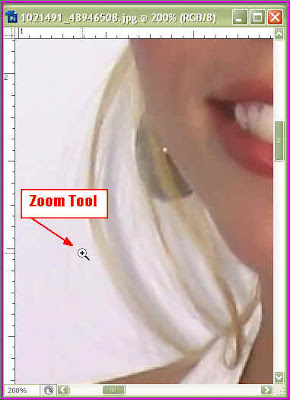 Step 7 : I have zoomed into the image with the Zoom Tool.
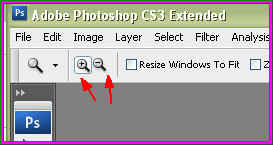 You can use he magnifying glass like icons in the top panel to zoom in and out. But it is simpler to use the bracket keys.
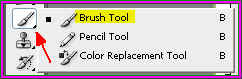
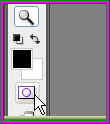
 Click on the Edit in Quick Mask Mode button.
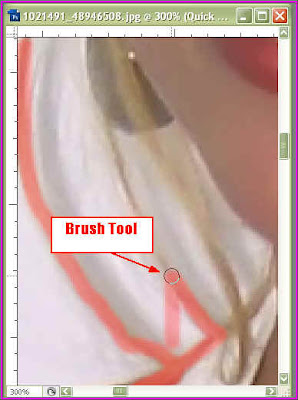 Step 8 : I have begun painting the strands of hair with the Brush Tool. The Brush has a reddish tinge which is the mask.
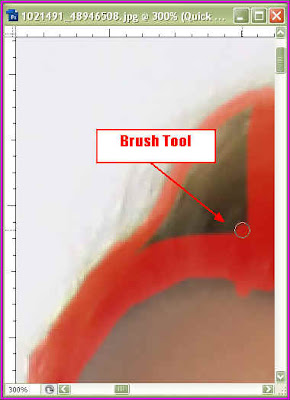 I am working with the Brush Tool on another part.
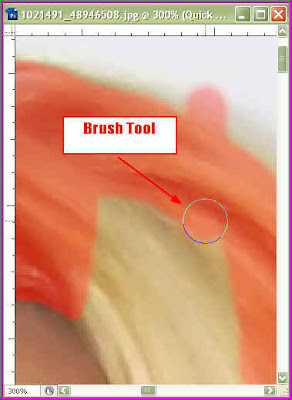 I am working on another part. You can make out that I have increased the Brush Tip with the ] key.
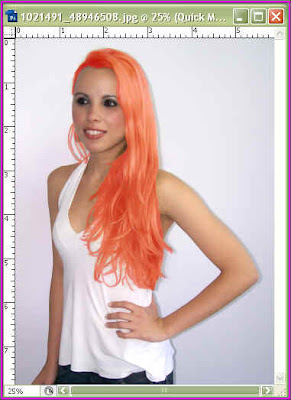
The entire hair has been masked. It looks orange. It is the color of the mask and not the color of the hair.
 Step 9 : Now click the Edit in Standard Mode button. In CS 3 the same switch toggles between Edit in Quick Mask Mode and edit in Standard Mode. In CS2 and PS 7 the two buttons are placed side by side.
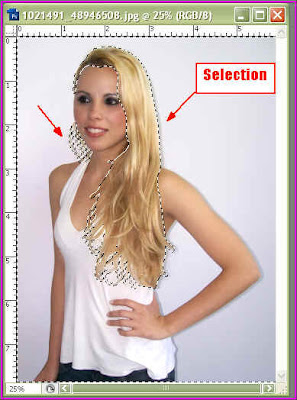
Step 10 : As soon as you click the Edit in Standard Mode button the reddish tinge is replaced by a selection. Step 11 : Go to Select>Inverse.
 Step 12 : Go to Filter>Blur>Gaussian Blur.
 Step 13 : The Gaussian Blur dialogue box opens. I have given a Radius of 3.1 pixels. There is nothing hard and fast about it. It will depend on your image. After you are satisfied click ok.
 Step 14 : Press CTRL+U. Itwill bring up the Hue/Saturation dialogue box. The 'Hue' slider is to change the Color. The Saturation slider increases or decreases the saturation of the color and the Lightness slider brightens or darkens the color.
 Step 15 : I have dragged the Hue Slider to -41.
 This makes the hair look purple.
 Now I have dragged the Hue slider to +19.
This makes the hair look yellowish green. This is to demonstrate that you can change the color at will by dragging the Hue slider either to the left or the right.

Now I have dragged the Hue slider to -10.
 This gives the hair a nice brown tint.
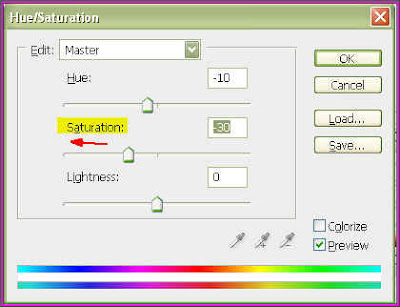 Step 16 : Now let us experiment with the Saturation slider. I have dragged the Saturation to -30 i.e. I have decreased the saturation.
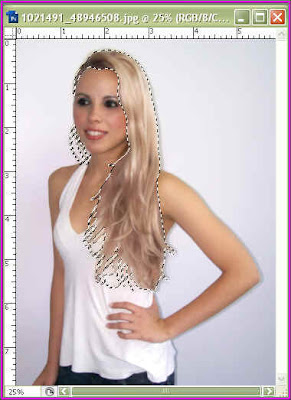 This is how the hair looks with decreased saturation.
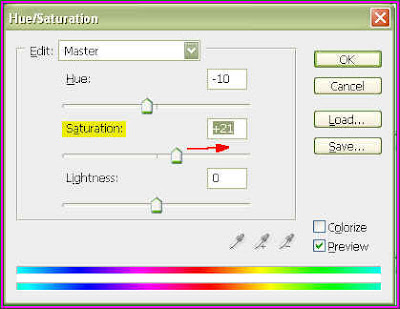
Now I have increased the Saturation to +21.

The hair looks brighter.
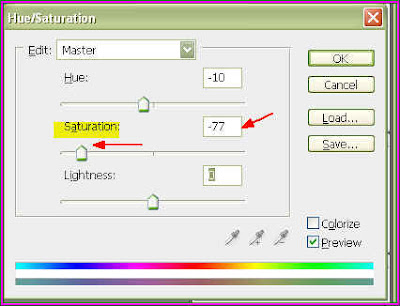 Step 17 : I have now decreased the Saturation to -77.
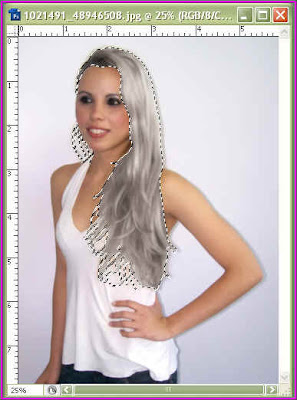
This is how the hair looks, a bit greyish.
Step 18 : Now I am decreasing the Lightness slider to -41 i.e. I am making it darker. If you drag the slider to the right the hair will brighten.

Here is how she looks. A blonde turned into a brunette. Press CTRL+D to deselect. That is all.


