
Step 1 : Open your image. I have opened up this image of Bollywood actress Aishwarya Rai Bacchan to which I will apply makeup with Photoshop.
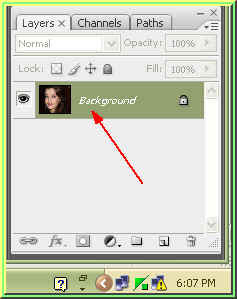
Note that there is only a single layer labelled Background in the Layers/Channels/Paths pallete.
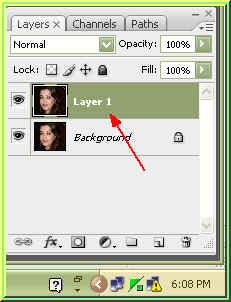
Step 2 : Press CTRL+J on the keyboard and the Background will be duplicated and named Layer1.

Step 3 : Double CLick where the arrow points to and you can rename the layer. I have renamed it Blur.
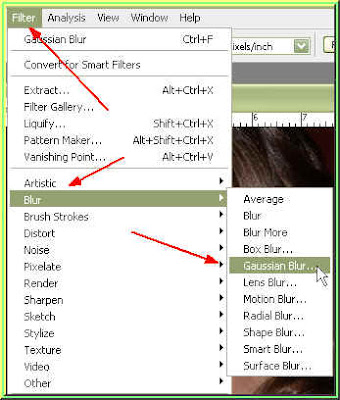
Step 4 : Go to Filter>Blur>Gaussian Blur.
Step 5 : When the Gaussian Blur dialogue box I have set the radius at 5.0. It is not hard and fast. It will depend on your image. This step is make the skin look softer.
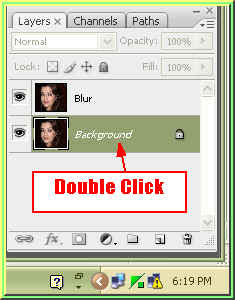
Step 6 : Double Click the Background.
Step 7 : The New layer dialogue box opens. Click ok.

Step 8 : The Background changes to Layer o.
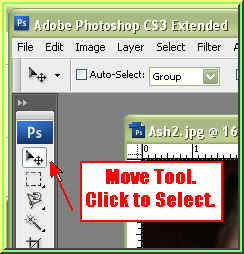
Step 9 : This is the Move Tool. Click to select it.
Step 10 : With the Move Tool selected drag Layer 0 on top of the Blur Layer.

Layer 0 is now on top of Blur layer.

Step 11 : Click where the arrow points to and from the pop up choose Lighten.

The Blend Mode is now set to Lighten
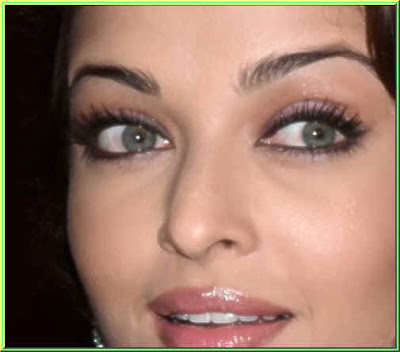
The skin appears softer. Step 12 : Now to add an Eye Liner. Select the Magnetic Lasso from the Lasso Tools.
Step 13 : Place the Magnetic Lasso on the eye as shown.

Step 14 : Click around the eye with the Magnetic Lasso. If you place a dot wrongly, just hit delete and it will remove the last point, then continue. When you come back to the point you began clicking a small 'o' form near the Magnetic Lasso.

The selection has been formed.

Step 15 : After completing the selection of one of left eye, press SHIFT on the keyboard and use the Magnetic Lasso to select the right eye. Both eyes will be selected.
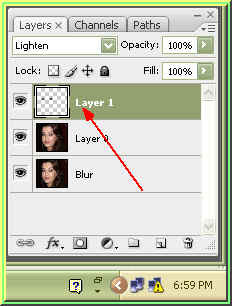
Step 16 : Now with the selection in place, press CTRL+J. The selection of the eyes will be copied and pasted onto another layer -- Layer 1.
Step 17 : Rename Layer 1 'eyes' as shown in Step 3.
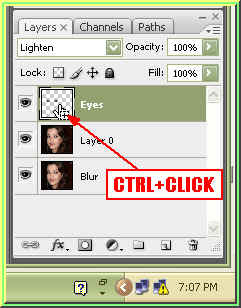
Step 18 : CTRL+Click the layer thumbnail of Eyes.
The selection has appeared around the eyes again.

Step 19 : Now press CTRL+SHIFT+I to inverse the selection and you will find the selection has been inversed.
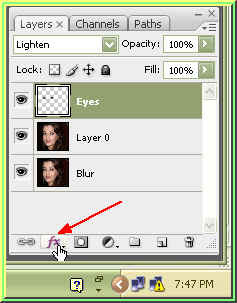
Step 20 : Click where the small white hand and arrow points to.
Step 21 : From the pop up click on Outer Glow.

Step 22 : The Outer Glow dialogue box opens.

Step 23 : This is a closer look at the controls of Outer Glow. Click where the arrow points to.
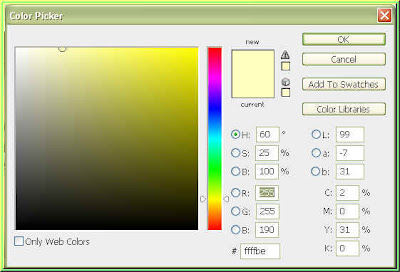
The Color Picker with the default settings open.
Step 24 : In the Color Picker type 000000 (six zeros) where the arrow points to. The New at the top changes to Black. Click ok.

Step 25 : Now change the Blend Mode to Color Burn from the pop up. Click where the arrow points to reveal the popup. Now change the Size slider to 50 pixel. There is nothing hard and fast about it. It will depend on your image.
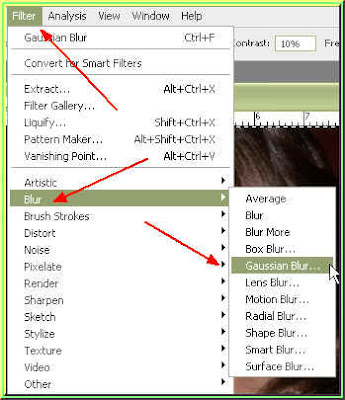
Step 26 : Go to Filter>Blur>Gaussian Blur.
Step 27 : When the Gaussian Blur dialogue box opens drag the slider. I have dragged it to 60 pixels. But it is not hard and fast. It will depend on your image.

Step 28 : in the Layers/Channels/Paths pallette, change the Blend Mode of Layer 1 or the 'eyes' layer to Color Burn.

Step 29 : Drag the Opacity slider to 67 %, at least that is what I have done. You can experiment.

This is how the image looks. It is the Eye Liner. But it is a bit to dark. let me fix it.
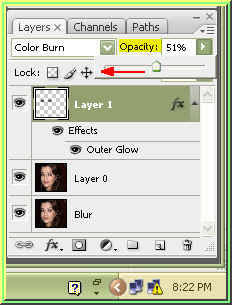
I have lowered the opacity to 51 %.
The Eye Liner looks better.

Step 30 : Now to apply a Lipstick. Click on Layer 0.
Step 31 : Press CTRL+J to copy and paste the selection onto a new layer. Rename the Layer as Lips.
Step 32 : Now CTRL+Click the thumbnail of the lips layer.

The lips have been selected.
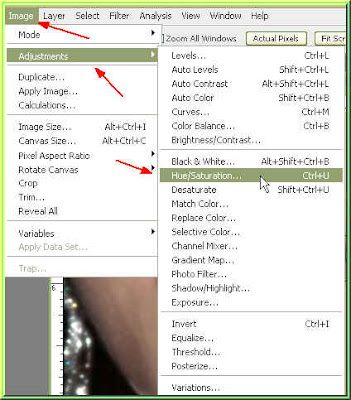
Step 33 : Go to Image>Adjustments?Hue/Saturation.
Step 34 : In the Hue/Saturation dialogue box I have given the setting for Hue at -33 and Saturation +27. Click ok.

The Lipstick has been applied.

Press CTRL+D to deselect the Lips.

This how the image looks with Eye Liner and Lipstick applied. Now to apply an Eye Shadow.
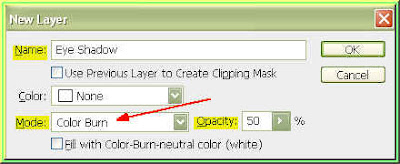
Step 35 : Press CTRL+SHIFT+N. This will bring up the New Layer dialogue box. Name it Eye Shadow. Change the Mode to Color Burn from the pop up and reduce the Opacity to 50 %. Click ok.
The Eye Shadow layer forms at the top of the Layers/Channels/Paths pallette.

Step 36 : Click on the Brush Tool to select it.
Step 37 : Click where the White arrow points to in the top panel and it will reveal a dropdown. Ser the Hardness at 0 %. The Master diameter can be controlled with these bracket keys [ ]. The left bracket is to make the brush tip smaller and the right bracket to make it bigger.
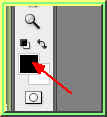
Step 38 : Click on the Foreground Color.
Step 39 : The Color Picker opens. From the Spectrum in the middle click on the Orange at the bottom. Then click where arrow at the top to select the shade. Click ok.
Note that the Foreground Color has changed to color I picked. Now click on the Brush Tool.
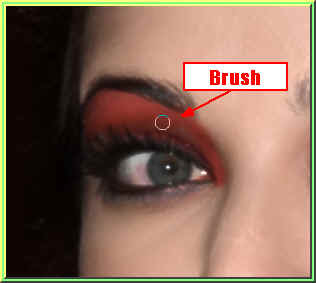
Step 40 : I am now painting the Eye Shadow.
Step 42 : I have painted the Eye shadow above both eyes. It looks a bit unnatural.

Step 43 : Now in the Layers/Channels/Paths pallette I have reduced the Opacity of the layer to 27 %.

The Eye Shadow has been applied. Now to apply a Blush.
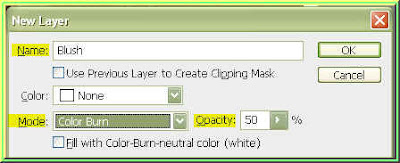
Step 44 : Press CTR+SHIFT+N. This will bring up the New Layer dialogue box. Name it Blush, change the Mode to Color Burn and reduce the Opacity to 50 %. Click ok.
The Blush layer can be seen at the top of the Layers pallette.

Step 45 : Click the Foreground Color.
Step 46 : When the Color Picker opens pick a shade of Pink i.e. you can enter e861A4 in the highligted box to get the shade. Click ok.
Step 47 : Click on the Brush Tool.
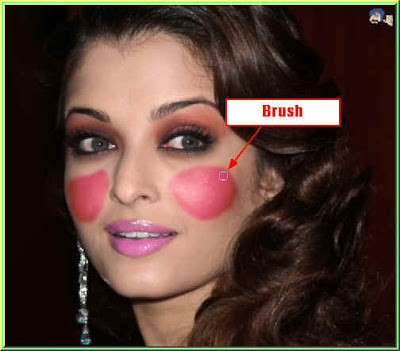
Step 48 : I have painted the cheeks. I know it looks horrible.
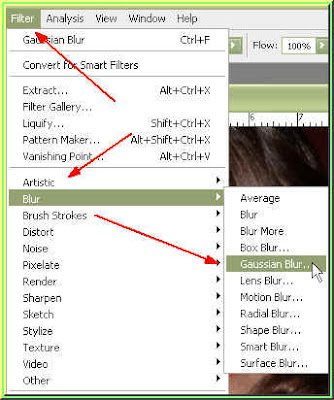
Step 49 : Go to Filter>Blur>Gaussian Blur.

Step 50 : When the Guassian Blur dialogue opens I have given a Radius of 105.8 pixels and clicked ok.

Step 51 : I have now lowered the Opacity of the layer to 35 %.

The Blush. The Makeup with Photoshop is complete. That is all.


