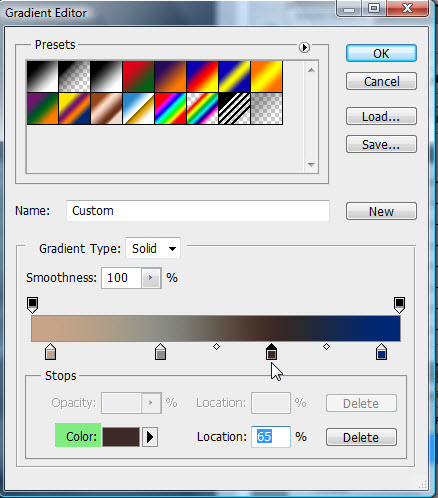
Some Gradients come with Photoshop. You can edit these Gradients as you like to produce new ones.
You can click the Gradient Tool or just press g on the keyboard. As soon as you click you will find the Gradient Editor at the top. Click it.
The Gradient Editor opens. All Photoshop versions have these Gradients. Now to edit a Gradient.
Step 1 : We need a image. I am using this free stock image. You will find it here
It belongs to mjranum-stock
Step 2 : Click the New Layer icon and a new Layer1 forms.
Step 3 Click to open the Gradient Editor.
Step 4 : The Gradient Editor opens.
Step 5 : I have clicked on Yellow, Violet, Orange Blue Gradient.
Step 6 : Click on the first Stop at the left. The Color changes to yellow.
Step 7 : With the Gradient Editor open I have clicked on the hand.
Step 8 : Look at the Stop and Color. Both have changed to the color clicked.
Step 9 : I have clicked on the second Stop. The color changes.
Step 10 : I have now clicked on the dress.
The Stop Color and Color has changed to the color clicked.
Step 11 : Click on the third stop.
Step 12 : I have now clicked on the darker part of the arm.
The third stop changes to the color clicked as well as Color.
Step 13 : I have clicked on the last Color Stop.
Step 14 : I have clicked on the forehead.
The Color and the color of the stop has changed.
Step 15 : Click OK in the Gradient Editor.
Step 16 : Drag diagonally from top left to bottom right. You may drag in any direction. You will get a different effect.
The image looks like this.
Step 17 : Change the Blend Mode to Screen.
The image looks like this.
Step 18 : Click the Add Layer Mask. A Layer Mask forms next to the layer thumbnail on Layer1.
Step 19 : Click the Brush Tool. You can also press b on the keyboard to bring up the Brush Tool.
Step 20 : Click at the top to bring up the Brush controls. You can set the Brush Size and Hardness. You can also change the brush size with the [ ] (bracket keys next to letter p on the keyboard). Press [ (left bracket) to make the Brush small and ] (right bracket) to make it larger. To make a Brush soft press SHIFT+[ and to make it hard SHIFT+]. Here we will be using a soft brush.
The Foreground/Background color should be set to default Black/White. If it is not press x and d on the keyboard to restore the default.
Step 21 : Use the Brush to reveal the image below. It is possible taht you might reveal a bit more than you intended near the edges.
Step 22 : Press x on the keyboard to switch the Foreground Color to White. You can also use the bent arrow to switch between Fore/background color.
Step 23 : Use the Brush away from the edge of the image to paint back.
The finished image. Remember you can use any of the Gradients. You can edit it as you wish.
Other photoshop tutorials are here


