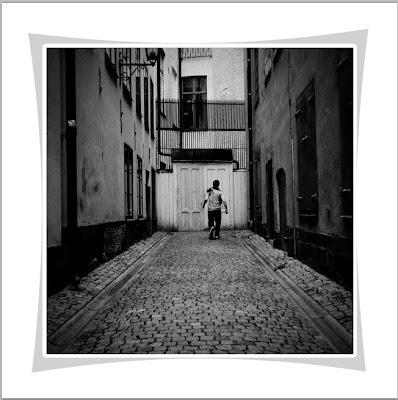
Drop Shadow is something that is easy to apply in Photoshop. You can also manipulate the Drop Shadow as you wish. It's quite simple.
I will be using this free stock image. You will find it here
It belongs to ~RazyGraphicDesign
You can use any image.
Step 1 : Press ALT and double click the Background Layer.
The Background Layer changes to Layer0. I did this to unlock the Background layer to make it editable. You cannot edit a Background layer otherwise.
Step 2 : Press CTRL+Click the New Layer icon. A new Layer 1 forms below Layer0.
Step 3 : The Foreground/Background Colors should be set to the default Black/White. If it is nor press x and d on the keyboard to restore the default.
Step 4 : Press CTRL+BACKSPACE. This will fill with the Background Color which is White in this case.
Step 5 : Click back on Layer 0.
Step 6 : Press CTRL+T. A selection forms with corner handles and middle handles around the image.
Step 7 : Press SHIFT+ALT and drag down diagonally from the top left corner. You will be able to reduce the size of the image proportionately.
The image has been reduced in size proportionately. Press ENTER. The selection goes away.
Step 8 : This is how the Layers palette looks after the resizing.
Step 9 : Click on the Layer Styles button and click on Stroke.
Step 10 : The Stroke dialogue box opens. Click on the Color.
Step- 11 : The Select Stroke Color dialogue box opens. It is the same as the Color Picker.
Step 12 : Type in ffffff (6fs) in the box at the bottom. Click OK in the Select Stroke Color dialogue box.
The Stroke Color has changed to White. Click OK in the Stroke dialogue box.
Step 13 : Drag the Size slider to apply the Stroke. You can make it as thick or thin as you want. Click OK.
Step 14 : Click off the eye icon on Layer 1. Since Layer 1 is White the White Stroke cannot be seen otherwise.
With the Layer 1 turned off you can now see the Stroke.
Step 15 : Click on the eye icon on Layer 1 to turn it on.
Step 16 : Double click the Stroke.
Step 17 : The Layer Style dialogue box appears. Stroke at the bottom is checked. Click on Drop Shadow.
Click OK in the Layer Styles dialogue box.
Look in the Layers palette. The Drop Shadow has been applied to Layer0, though you cannot see it right now.
Step 18 : Right Click the Drop Shadow. Click on Create Layers from the pop up.
Step 19 : This dialogue box opens. Click OK.
Step 20 : Look at the Layers palette. Layer0 is highlighted, which means you are on that layer. The Layers 0's Drop Shadow forms below.
Step 21 : Click on Layer0's Drop Shadow layer to select it.
Step 22 : Press CTRL+T. A selection forms.
Step 23 : Right click inside the selection. Click on Warp from pop up.
Step 24 : Pull out the corner top left handle.
Step 25 : Drag out all the four corner handles.
Press enter.
Step 26 : I have reduced the Opacity of the Layer to 25%.
The image looks like this. The Drop Shadow looks quite hard.
Step 27 : Go to Filter>Blur>Gaussian Blur.
Step 28 : The Gaussian Blur dialogue box opens. I have set a Rdius of 25 pixels. Click OK.
The image looks like this. The shadow had been hard earlier which was unrealistic. The Blur gives a more real effect.
Step 29 : Now click on Layer 0.
Step 30 : Press SHIFT and click on Layer0's Outer Stroke. Both Layers are highlighted.
Step 31 : Press CTRL+E. Both layers merge into Layer 0.
Step 32 : After clicking on Layer 0. Press CTRL+T. A selection forms. Right click in side the selection and click on Warp from the pop up.
Step 33 : Push out all the four corner handles slightly. Press ENTER.
The finished image.
Other Photoshop tutorials are here.


