


I have shown how a button can me made in Photoshop. The tutorial is here. Here is another equally easy way of creating a button.
Step 1 : Open a New Layer by pressing CTRL+N.
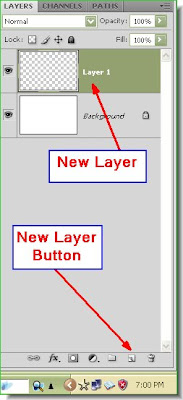
Step 2 : Click the Create New Layer button in the Layers pallette and a New Layer 1 forms above the Background.
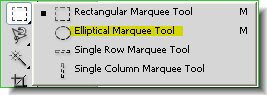 Step 3 : Click the Elliptical Marquee Tool.
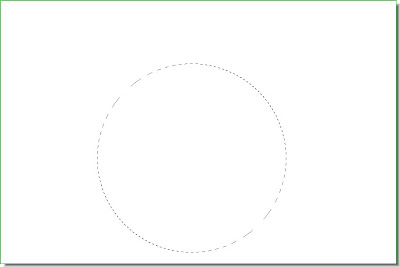 Step 4 : Press Shift and you can draw a perfect circle with Elliptical marquee Tool.
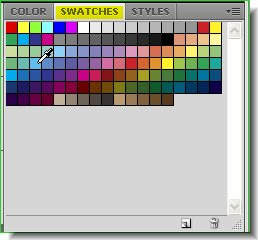
Step 5 : Now click on the Swatches in the right hand panel. Click on any color. I have picked a color. When you click on a color the cursor changes to an eyedropper as you can see.
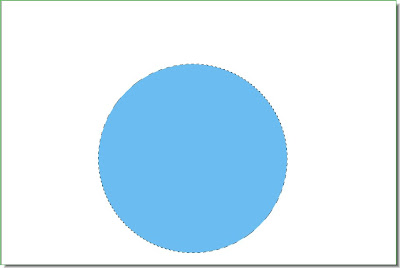
Step 6 : Press Alt+Backspace. The Circle is filled with the color you picked. This is because the Foreground color changes to the Color you pick. Move the circle to the middle of the canvas with the cursor. If you want to move it to the exact middle see the earlier tutorial here.
 The foreground color.
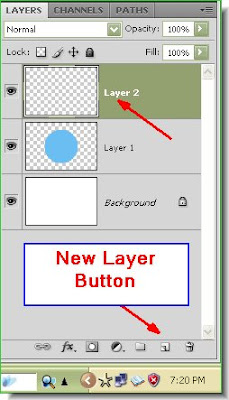 Step 7 : Click the New layer button and a new Layer 2 forms.
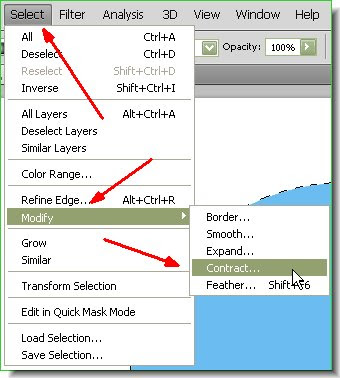 Step 8 : Go to Select>Modify>Contract.
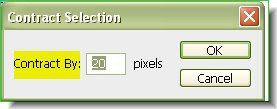
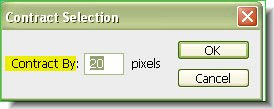 Step 9 : The Contract selection dialogue box opens. I have used 20 pixels. There is nothing hard and fast about it. Make sure that it is not too small or none too large.
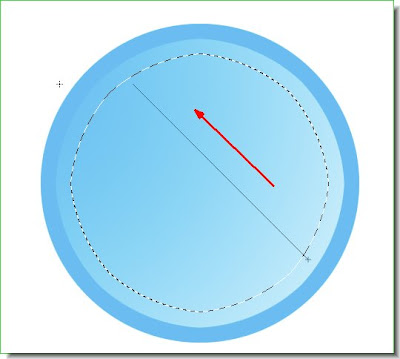
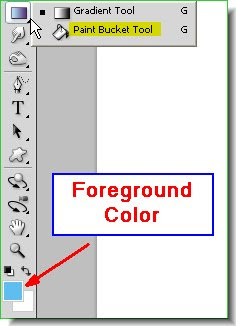 Step 10 : Now click the Gradient Tool. Note that the Foreground color is the one picked earler, while the background is White. Drag diagonally across the circle.
This is the effect.
Step 11 : Again go to Select>Modify>Contract.
Step 12 : Again I have put 20 pixels.
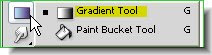
Step 13 : Again click the Gradient Tool.
Step 14 : Drag with the Gradient in the opposite direction you dragged the first time.
This is the effect I have got.
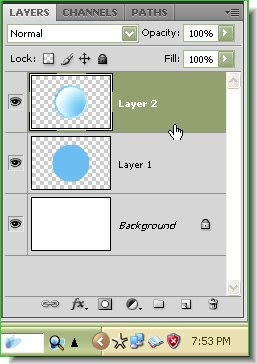 Step 15 : Click on Layer 2.
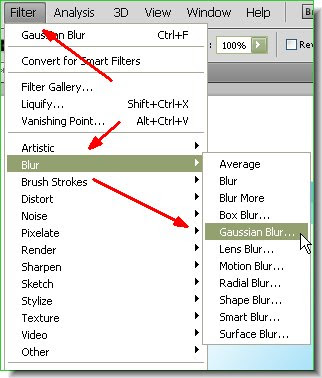 Step 16 : Go to Filter>Blur>Gaussian Blur.
Step 17 : in the Gaussian Blur dialogue box I have set the radius at 4. You can put any Radius you want. You can see the effect as you drag the Radius slider. Give the effect you like.

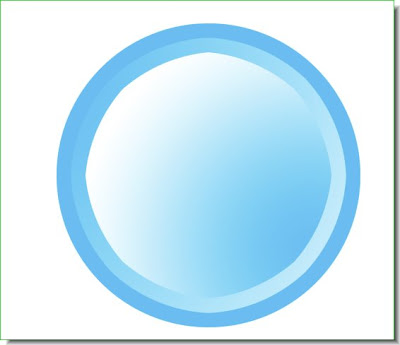
This is the effect I have got.

Add Text and add a dropshadow.


