This is an easy special effects tutorial. I call it a 'Face in the Wall. You have to get a photo of a brickwall and any other photo. That's all you need.
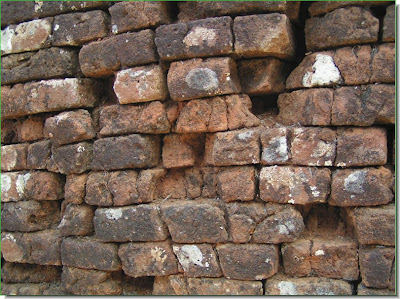
Step 1 : I have got my two photos.
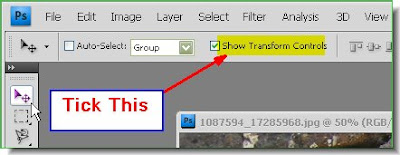
Step 2 : Click the Move Tool. Make sure that the Show Transform Controls is ticked. It is called Bounding Box in PS7 and is found in the same place.
Step 3 : Press Shift and drag with the picture of the girl with the Move tool onto the brickwall as shown.
Step 4 : Keeping the Shift key pressed ensures that the image of the girl lands right in the centre of the wall image.
Step 5 : Press CTRL+T. You will find corner handles on the four corners of the girls' image.
Step 6 : Now press Shift+Alt and drag a corner handle diagonally upwards. This will make the image of the girl increase in size proportionately till it covers the wall image entirely. As soon as you are done click the Tick mark on the top panel at right. Since you have altered or transformed the image, this will 'Apply the Transformation'.
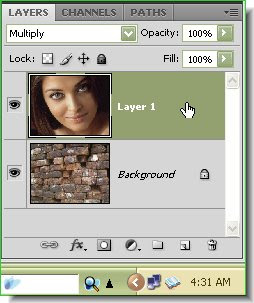
Step 7 : Look at the Layers pallette. The brick wall is the Background layer and the girls image is on Layer 1. Now changle the Blend Mode to Multiply from the popup menu.
This is how the image looks.
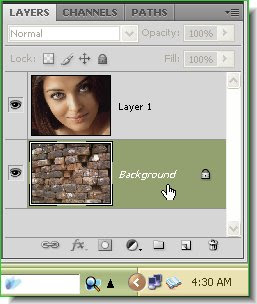
Step 8 : Now click on the Background layer.
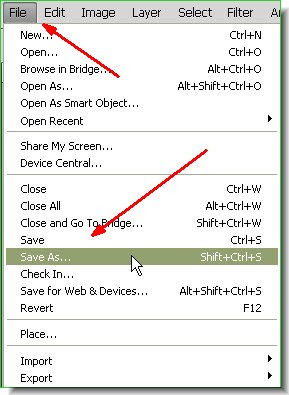
Step 9 : Go to File>Save As.
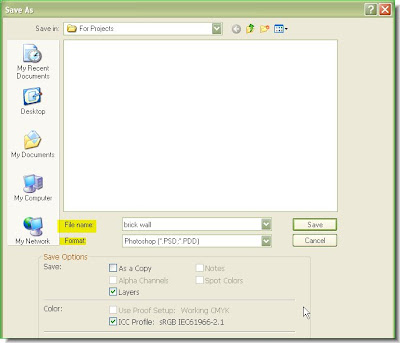
Step 10 : This dialogue will open. You can choose where to save it on your computer. Give the file a name. I have named mine 'brick wall'. The Format should be PSD. Click Save.
Step 11 : Now click on Layer1.
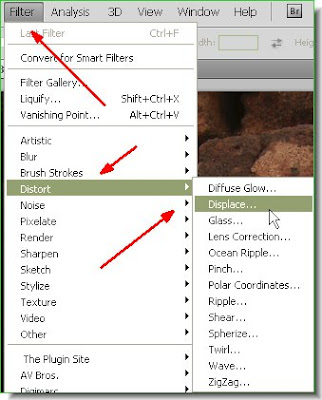
Step 12 : Go to Filter>Distort>Displace.
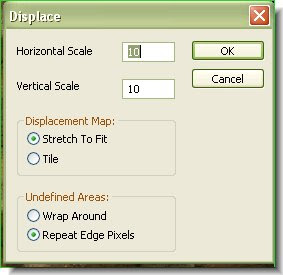
Step 13 : This dialogue box appears. Just click ok.
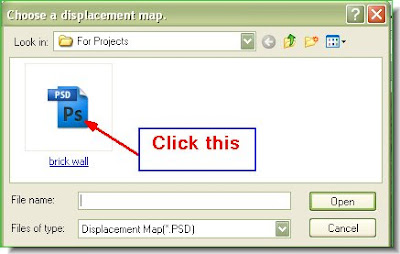
Step 14 : As soon as you click ok, this dialogue box opens. Click the PSD file.
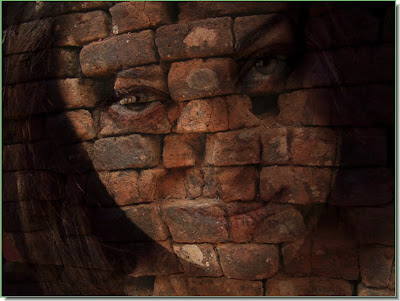
This is the result you get. Let me explain. when you are saving the background as a PSD file you are doing do so to use it as a Displacement map. You are applying the Displacement Map with the Distort>Displace filter. What actually is happening is that layer1 is fitting onto the contours of the background layer brickwall.
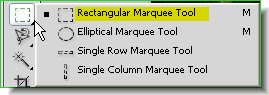
Step 15 : Select the Rectangular Marquee Tool.
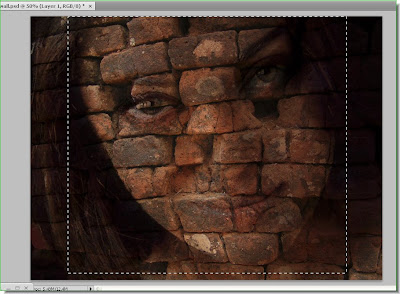
Step 16 : I have drawn out a selection with the Rectangular Marquee Tool to include the face primarily.
Step 17 : Go to Image>Crop.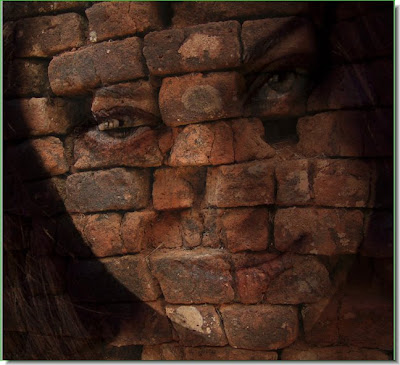
The image has been cropped. Press CTRL+D to deselect. and, that is all. You can use any image for a Displacement map instead of a brick wall. You will come up with interesting effects. That's all for now.
For another interesting special effects tutorial go here.


