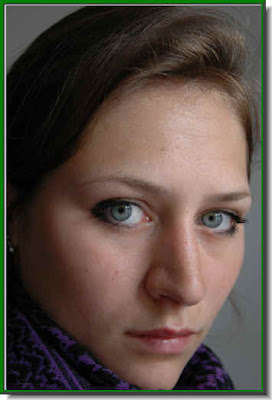
 Step 1 : I have opened this free stock image for the tutorial.
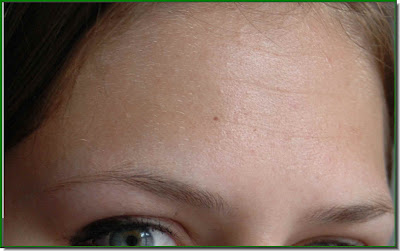
Step 2 : I have zoomed into the image. You can see that the skin is rough.

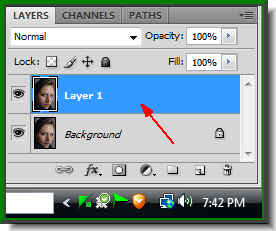
Step 3 : Press CTRL+J to duplicate the Background layer. Layer1 is the new layer. It is highlighted which means that it is selected. Step 4 : Go to Filter>Noise>Median
 Step 5 : The Median dialogue box opens. I have put the Radius at 5 pixels. This is a high resolution image. If you use a low resolution image you can set it at less.
 Step 6 : Press Alt and click the Add Layer Mask button. A Black Layer Mask forms next to the layer thumbnail on Layer1.
 Step 7 : Change the Foreground Color to White.
 Step 8 : Click on the Brush Tool.
 Step 9 : After clicking the Brush Tool, click where the red arrow points to. From the dropdown set the Hardness to zero. You need not set the Brush Tip size from here. To increase the brush tip press ] (right bracket next to the letter P) and to decrease it [ (left bracket).
 Step 10 : Here is a portion of the forehead that I have zoomed in on.
 Step 11 : Now paint gently with the Brush Tool and you will find that the skin smoothens. See the difference in the two illustrations above.
 Step 12 : Here is a portion of the nose.
 Step 13 : The nose after being painted with the Brush Tool.
 Step 14 : Here is another portion of the skin under the eye.
 Step 15 : The same portion after painting. NOTE. Do not paint on eyes or lips. If you do it will blur them. That is all you have to do to soften skin with Photoshop.
 The final image.
Other photoshop tutorials are here.


