


I had posted a tutorial on making a filmstrip in Photoshop which is here
This is another way of making it, but for achieving a another kind of effect. First you need a series of free stock images.

I will be using some of these free stock photos. You will find them here
They belong to mjranum-stock
You will need to register. Registration is free. You can download the images then for free.

Step 1 : Press CTRL+N to open a new document in Photoshop.
Put the Width and Height at 4 and 20 inches respectively. The Resolution is at 300 pixels. Click OK.

The document open according to the specifications set.

Step 2 : I have opened one of the free stock images.
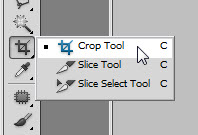
Step 3 : Press c on the keyboard for the Crop Tool or click on it from the fly-out.

Step 4 : In the top panel Put the width at 4 in, Height at 5 in and Resolution at 300 pixels.

Step 5 : The size of the crop has already been set. Drag with the Crop Tool. Move the crop Tool selection up or down to include the figure. Press Enter to apply the crop.

The photo has been cropped.

Step 6 : Press v for the Move Tool, and drag the image to the White document.

Step 7 : Since the photo has been cropped specifically the image snaps easily into the white document. Place it at the top.

Step 8 : Close the image. Be careful to click on No when this dialogue box opens or the cropped image will replace the original image.

Step 9 : Open the second image in Photoshop.

Step 10 : Press c on the keyboard for the Crop Tool. Look in the top panel. Photoshop remembers the last settings.

Step 11 : This image is a bit too long, so I have had to crop out a portion below the dress. Press Enter to apply the crop.

Step 12 : Press v for the Move Tool and place the second image below the first in the white document. Close the second image.

Step 13 : Open the third image in Photoshop.

Step 14 : Press c for the Crop Tool. This image is also a trifle long. Some portion of the image has to be cropped out. Press Enter to apply the crop.

Step 15 : Press v for the Move Tool and move the third image to the white document. Close the third image in photoshop.

Step 16 : Bring up the fourth image in Photoshop. Press c for the Crop Tool. Press Enter to apply the crop.

Step 17 : Press v for Move Tool and move the fourth image to the white document.
Close the fourth image.

The Layers palette looks like this.

Step 18 : Click the Layer Styles button.
Click on Stroke.

Step 19 : In the Stroke dialogue box click the Color.

Step 20 : The Set Stroke Color dialogue box opens. Type in ffffff (6fs) at the bottom. It stands for White. Click OK.

Step 21 : The Color of the Stroke has changed to White. In the top, change the Position to Inside.

Step 22 : Drag the Size slider.

Drag the slider till the Stroke is visible. Click OK.

Step 23 : The layer palette looks like this. The Stroke can be seen below Layer 4.

Step 24 : Press ALT and Drag the 'fx' (layer style) to below Layer 3.

The Layer style has been dragged to Layer 3.

The stroke has been applied to the second last image.

Step 25 : Now press ALT and drag the fx to below Layer2.

Step 26 : Press ALT and drag fx below Layer 1.

The Stroke has been applied to all the images.

Step 27 : Click on Layer 1.

Step 28 : Press SHIFT and click on Layer 4 at the top.

Step 29 : Press CTRL+E. The layer combine into Layer 4.

Step 30 : Open a new white document.

Step 31 : Press v on the keyboard for the Move Tool and drag the film strip onto the white document. The filmstrip is large and covers the white document.

Step 32 : Scroll the image till you can see a corner handle.

Step 33 : Keeping SHIFT+ALT pressed resize the image till it is in the middle of the White document.

Step 34 : Hover the cursor on a corner handle. A small bent arrow appears. You can rotate the image with it.
Press ENTER.

Step 35 : Go to Filter>Distort>Shear.

Step 36 : The Shear dialogue box opens. Drag the diagonal in the middle after clicking points to bend the selection. You can see how the image is affected below. Click OK.

This is how the image looks.

Step 37 : Click the fx button and click on Drop Shadow.

Step 38 : Keeping the Layer Styles dialogue open, place the cursor on the image and you will abe able to move the Drop Shadow in Any direction.

Step 39 : The Distance has already been set by dragging the Drop Shadow. Next set the Size, then the Spread and lastly reduce the Opacity. Click OK.

The image looks like this.

Step 40 : Click the New Layer icon. A new Layer 2 forms.

Step 41 : Press b to bring up the Brush Tool. Click on top to reveal the Brush controls. Set the Hardness to 0. To increase the size of the Brush press ] (right bracket) and to decrease it press [ (left bracket).

You can see that I am using a large brush.

Step 42 : Paint with the Brush on top and in the middle as shown.

Step 43 : Decrease the Opacity of the Layer.

The image looks like this.

Step 44 : Click between Layer 2 and 1 to create a clipped layer.

Step 45 : Click on the Background Layer.

Step 46 : Click the New Layer icon. A new layer 3 forms over the Background.

Step 47 : Press g on keyboard for the Gradient Tool. Click on top to bring up the Gradient Editor.

Step 48 : In the Gradient Editor, from the Presets click on Chrome. (You can use any Gradient of course.)

Step 49 : Click the Blue stop at the right. The Color changes to Blue.

Step 50 : Click on Color. The Select Stop Color dialogue box opens. The current color is shown.

Step 51 : Click with Cursor on the background of the filmstrip.
The color is immediately selected. Click OK in Select Stop Color dialogue.

Step 52 : Click on the third Stop Color. Click on the Color.

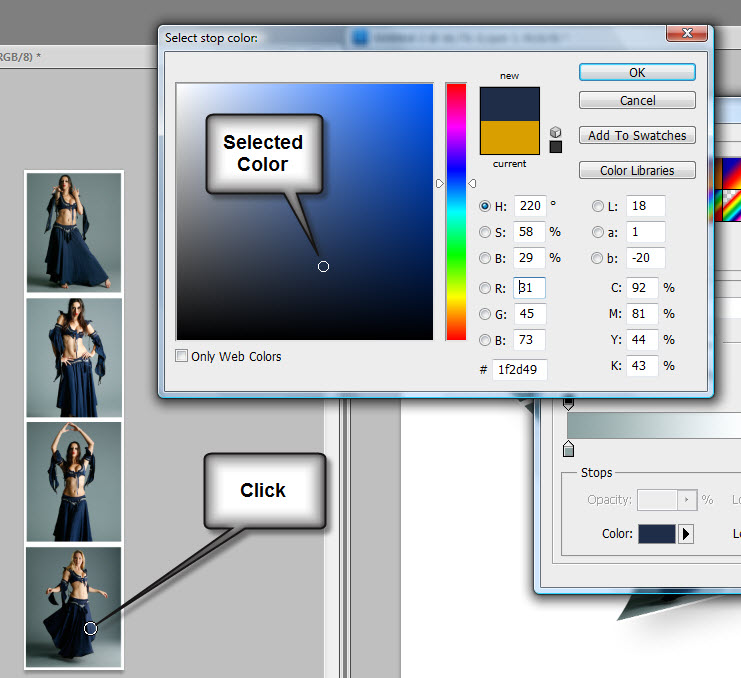
Step 53 : The Stop Color dialogue opens again. I have clicked on the image of the dancer with the cursor. The color is immediately selected. Click OK in the Select Stop Color.

Step 54 : Now click on the 4th stop. Click on the Color.
Step 55 : I have clicked on the deep blue dress of the dancer. The color is selected. Click OK in the Stop Color.

Step 56 The Gradient has been edited. Click OK in the Color Picker.

Step 57 : Press SHIFT and drag up with Gradient Tool.

The image looks like this.

Step 58 : Drop the Opacity of the layer.

This is how the image looks.

Step 59 : Press c to bring up the Crop Tool. Press Enter to apply the crop.

The finished image.

Step 60 : Go to Filter>Render>Lighting Effects.

Step 61 : The Lighting Effect dialogue box opens.

Step 62 : Drag down the light as shown. Click OK.

The finished image.
Other photoshop tutorials are here


