


Sometimes you may want to give a vintage look to images. You can do so easily with Photoshop with just a few of the wonderful tools that it now has. Unlock the secrets of the Black & White Adjustment Layer, use Gaussian Blur yet keep certain details sharp. Tint an image to your liking. Changing an image to B&W takes a single step, but it appears flat without color. How do we overcome this and yet make the image look like a vintage one. Nothing is difficult.

I will be using this free stock image. You will find it here
It belongs to jessangel2003
The easiest way to change an image to black and white is to press CTRL+SHIFT+U, but we will not do so.

This is the effect I will achieve.

Step 1 : Click the Black and White Adjustment Layer button. There is only the Background Layer in the Layers palette.

Step 2 : The Black and White adjustment Layer forms over the Background Layer. In the Black & White dialogue box note the small hand where I have asked you to click.

Step 3 : Clicking it shows what it does. You have to click and drag in the image after clicking this button.

The image looks like this without dragging the slider.

Step 4 : Hover the cursor over any part of the image. The cursor changes into an eyedropper.

Step 5 : If you left click the mouse button and hold, the eyedropper changes into a small white hand with a two-headed arrow.

This are the default positions of the Reds, Yellows, Greens, Cyans, Blues and Magentas sliders. The total of this adds up to 300. After moving the sliders, it is not essential that the sliders add up to to 300.

Step 6 : Now I am pressing the left mouse button and dragging. What happens? The Reds slider begins to move. How do I know that it is the Reds slider moving, darkening or lightening the portion where I am moving the cursor?

Step 7 : Look int the Black & White. The Reds slider has moved of its own accord. This is the secret of using it. As you click and drag different parts of the images, the sliders will move forwards or backwards, darkening or lightening different parts of the image.


Step 8 : As I drag the slider to the left I am darkening the cloth at the top and bottom.

Step 9 : The Cyans sliders have moved to - 44 from 60, its default position.

Step 10 : I am dragging the slider over the hair to the right.

Step 11 : The Yellows slider has moved to 130 from 60. Now I think you have got the hang of using the Black and White. Just keep dragging in different parts of the image you want to darken or lighten.

This is how my black and white image looks like after dragging the sliders of B & W.

This is how the Black & White dialogue box looks. It is not necessary that your Black and White Adjustment will look the same.

Step 12 : Click the arrow at the bottom of of the pallete to return to the Adjustment List as it says.

Step 13 : Now click the Hue/Saturation button.

Step 14 : A Hue/Saturation layer forms over the Black & White Layer. Check the Colorize in Hue/Saturation.

Step 15 : By default whichever image you use, this will be the Hue get when you check the Colorize.

Step 16 : As you drag the Hue slider the color changes. I have stopped at +35.

The image acquires this sepia tone.

Step 17 : Dragging the Saturation increases or decreases the saturation. The slider reads +18.

Step 18 : Dragging the Lightness slider darkens or lightens the image. I have moved it to +5. NOTE : None of these values are absolute. It will vary according to your taste and the image you are working on.

My image looks like this.

Step 19 : I am dropping the Opacity of the Hue/Saturation Layer to 50%. You can lower it to taste.

My image looks like this.

Step 20 : Press CTRL+SHIFT+ALT+E to form a composite Layer 1.

Step 21 : Go to Filter>Blur>Gaussian Blur.
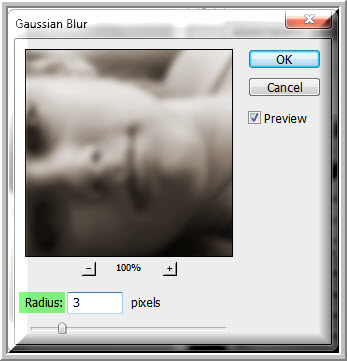
Step 22 : In the Gaussian Blur dialogue box I have set a Radius of 3. Click OK.

The Gaussian Blur is applied to the image.

Step 23 : Click the elliptical Marquee Tool.
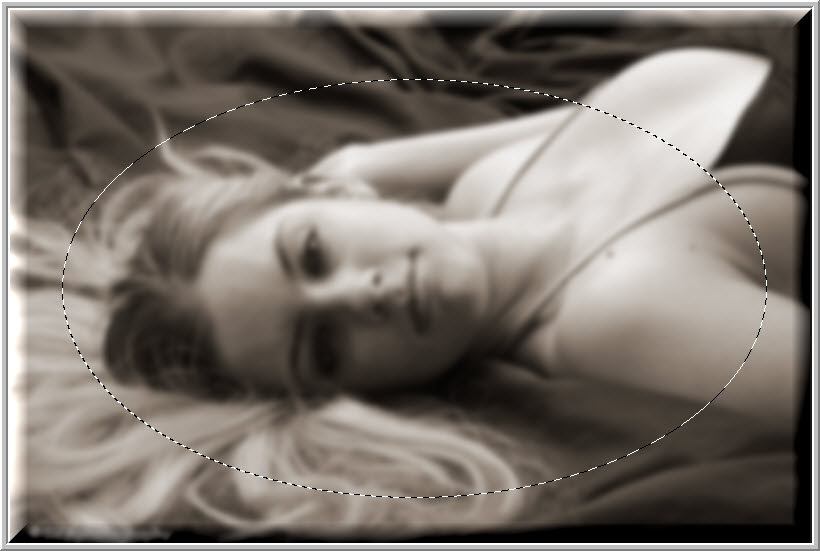
Step 24 : Draw a selection like this. What I intend to do is to blur the edges.

Step 25 : Go to Select>Modify>Feather.

Step 26 : I have set a Feather Radius of 100 pixels. You can set more, you can set less. Click OK

Step 27 : Click the Add Layer Mask button. A Layer Mask forms on the composite Layer 1.

The image still looks like this.

Step 28 : Press CTRL+I to inverse the Layer Mask.

Step 29 : The center of the image looks sharp again, while the sides have blurred.

Step 30 : I am reducing the Opacity of Layer 1 to 80%.

The image looks like this.

Step 31 : CTRL+CLICK the Layer Mask.

Step 32 : A selection forms.

Step 33 : Click the Exposure Adjustment Layer button.

Step 34 : The Exposure 1 layer forms. The Exposure dialogue opens at the top with the default settings.

Step 35 : Drag the Exposure slider to increase the light and use the Offset slider to offset it.

The image looks like this.

Step 36 : Click the Return to adjustment list.

Step 37 : Click on Curves Adjustment.

Step 38 : Curves 1 Layer forms. In the Curves dialogue box click with the cursor exactly in the middle.

Step 39 : Press SHIFT and press the UP ARROW just once.

The finished image.
Other photoshop tutorials are here


