Sketching in Photoshop is easy. There are two ways in which you can change a color photo to a sketch. Both are easy and does not require great photoshop skills. It can also be done in any version of photoshop. It works with most images. The two methods will give different effects. At the outset let me say that none of the values that I will be using are absolute. They will vary from image to image. It gives you scope to experiment and thereby learn photoshop a bit better.

I will be using this free stock image. You will find it
hereIt belongs to
mjranum-stockThis is a sketch with one method.
This is a sketch with the second method.
You will also be able to create this effect if you wish.
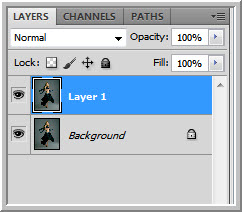
Step 1 : In the first method, press CTRL+J to duplicate the Background Layer.
Step 2 : Press CTRL+SHIFT+U to desaturate Layer1.
Step 3 : Press CTRL+J to duplicate the desaturated Layer1 into Layer1 copy.
Step 4 : Press CTRL+I to invert.
The image will look like a negative.
Step 5 : Change the Blend Mode to Color Dodge.
The image may have some black grains like this, or it may be just pure white.
Step 6 : Go to Filter>Blur>Gaussian Blur.
Step 7 : The Gaussian Blur dialogue box appears. Drag the Radius slider towards the right. The more you drag to the right the more pronounced will the effect will be. I have dragged it to 5.5 pixels. By no means is this absolute. I just like this effect.
This is the effect. The lines are light in most places.
If I drag the Radius slider to 10.0 I will get a more pronounced effect.
This is the effect. How much Gaussian Blur you will give will depend on your liking. This is the first method.
Step 1 : For the second method, let us begin again with the Background Layer.
Step 2 : Press CTRL+J to duplicate the Background layer to Layer 1.
Step 3 : Press CTRL+SHIFT+U to desaturate Layer 1.
Step 4 : Go to Filter>Sharpen>Unsharp Mask
Step 5 : These are the settings that I have given for Amount, Radius and Threshold. Click OK. This is particular to this image. Also liking plays a great part.
Step 6 : Go to Filter>Stylize>Find Edges.
This is the effect I have got. If you wish to vary this you will have to do so in Step 5.
Step 7 : If you are satisfied with the effect, there is no need to go for this step. Otherwise press CTRL+L to bring up the Levels dialogue box.
Step 8 : Drag the Black slider at the left inwards to make the lines darker if you wish. Click OK.
This is the effect.
Step 9 : To go a bit further, click the Add Layer mask button. A Layer Mask forms next to the Layer thumbnail on Layer1.
Step 10 : The Foreground/Background Colors should be set to Black/White.
Step 11 : Click the Gradient Tool.
Step 12 : Click the tiny arrow to reveal the Gradients. Click on the Foreground to Transparent.
Step 13 : Click on the Reflected Gradient icon.
Step 14 : Press SHIFT and drag just a little bit.
You will get something like this.
Other photoshop tutorials are
here


 This is a sketch with one method.
 This is a sketch with the second method.
 You will also be able to create this effect if you wish.
 Step 2 : Press CTRL+SHIFT+U to desaturate Layer1.
 Step 3 : Press CTRL+J to duplicate the desaturated Layer1 into Layer1 copy.
 Step 4 : Press CTRL+I to invert.
 The image will look like a negative.
 Step 5 : Change the Blend Mode to Color Dodge.


