


I have been asked to post a tutorial on creating a beard. You can make a clean shaven person bearded with the help of a brush that is found in all versions of Photoshop. It is quite easy to do. Just follow the steps.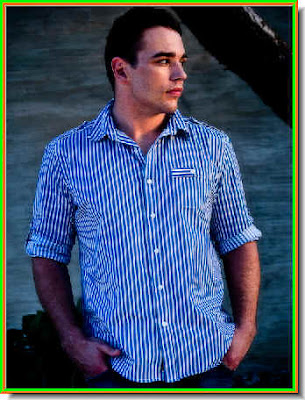
Step 1 : I have opened this free stock photo of a clean shaven man. I will add the beard.
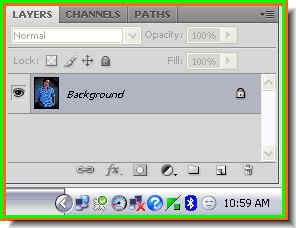
Step 2 : In the Layers panel you will find only a single layer -- the Background layer with a thumbnail of the image.
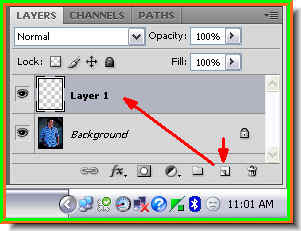 Step 3 : Click the New Layer button and an empty Layer 1 forms. The Layer 1 will be used to create a beard and moustache.
 Step 4 : Click on the Zoom Tool.
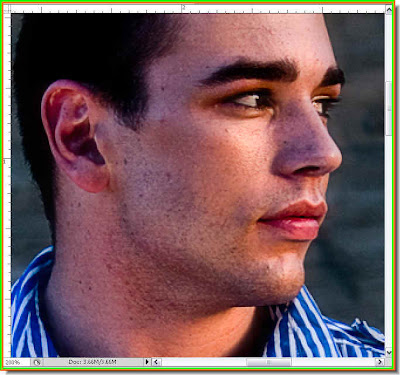 Step 5 : I have zoomed in on the face with the Zoom Tool. Now to select the Brush Tool.
 Step 4 : Click on the Brush Tool to select it.
 Step 5 : In the top panel look at the right. You will find the icon that the red arrow points to. Click it.
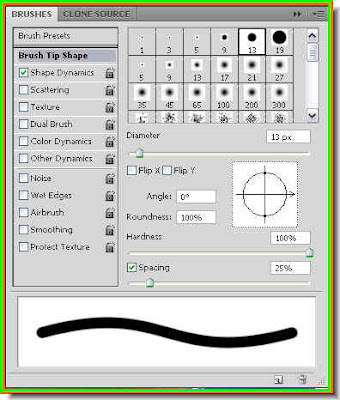 Step 6 : The Brushes pallete opens.
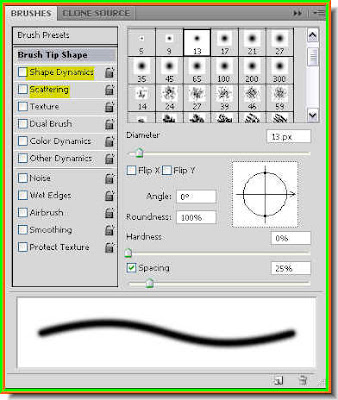
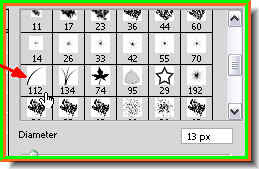 Step 7 : Now click on Brush no 112. See the arrow. This will select the Brush.
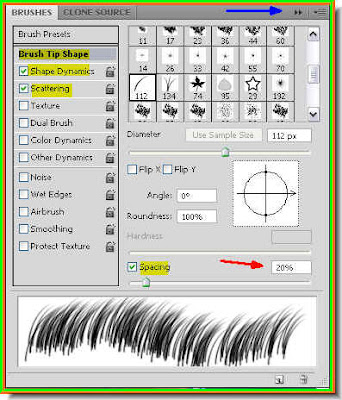 Step 8 : First click on the Brush Tip Shape then check Shape Dynamics and Scattering. Lastly drag the Spacing slider to the left. I have dragged it to 20%. It will depend on your image. This is a high resolution free Stock Photo. I have downloaded it for free from here. You can do it too.
The site is http://www.sxc.hu/index.html After you have applied the settings click where the blue arrow points to and the Brushes pallette will disappear. (It looks a bit different in Photoshop7). To make the Brush Tip small press the [ (Left Bracket key) and to make it bigger ] (Right Bracket Key). You will be required to switch between a large and a small brush tip constantly.

Make sure that Foreground Color is set to Black and Background to White. If it is not press 'x' then 'd' on your keyboard.
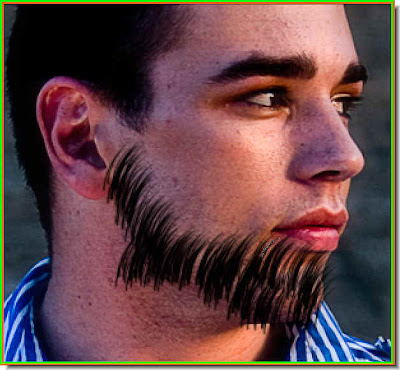 Step 9 : I am using the brush to paint the beard.
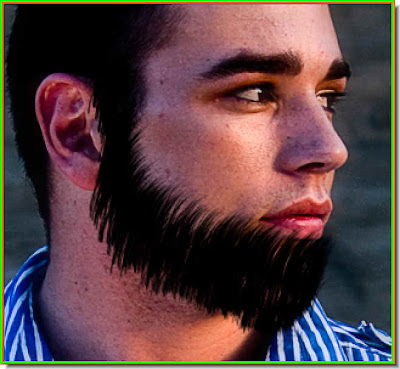 There's the beard.
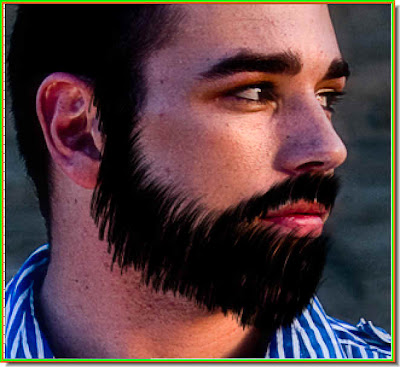 Step 10 : I have made the brush smaller and painted in the moustache.
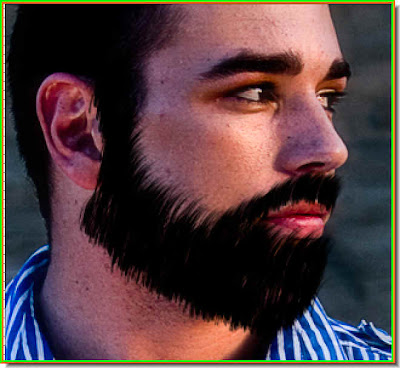 Step 11 : Just brush over the edges to prevent it from looking unkempt.
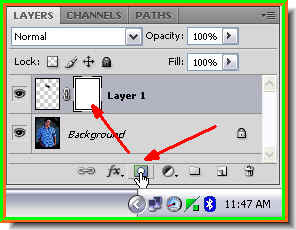 Step 12 : Click the Add Layer Mask button and a layer mask forms next to the layer thumbnail on Layer 1.
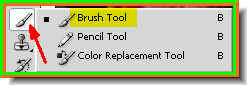
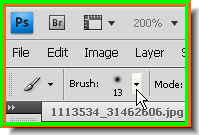
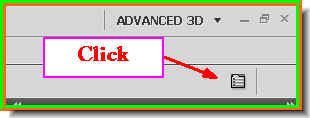 Step 13 : Click the Brush Tool again and then the icon on the top panel at right.
 Step 14 : Look where the white arrow points to. Click the tiny black arrow.
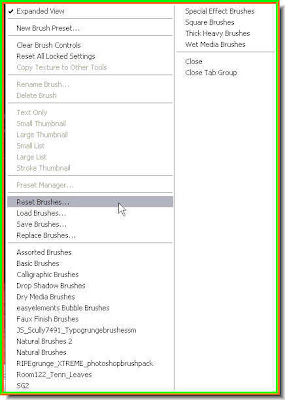 Step 15 : This dialogue opens. Click on Reset Brushes.
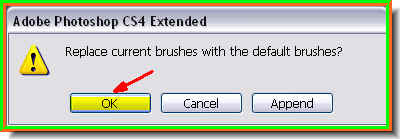
Step 16 : As soon as you click on Reset Brushes this dialogue box opens. Click OK.
Step 17 : In the Brushes pallette uncheck Shape Dynamics and Scattering. The pallette then will look like as above. Close the dialogue box as shown in Step 8.
 Step 18 : Now click where the arrow points to on the left of the top panel.
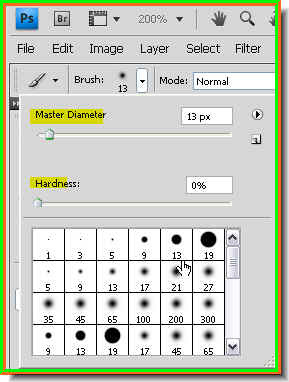
Step 19 : When you click where the arow points to it opens the Brush presets. I have clicked on Brush 13. It is a hard brush. In the controls above you can see that Hardness is set to 0% and Master Diameter to 13 pixels.

Step 20 : With the brush tool gently erase parts of the moustache that have overlapped onto the lips and beside the chin. You can erase because a layer mask is in place. 

The clean shaven man now has a beard. Easy is it not? Now what do you do if you want a greyish beard. You can do that too.
Step 1 : Bring up the Brushes pallette. Check Shape Dynamics, Scattering and also Color Dynamics. Close the pallette.

Step 2 : Click on the White Background color.
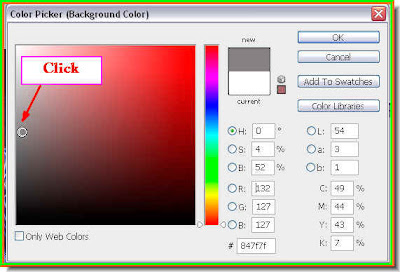
Step 3 : This brings up the Color Picker. Click on a Grey shade at the left. Click ok in the Color Picker.

Step 4 : The Background Color has changed to gray.

Step 5 : Paint the beard and moustache.
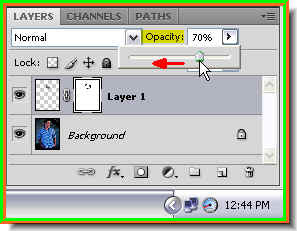 Step 6 : I have lowered the Opacity to 70%.
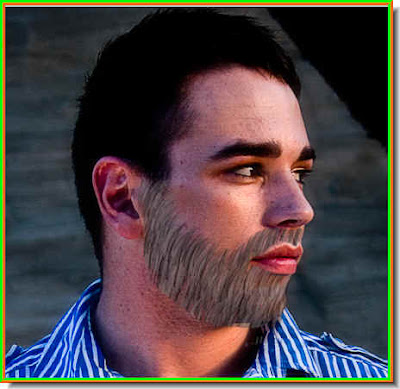 And you have a gray beard.
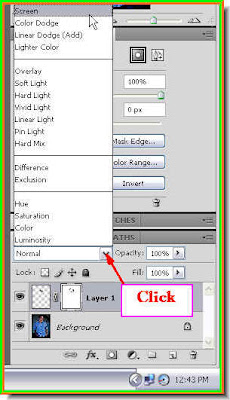 Step 7 : I am changing Blend Mode from the popup menu to Screen.
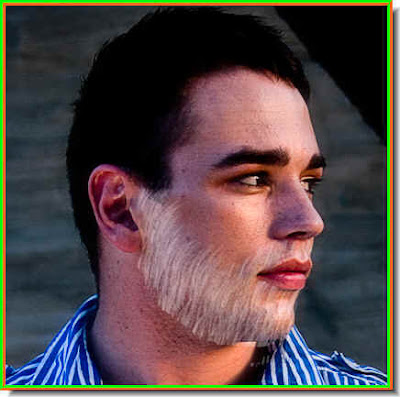
Step 8 : And now he has a white beard. You can make the color of the beard color you want. That is all. Try is out.


