


I had a posted a tutorial on cutting out a part of an image such as a figure cleanly with channels. The tutorial is here. This is a continuation of the tutorial. The object of the tutorial is to make the object to be cut out, either completely black with the help of channels or completely white. In the last tutorial I had shown how to cut out a figure after turning it complely black against a white background. This will be just the opposite -- a white figure on a black background. This is to stress that whatever method you use, you can either make the figure to be cut out either black or white.
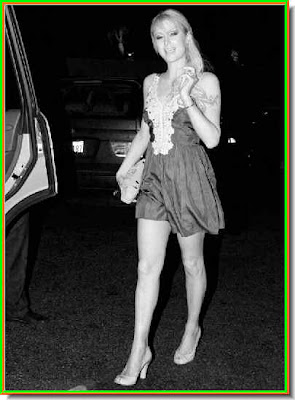
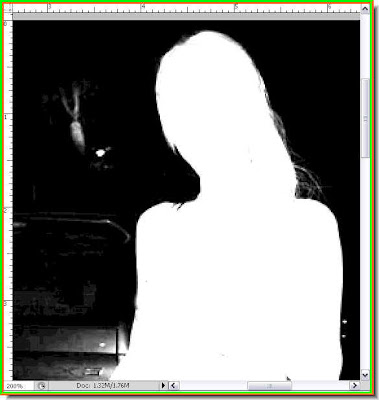
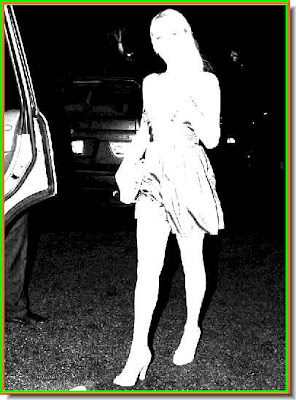
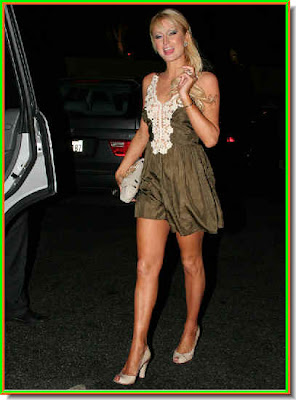 Step 1 : Look at this image. The background is almost completely black. The earlier method of making the image black will not work as the background is black. Therefore the answer is to make the image white and the background black.
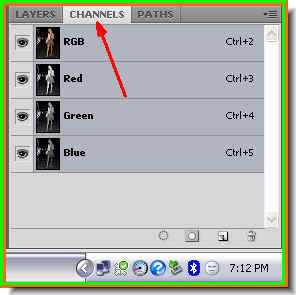
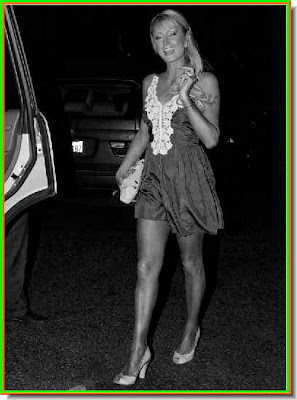 Step 3 : Now click on each of the Red, Green and Blue channels in turn. I have clicked the Blue channel here. The figure appears dark.
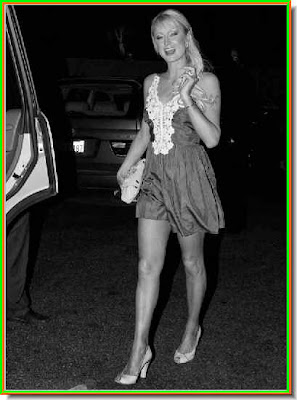 I have clicked on the Green channel and the figure has more light.
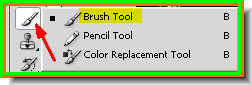 Step 10 : Click on the Brush Tool to select it. You can make your brush tip larger by pressing the ] (right bracket) key and smaller by using the [ (left bracket) key. You can make the brush tip soft by pressing Shift+[ and make it hard by pressing Shift+].
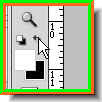 Step 11 : The default Background Color is Black and Foreground White. Just click the small bent arrow where to change the Foreground to White.
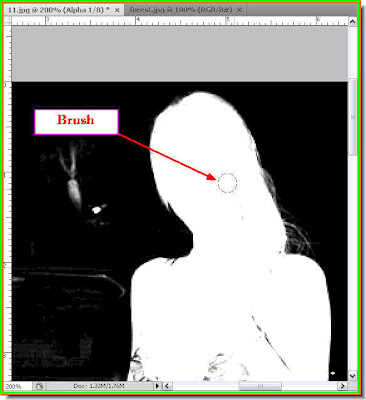 Step 12 : I have zoomed into the image and am painting out all the black spots from the figure.
 Step 13 : I have painted out all the black withe white.
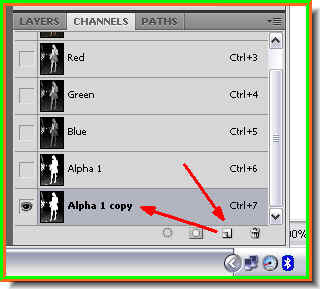 Step 14 : Now drag Alpha 1 channel to the New Channel icon and a Alpha 1 copy forms.
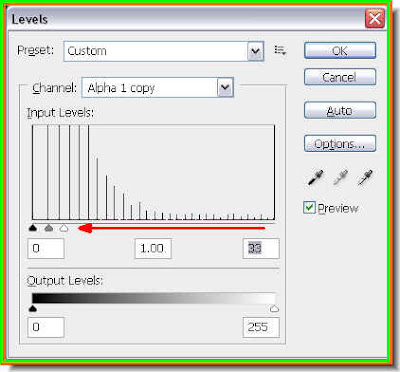 Step 15 : Again press CTRL+L to bring up the Levels dialogue box. I have again dragged the White slider to the extreme left. Why did I do this? It will become clear in the next step.
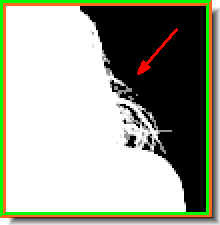 Step 16 : I did the earlier step to make the delicate strands of hair visible. It will be impossible to select the strands of hair with any of the selection tools. But the selection is made possible by using channels.
 Step 17 : Now drag the Alpha 1 Copy to the New Channel icon and an Alpha 1 Copy 2 channel forms.
 Step 18 : Now change the Foreground Color to Black.
 Step 19 : Click the Brush Tool again.
 Step 20 : I am beginning to paint the background with Black as far as practicable.
 Step 21 : I have painted the background entirely black.
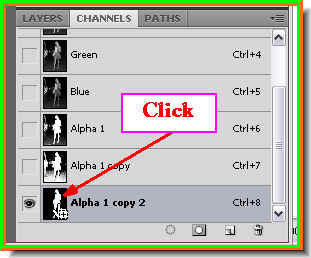 Step 22 : Click on the layer thumbnail of the Alpha 1 copy 2.
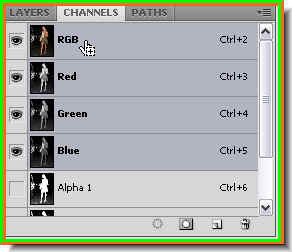 Step 23 : Now click on the RGB channel.
Step 24 : As soon as you click on the RGB channel, the color returns. Also there is a selection of marching ants all around the figure.
 Step 25 : Click back on the Layers pallete.
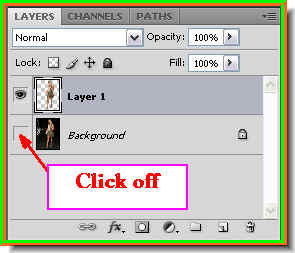 Step 27 : Click off the eye icon on the Background layer.
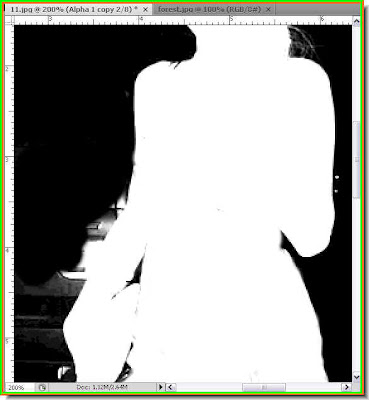
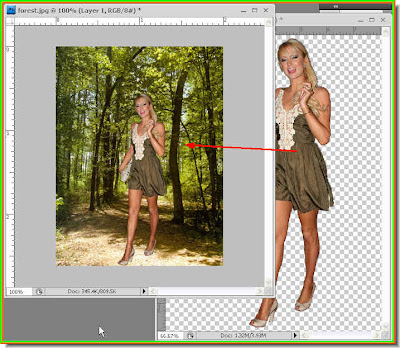 Step 29 : I have dragged the girl's image onto a new photo that I have opened. I expect you know that you have to use the Move Tool to move the image and then resize it if necessary.
 This is how the image looks. What is wrong is that the lights are not correct. The angle of light on the girl is different from the angle of light on the forest in the background.
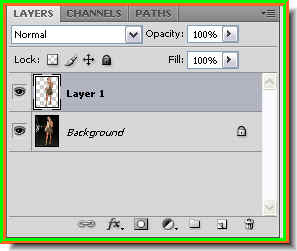
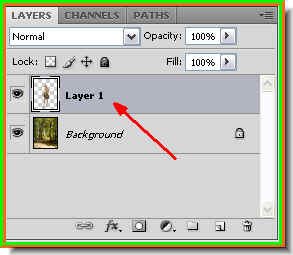 Note that the girl's image is on Layer 1 and the forest image is on the Background layer.
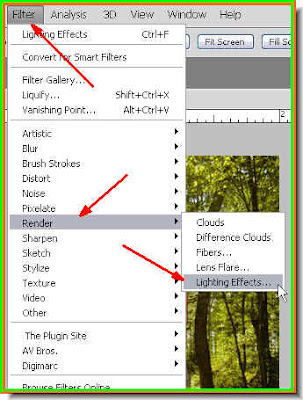 Step 30 : Go to Filter>Render>Lighting Effects.
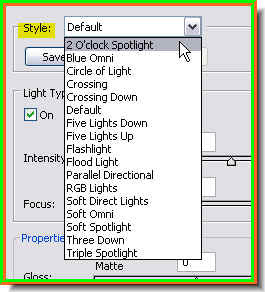
Step 32 : I am changing the Style to 2 o'clock Spotlight.
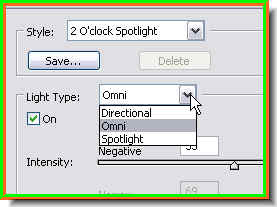
Step 33 : I am changing the Light Type to Omni.
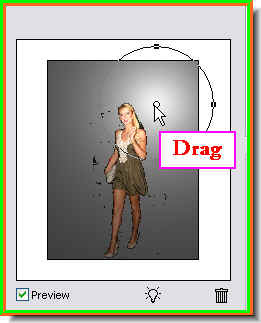
Step 34 : In the left panel I have dragged the light to the top left. Click ok in the Lighting Effects dialogue box.
This is how the image looks.
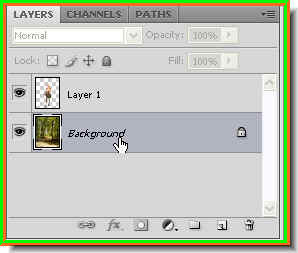
Step 35 : Now I have clicked back on the Background layer.
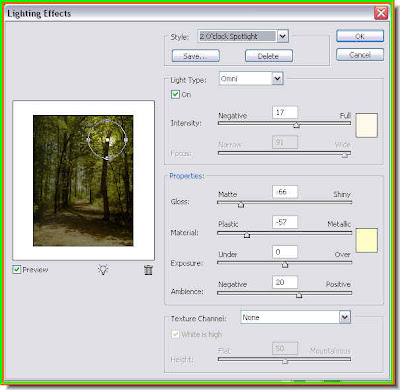 Step 36 : Now open the Lighting Effects dialogue again and give the same settings as given for the girl. Click ok.
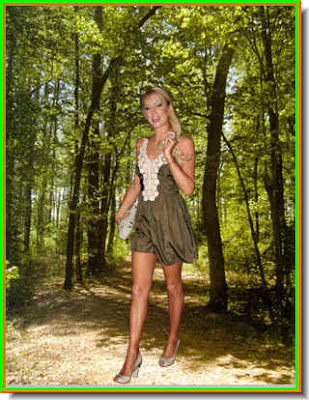
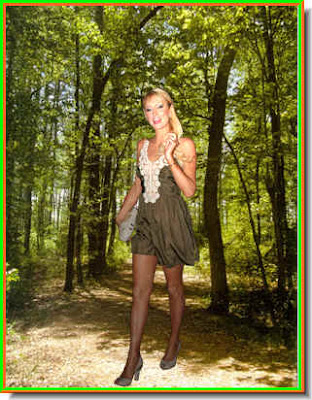
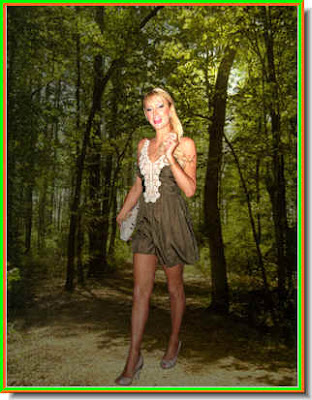 This is how the image looks. The lighting has been corrected. Thtatis all. I will do one more step for a particular effect which someone who follows this blog has asked for.
Step 1 : Look at this image. The background is almost completely black. The earlier method of making the image black will not work as the background is black. Therefore the answer is to make the image white and the background black. Step 2 : In the Layers/Channels/Paths pallete click on Channels to open it.
Step 3 : Now click on each of the Red, Green and Blue channels in turn. I have clicked the Blue channel here. The figure appears dark. I have clicked on the Green channel and the figure has more light.This is the Red channel. The figure has the most light. This will do.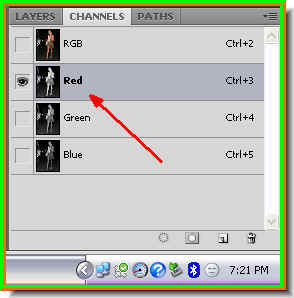
Step 4 : I have clicked on the Red channel. It is highlighted which means it is selected. Step 5 : Go to Image>Calculations.
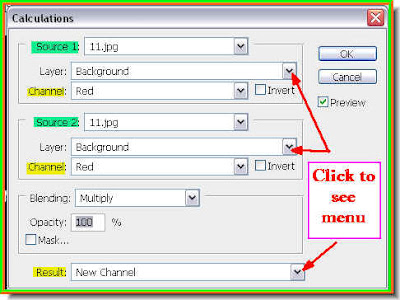 Step 6 : In the Calculations dialgue box select Red channel in Source 1 and also from Source 2. Change the Result to New Channel. You can make the change from the drop down menus where the red arrows points. Click ok.
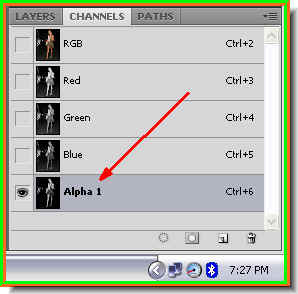 Step 7 : As soon as you click ok a new Alpha 1 channel forms in the channels pallette.
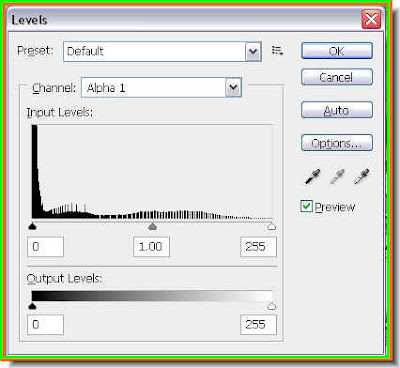 Step 8 : Press CTRL+L to bring up the Levels dialogue box.
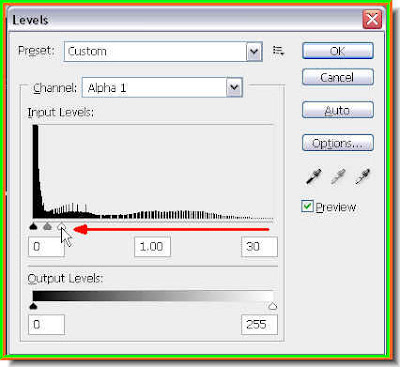 Step 9 : I have dragged the White slider at the right to the extreme left.
Step 5 : Go to Image>Calculations.Step 6 : In the Calculations dialgue box select Red channel in Source 1 and also from Source 2. Change the Result to New Channel. You can make the change from the drop down menus where the red arrows points. Click ok.Step 7 : As soon as you click ok a new Alpha 1 channel forms in the channels pallette.Step 8 : Press CTRL+L to bring up the Levels dialogue box.Step 9 : I have dragged the White slider at the right to the extreme left.This is how the image looks after dragging the White slider all the way to the left. Click ok in the Levels dialogue box.
Step 10 : Click on the Brush Tool to select it. You can make your brush tip larger by pressing the ] (right bracket) key and smaller by using the [ (left bracket) key. You can make the brush tip soft by pressing Shift+[ and make it hard by pressing Shift+].Step 11 : The default Background Color is Black and Foreground White. Just click the small bent arrow where to change the Foreground to White.Step 12 : I have zoomed into the image and am painting out all the black spots from the figure.Step 13 : I have painted out all the black withe white.Step 14 : Now drag Alpha 1 channel to the New Channel icon and a Alpha 1 copy forms.Step 15 : Again press CTRL+L to bring up the Levels dialogue box. I have again dragged the White slider to the extreme left. Why did I do this? It will become clear in the next step.Step 16 : I did the earlier step to make the delicate strands of hair visible. It will be impossible to select the strands of hair with any of the selection tools. But the selection is made possible by using channels.Step 17 : Now drag the Alpha 1 Copy to the New Channel icon and an Alpha 1 Copy 2 channel forms.Step 18 : Now change the Foreground Color to Black.Step 19 : Click the Brush Tool again.Step 20 : I am beginning to paint the background with Black as far as practicable.Step 21 : I have painted the background entirely black.Step 22 : Click on the layer thumbnail of the Alpha 1 copy 2.Step 23 : Now click on the RGB channel.
Step 25 : Click back on the Layers pallete. Step 26 : With the selection still in place, press CTRL+J. The selection is copied and pasted to a new layer -- Layer 1.
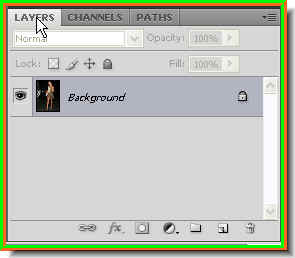
Step 27 : Click off the eye icon on the Background layer.
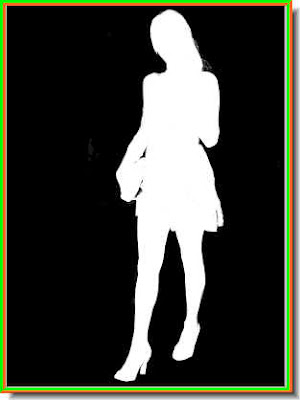
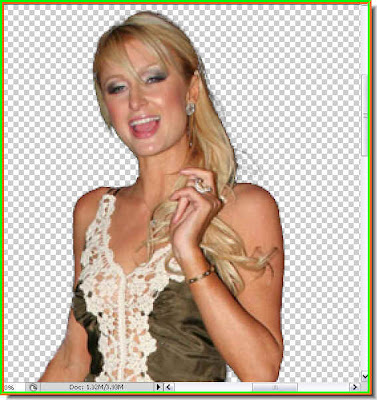
Step 28 : The background has been eliminated cleanly.
Step 29 : I have dragged the girl's image onto a new photo that I have opened. I expect you know that you have to use the Move Tool to move the image and then resize it if necessary. This is how the image looks. What is wrong is that the lights are not correct. The angle of light on the girl is different from the angle of light on the forest in the background. Note that the girl's image is on Layer 1 and the forest image is on the Background layer. Step 30 : Go to Filter>Render>Lighting Effects.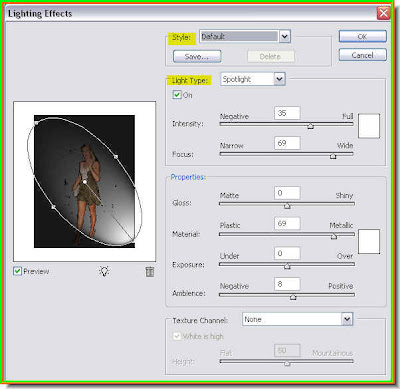
Step 32 : I am changing the Style to 2 o'clock Spotlight.
Step 33 : I am changing the Light Type to Omni.
Step 34 : In the left panel I have dragged the light to the top left. Click ok in the Lighting Effects dialogue box.
This is how the image looks.
Step 35 : Now I have clicked back on the Background layer.
Step 36 : Now open the Lighting Effects dialogue again and give the same settings as given for the girl. Click ok.This is how the image looks. The lighting has been corrected. Thtatis all. I will do one more step for a particular effect which someone who follows this blog has asked for.
Remember that the Background layer is selected. I have pressed CTRL+SHIFT+U and desaturated the background. You need not do this. It is only for the benefit of someone who has asked me how it can be done. That is all.


