


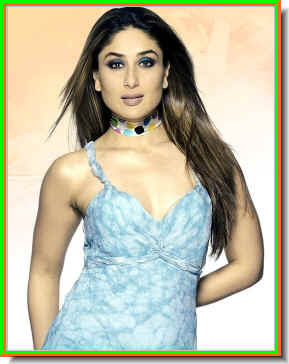
 Step 1 : This is the image I will be using to cut out from its background with channels.
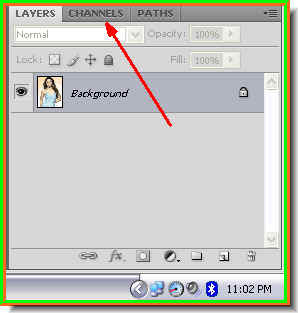 Step 2 : In the Layers/Channels/Paths pallette, click on Channels.
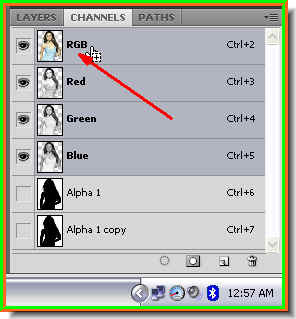
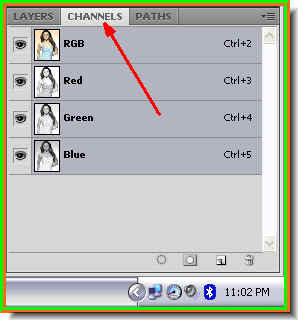 Step 3 : The Channels pallette opens. Note the RGB, Red, Green and Blue channels. Among the Red, Green and Blue channels, see which has the greatest contrast.
 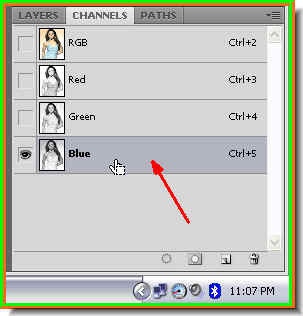 Step 4 : By looking at the layer thumbnails of the Red, GReen and Blue channels in this particular image, the Blue has the most contrast. Click on the Blue channel, which will highlight it, which means the channel has been selected.
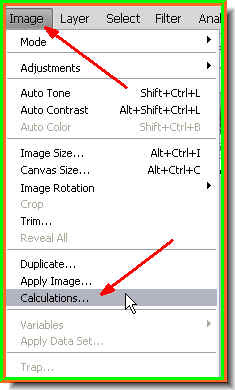 Step 5 : Go to Image>Calculations.
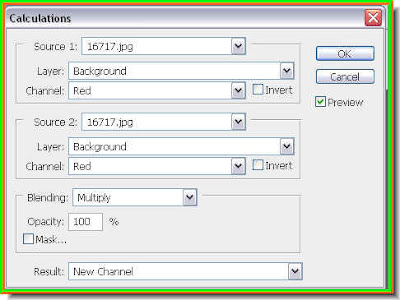 Step 6 : The Calculations dialogue box opens.
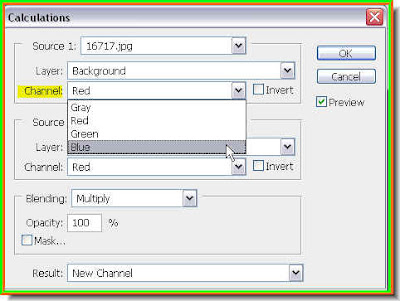 Step 7 : Change the Channel of Source 1 to Blue from the dropdown menu.
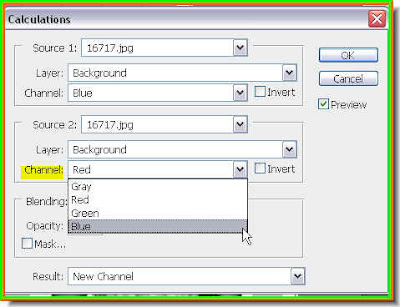
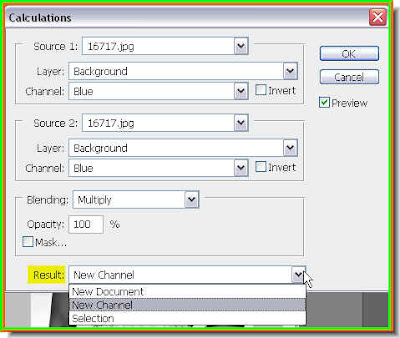
Step 9 : Now change the Result to New Channel. Click ok.
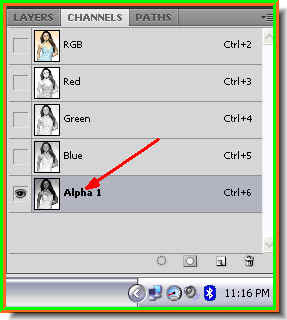
Step 10 : Look in the Channels pallete. A new channel -- Alpha 1 has formed.

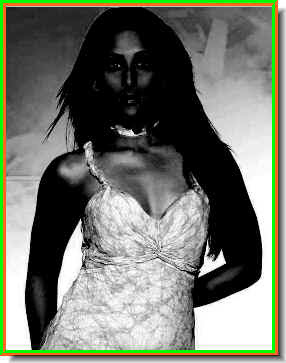
Meanwhile, this is how the image looks.
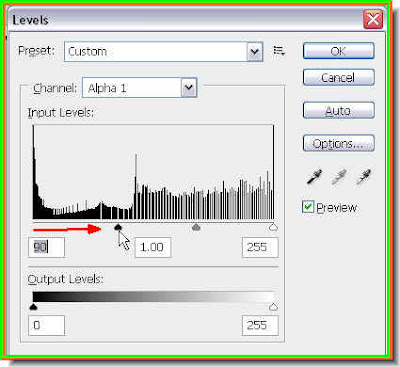
Step 11 : Press CTRL+L to bring up the Levels dialogue box and drag the black slider to the right while keeping an eye on the image.
The image has darkened perceptibly, but the background can also be made out.
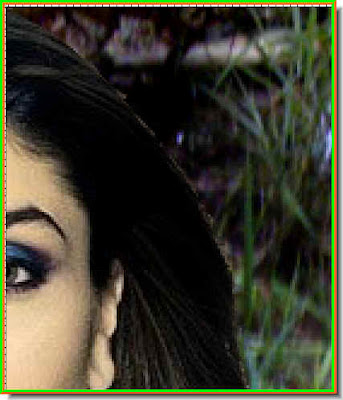
 Zoom into the image with the Zoom Tool.
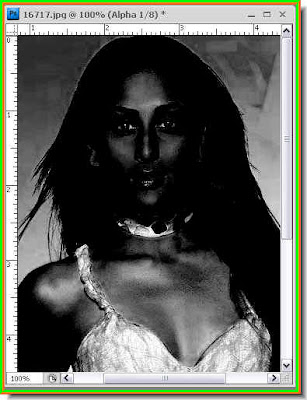 I have zoomed in on the image.
 Step 12 : Make sure the Foreground Color is set to Black and Background to White. If it is not
press 'x' and then 'd' on the keyboard.
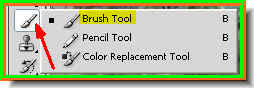 Step 13 : Click on the Brush Tool. To make the the Brush Tip large press the right bracket ] key. To make it smaller press the left bracket key [. To make the brush tip hard press Shift+] and to make it soft Shift+[.
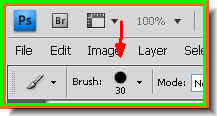 A hard brush tip.
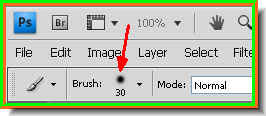 A soft brush tip. We will be using a hard brush tip.
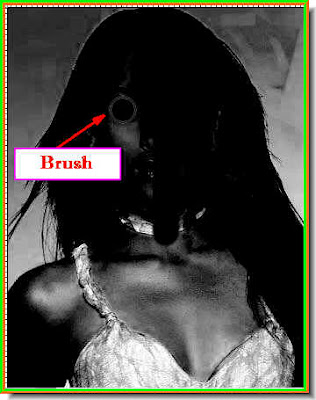 Step 14 : I am using hard brush to paint the girl in black.
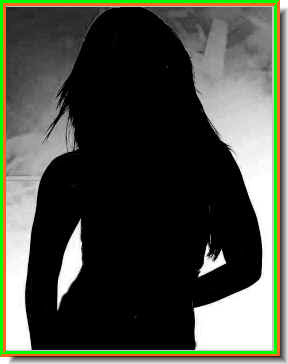 Step 15 : I have painted the girl entirely with Black.

Step 16 : Now change the Foreground Color to White by clicking the small bent arrow. Then click on the Brush Tool to select it.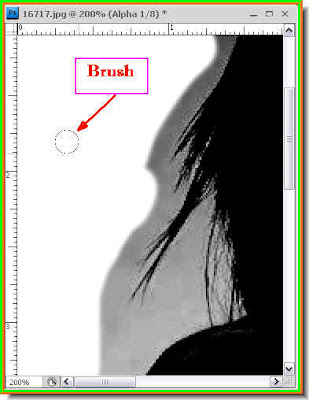
 Drag the Alpha 1 copy to the New Channels button and a Alpha 1 copy forms.
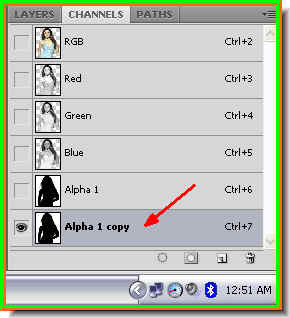 The Blue channel has been duplicated.
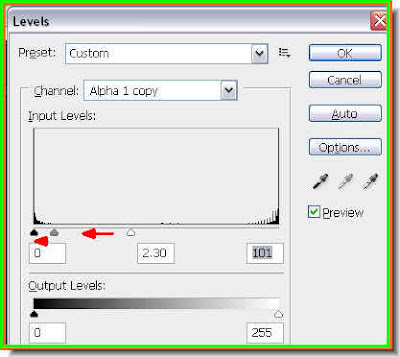 Step 19 : Press CTRL+L. This will again bring up the Levels dialogue box. Drag the White slider at the right and Grey slider to the left.
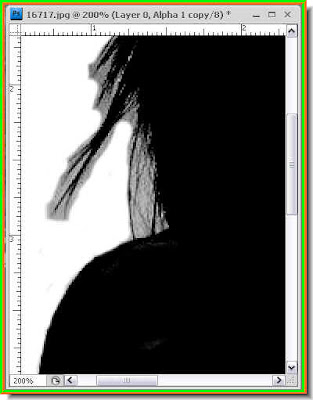
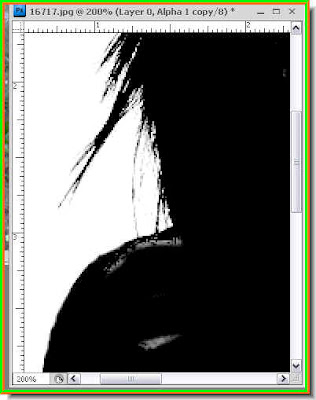 Step 20 : Drag the White and Grey sliders till the ends of the hair are covered with White as shown. Click ok.
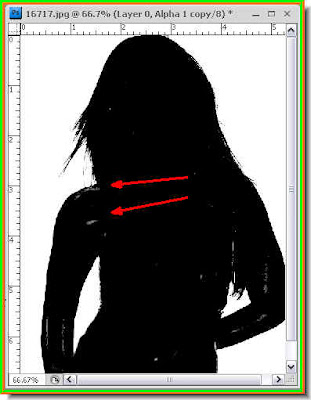 Step 21 : Note the background is completely white, but some white patches now are showing up on the black part.
 Step 22 : Change the Foreground Color to black and again choose the Brush Tool.
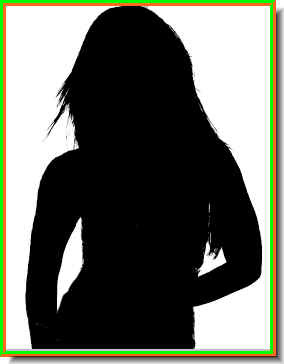
 Step 24 : Click back on the RGB channel. But before that click on the layer thumbnail of Alpha 1 copy. This will cause a selection to appear around the image.
I have clicked on the Alpha 1 copy layer thumbnail. A selection forms around the image.
 Step 25 : After clicking on the RGB channel, the color returns to the image. Also note that the selection is in place.
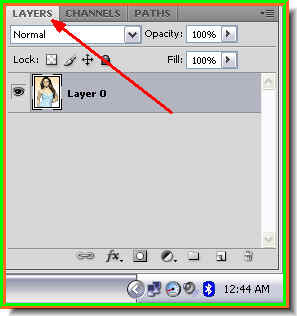
Step 26 : Click back on the Layers pallette.
Step 27 : With selection still in place hit the Delete key. The background disappears. Press CTRL+D to deselect.

Step 28 : I have opened this image which I shot with my mobile camera. I will use it for the background. Step 29 : Click the Move Tool.
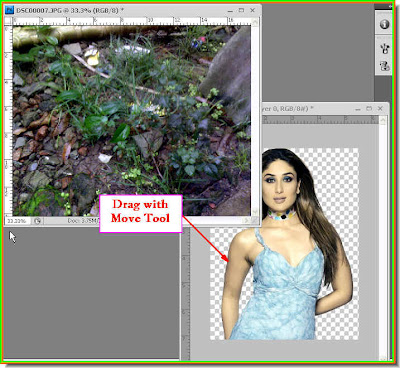
Step 30 : Down drag the image till it completely covers the other image. Press Enter if you have to resize the image. It will apply the transformation.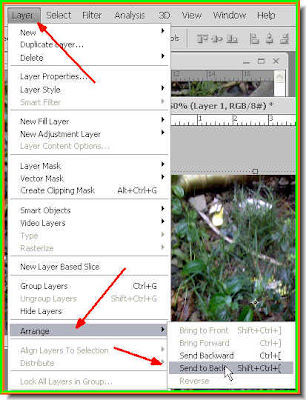
Step 31 : Go to Layer>Arrange>Send to Back.

The girl in the new background. Step 32 : I have zoomed in on the hair. Some of the yellow from the earlier background has been left behind.
 Step 33 : CTRL+CLICK the layer thumbnail on the layer containing the girl's image.
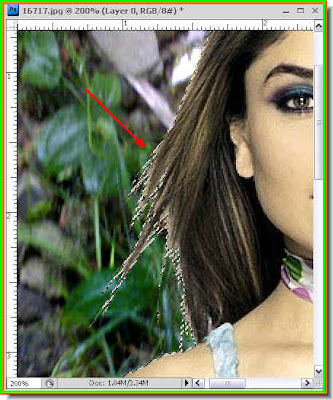
Step 34 : A selection is again visible.
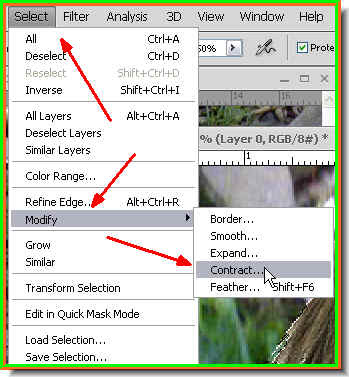
Step 35 : Go to Select>Modify>Contract.
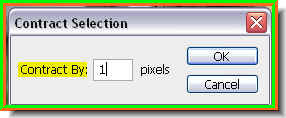
Step 36 : The Contract Selection dialogue box has opened. I have put 1 pixel for 'Contract By'. Click ok.
 Step 37 : Go to Select>Inverse. Then hit Delete.
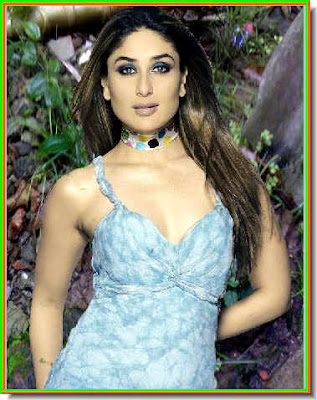
The yellowish edges have all but disappeared.
 Step 38 : Now click on the Burn Tool from the flyout.
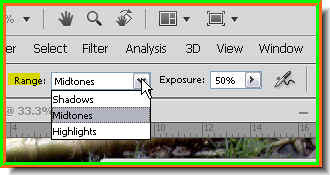
Step 39 : In the top panel change the Range to Midtones.
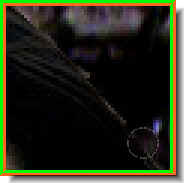
Step 40 : I am using the Burn Tool to burn off the yellow edges.
The yellow edges have been burnt off.

The girl on a new background. That is all. Try it out.
I have posted a similar tutorial here which you may also try. It is a variation on this one.


