


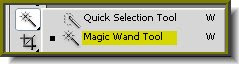
 Step 1 : Click the Magic Wand Tool.
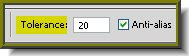 Step 2 : Reduce the Tolerance. I have reduced it to 20. It will depend on your image.
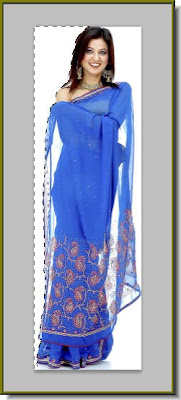 Step 3 : I have clicked on a portion of the White Background. A portion is immediately selected by the magic Wand.
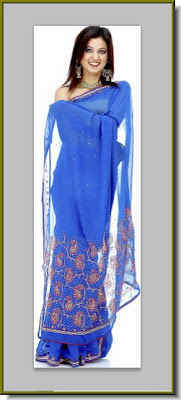
 Step 4 : Keeping the SHIFT pressed I have clicked on another area of white and it is also selected.
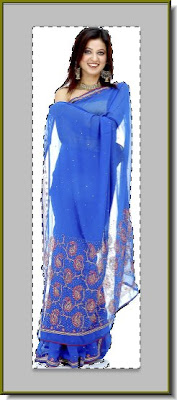
 Step 6 : Press CTRL+SHIFT+I. This will invert the selection.
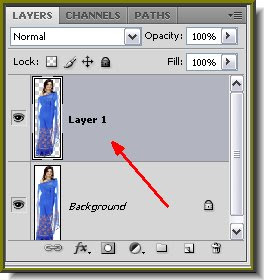 Step 7 : Now press CTRL+J. This will cut and paste the selection to a new layer. Look in the Layers pallette. You will find it as Layer 1.
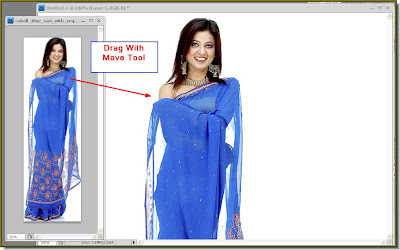 Step 8 : Now open a New White layer. Drag the Layer 1 (photo of the girl) onto to it with the Move Tool. I have dragged it onto the white layer. Minimise the photo of the girl. we will not need it any longer. You can also use the Extract Tool in PS instead of using the Magic Wand. See here.
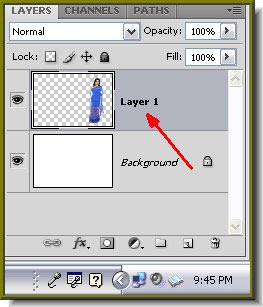 Look in the Layers pallette. The photo of the girl is on Layer1 and the White Layer is the Background
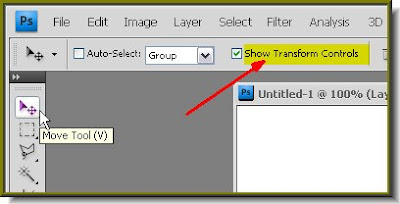 This is the Move Tool. Make sure that 'Show Transform Controls' (Bounding Box in PS7) is checked.
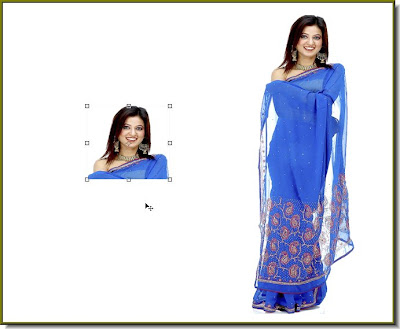
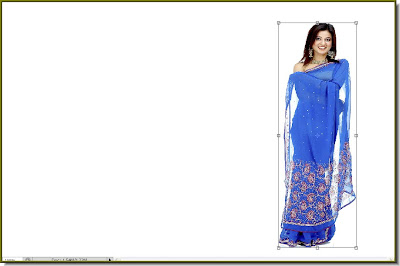 Step 9 : Now click on the layer 1 containing the girl's image. You will find a selection around it. Press CTRL+T, then SHIFT+ALT to resize the photo and move it to a corner as I have done.
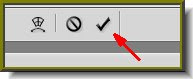 Step 10 : Since you have altered the proportions of the image, the transformation has to be applied. Just click the Tick mark in the top panel at right, or click the Move Tool or any oher tool. This will apply the transformation.
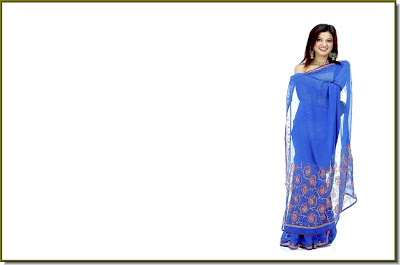
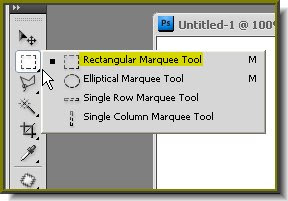 Step 11 : Click the Rectangular Marquee Tool.
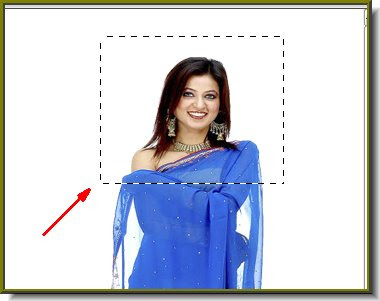 Step 12 : Draw out a selection with the Rectangular Marquee Tool of the bust as shown.
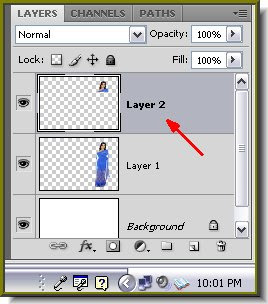 Step 13 : Press CTRL+J. You will not notice any difference in the image. Look in the Layers pallette. And the selection of the bust is now in Layer 2.
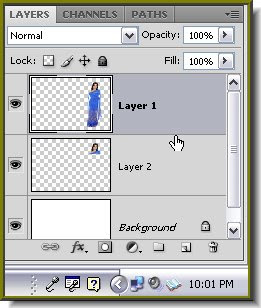

 Step 16 : Use the Move Tool to move the bust To the middle as shown.
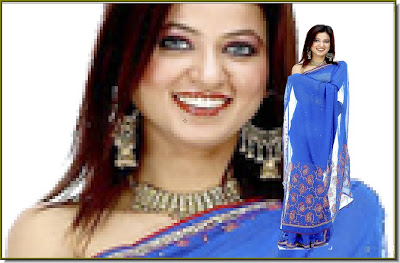 Step 17 : Press CTRL+T first. Then grab a corner handle. Press SHIFT+ALT and drag towards a corner till the bust is resized covering the entire background.
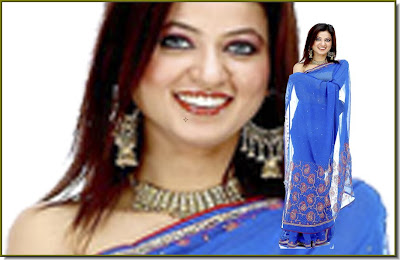 The bust has been resized. Click the Tick mark in the top panel to Apply the Transformation.
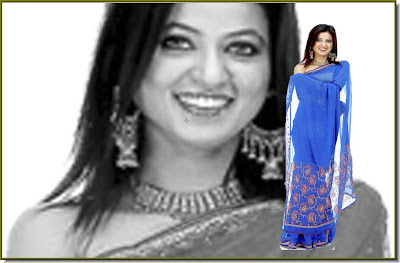 Step 18 : Now press CTRL+SHIFT+U to desaturate the bust.
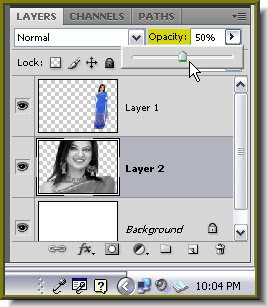 Step 19 : Now reduce the Opacity of the layer suitably. I have reduced it by 50%.
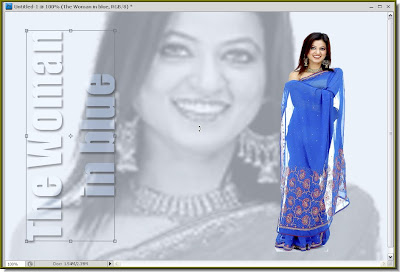
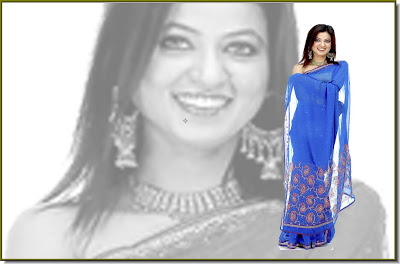 This how the image now looks.
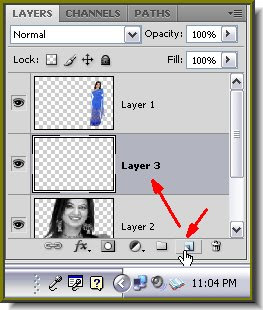 Step 20 : Remember you are working on Layer2. Click the New Layer icon at the bottom of Layers pallette and a new Layer 3 forms over Layer2.
 Step 21 : Click the Foreground color.
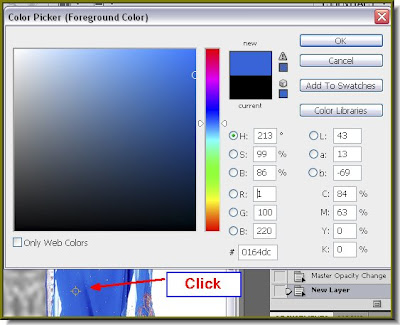 Step 22 : As soon as you click the Foreground color, the Color Picker opens. I have used the cursor to click on a Blue shade of the sari. The color in the preview box also changes to Blue.
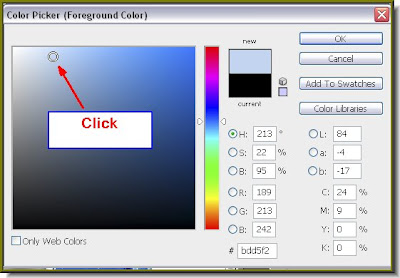 Step 23 : I have clicked on a light shade of Blue. Click ok in the Color Picker.


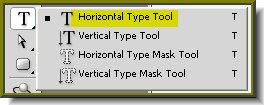 Step 26 : Click on the Horizontal Type Tool.
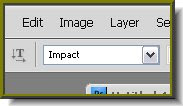 Step 27 : I have chosen Impact as the Font. It is available in all versions of PS.
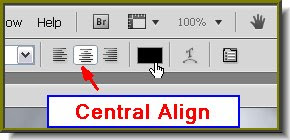 Step 28 : Click on central alignment for the text. The Text color by default is set to Black. It has to be changed. Click where the small hand points to.
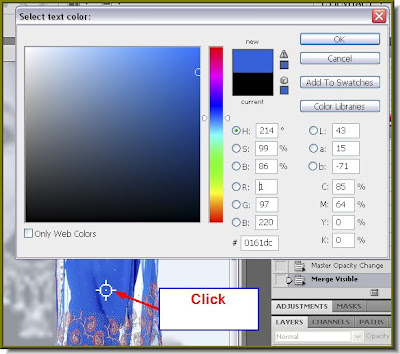 Step 29 : I have clicked on the sari. The color is the Select Text Color box box changes to Blue. It works in the same way as the Color Picker.
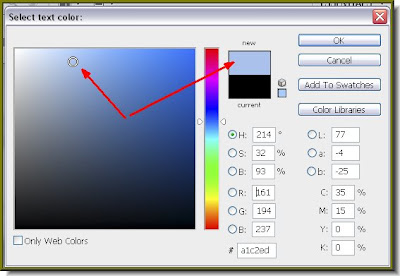 Step 30 : I have clicked on a light shade of Blue. The 'New' changes to the color I pick.
 The text color changes to the color picked.
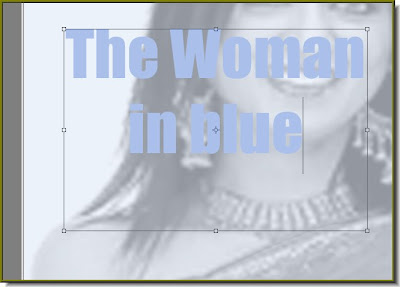 Step 31 : Draw out a text box and type in your text. I have typed in my text.
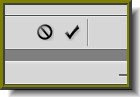 Step 32 : Click the Tick mark to apply the Text.
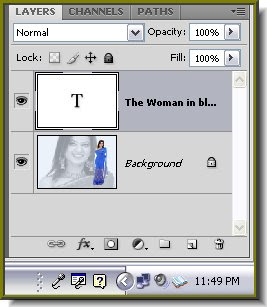
Note that the Text is on the topmost layer.
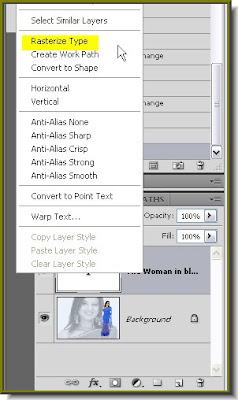
Step 33 : Right click the Text layer and select Rasterize text.
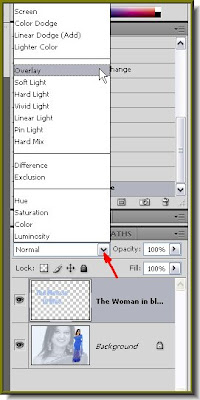
Step 34 : The Text has been rasterized. Change the blend mode from the popup to Overlay.
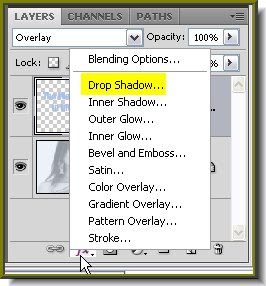
Step 35 : Click the Add Layer Style button at the bottom of the Layers pallette and choose Drop Shadow. When the Drop Shadow dialogue box appears. Just click ok.
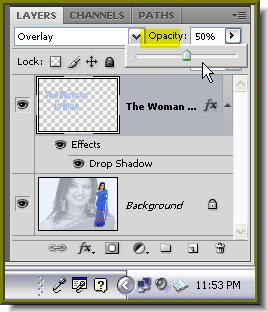
Step 36 : Now reduce the Opacity of the Text layer to 50 %.

Step 37 : Click th Move Tool.
Step 38 : Now press CTRL+T. This will bring up a selection around the text. Hover the Move Tool on a corner handle and a small bent arrow will appear. Use the bent arrow to rotate the text as shown. When you are satisfied click the Tick mark in the top panel to apply the transformation.
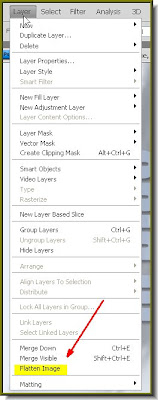
Step 39 : Go to Layer>Flatten Image.
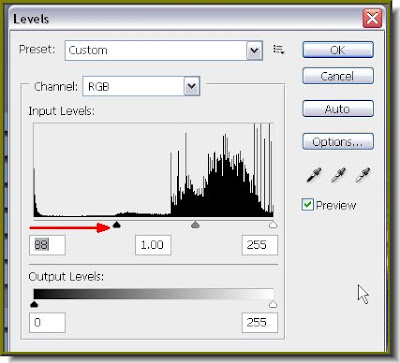
Step 40 : Press CTRL+L after flattening the image. This will bring up the Levels dialogue box. Drag the Black slider at left to the edge of the black graph. Click ok.
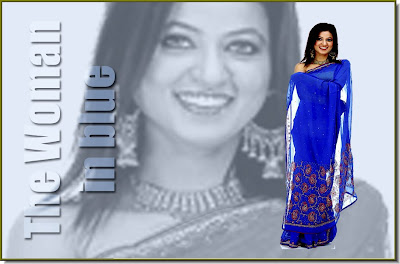
And here is the completed, mono color poster. Try it out.


