


There are the Rectangular Marquee and the Elliptical Marquee Tools in Photoshop of which you will be more than familiar. But there are two others beneath them -- the Single Row Marquee and the Single Column Marquee. You can create a special effect like a faint chequer board pattern with the two Marquees. I will also be using the Blend Modes. You can use them or something else that you prefer or if it looks good to you. You can change the Blend Modes after completion of the tutorial and experiment with them. None of values that are given are hard and fast, you can always be flexible.
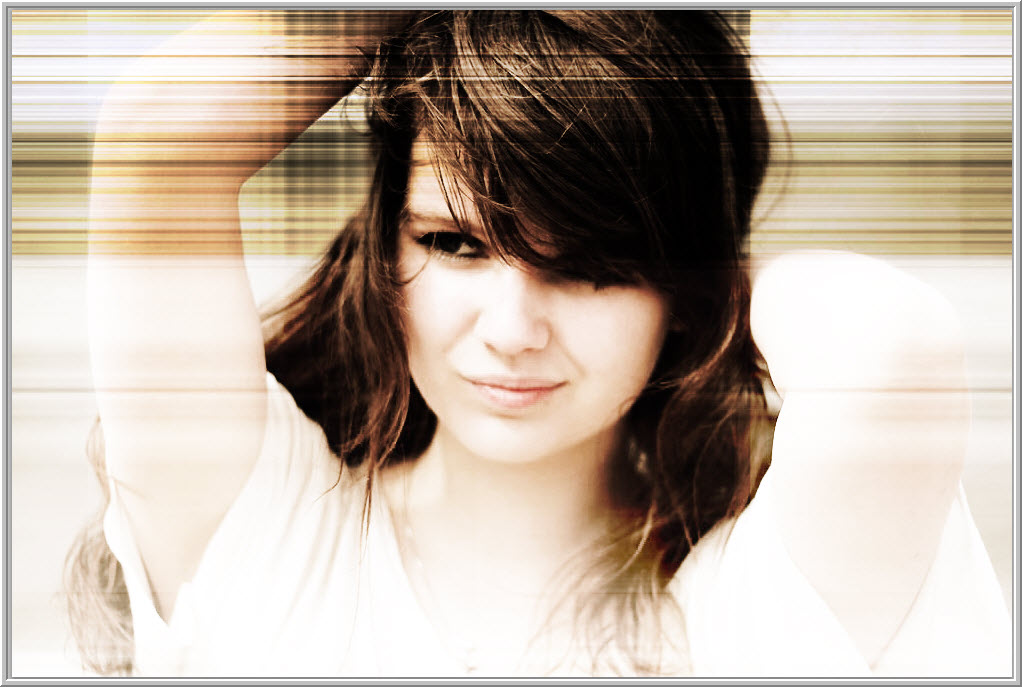
This is the effect I will create.

I will be using this free stock image. You will find it here
It belongs to beatqas

Step 1 : Press CTRL+J to duplicate the Background Layer into Layer1.

Step 2 : Click on the Background Layer.

Step 3 : Click on the Single Row Marquee.

Step 4 : Click with in in approximately the middle. You will get a horizontal column as shown.

Step 5 : Press CTRL+J. A new Layer 2 forms above the Background layer. Nothing will seem to happen to the image. The line of marching ants will also disappear.

Step 6 : Press CTRL+T. You will find that a diagonal selection appears.

Step 7 : Drag the middle handle down all the way to the bottom.

Step 8 : Drag the top of the selection up. Press ENTER.

Though the image appears to remain undisturbed, a change has taken place. Look in the Layers palette at Layer 2. It has changed. It is not visible because the Layer 1 above is hiding it.

Step 9 : Change the Blend Mode to Overlay.

Step 10 : Click on the Background Layer.

Step 11 : Click on the Single Column Marquee.

Step 12 : Click in the middle. A vertical row of marching ants appear. You can also see how the image looks after changing the Blend Mode.
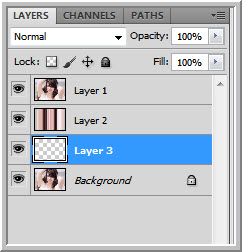
Step 13 : Press CTRL+J. A new Layer 3 forms below Layer 2 and above the Background Layer.

A vertical selection appears.

Step 14 : Drag from the centre to the left and right. Press ENTER.

Step 15 : Change the Blend Mode of Layer 3 to Hard Light.

Step 16 : Change the Blend Mode of Layer 2 to Soft Light.

The image looks like this.

Step 17 : With Layer 2 highlighted, CTRL+CLICK on Layer3.

Both the layers are highlighted.
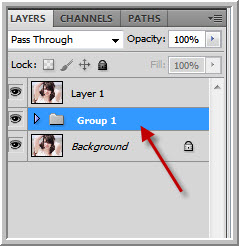
Step 18 : Press CTRL+G to group the two layers. The two layers are now in Group 1 layer.

Step 19 : Click on the Elliptical Marquee Tool.

Step 20 : Draw an elongated selection as shown. If you have not been able to draw it bang in the middle, use the left, right, top and bottom arrows to move it into position.

Step 21 : Press CTRL+SHIFT+I to inverse the selection.

Step 22 : Go to Select>Modify>Feather.

Step 23 : The Feather Selection dialogue box opens. Set the Feather radius at 60. Click OK.

Step 24 : Click on the Add Layer Mask button. A Layer Mask forms on Group 1 Layer.

This is how the image looks.

Step 25 : Click the Create new fill or adjustment Layer button.

Step 26 : Click on Hue/Saturation.

Step 27 : The Hue/Saturation adjustment layer forms above the Group1 Layer.

Step 28 : Check Colorize in Hue/Saturation.

This is what the image looks with the default setting.

Step 29 : Drag the Hue slider to 40.

You can drag the Hue slider to any other color. This is my completed image.
Other photoshop tutorials are here


