


I have been asked to post a tutorial on a collage against a brick wall. It is quite easy to do. First you need a photo of a brickwall. You can get a free stock photo here. You only have to register. The site is http://www.sxc.hu/
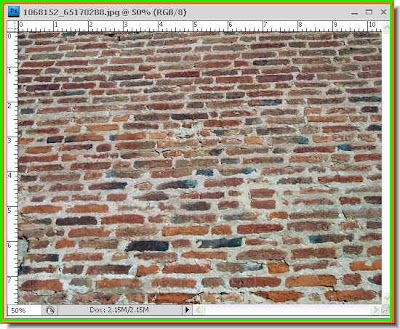 Step 1 : I have opened the photo of the brickwall.
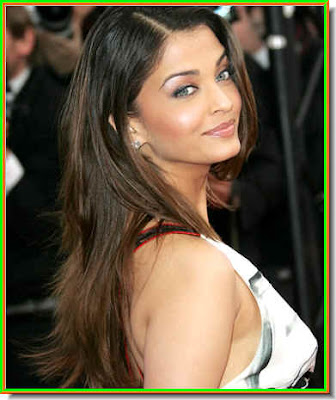 Step 2 : Now choose a set of photos for the collage. I have opened one of Aishwarya Rai.
 Step 3 : Click the Move Tool.
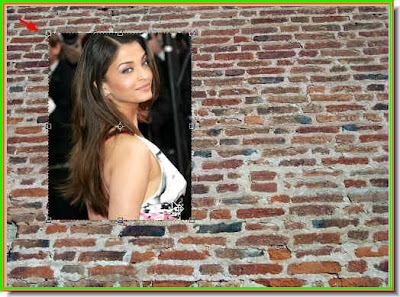
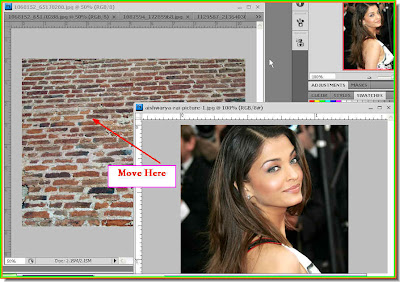 Step 4 : Drag the photo onto the brick wall with the Move Tool.
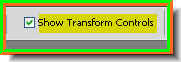 Step 5 : In the top panel make sure that Show Transform Controls (Bounding Box in PS7) is checked).
 Step 6 : The photo has been moved to the brick wall. Note you can see the corner handles because the Show Transform Controls are checked.
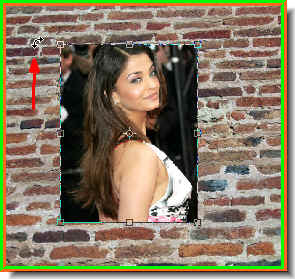 Step 7 : Press SHIFT and ALT and drag inwards. This will resize the photo proportionately and make it smaller. (You can make it bigger proportionately in the same way). Note that a small bent arrow appears when you hover the cursor on a corner.
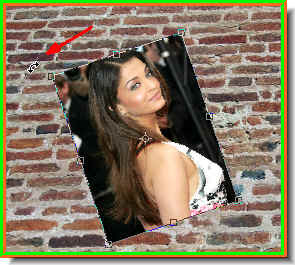 Step 8 : Use the bent arrow to rotate the photo in any direction you please. I have rotated it to the left. Then press Enter to apply the transformation.
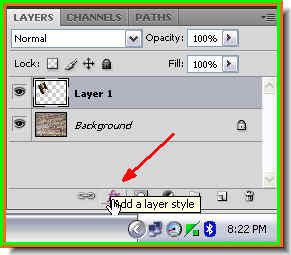 Step 9 : Click the Add Layer Style Button.
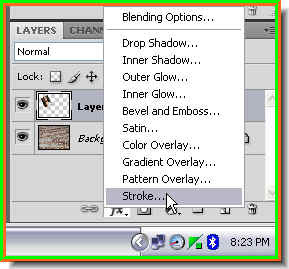
Step 1 : I have opened the photo of the brickwall. Step 2 : Now choose a set of photos for the collage. I have opened one of Aishwarya Rai. Step 3 : Click the Move Tool. Step 4 : Drag the photo onto the brick wall with the Move Tool.Step 5 : In the top panel make sure that Show Transform Controls (Bounding Box in PS7) is checked). Step 6 : The photo has been moved to the brick wall. Note you can see the corner handles because the Show Transform Controls are checked.Step 7 : Press SHIFT and ALT and drag inwards. This will resize the photo proportionately and make it smaller. (You can make it bigger proportionately in the same way). Note that a small bent arrow appears when you hover the cursor on a corner.Step 8 : Use the bent arrow to rotate the photo in any direction you please. I have rotated it to the left. Then press Enter to apply the transformation.Step 9 : Click the Add Layer Style Button.Step 10 : Click Stroke from the popup.
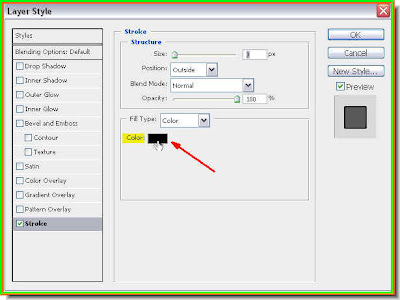 Step 11 : When the Stroke dialogue box opens click on the Color.
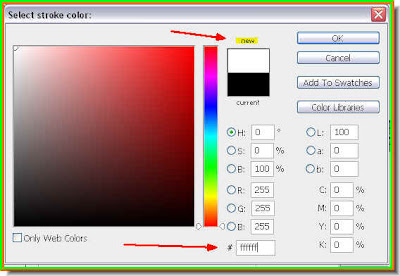 Step 12 : In the Select Stroke Color dialogue box type 'ffffff' (five 'f's) into the box shown by the red arrow. The 5 'f's denote White. Look at 'New' at the top. You will see that the top half has changed to White. Click Ok.
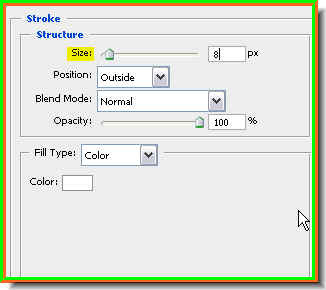 Step 13 : Increase the size of the Stroke. It is set at 3 pixels as default. How much will depend on your image and what you find satisfying. I have set it at 8 pixels. Click ok.
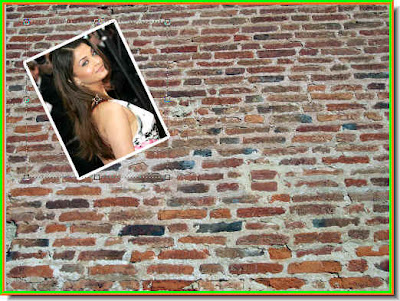 There that is how it looks. Now following exactly the same steps add the other photos, resize them rotate them and add a White Stroke. You can add any number of images. Make sure that they are of the roughly the same size and resolution. A high resolution image on a low resolution background can cause problems and vice versa.
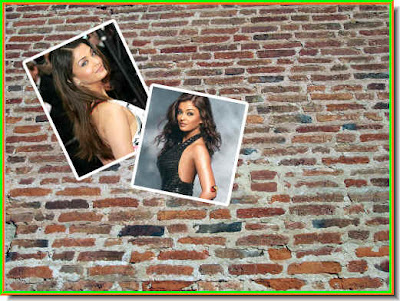 Following exactly the same steps I have added another photo.
 I have added six photos.
 Step 14 : I will teach you a trick which will help when you add a number of layer styles quickly. Go the layer below the one you are working on after adding a new photo. I have added a new photo. It is on Layer 7. I am now clicking on Layer 6. Right click the Effects. From the popup
click on Copy Layer Syle.

Step 15 : Now I am clicking back on Layer 7.
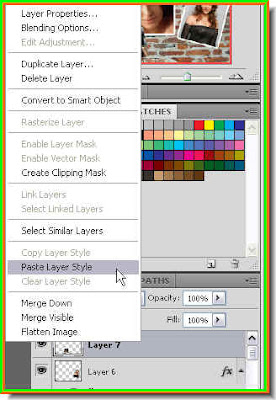
Step 16 : I am right clicking Layer 7 and from the popup clicking on Paste Layer Style.
Look what has happened. Since I have used only one layer style i.e. Stroke. It has been applied to the seventh photo that I have added. When you apply a number of layer styles to a layer, you copy and paste them to subsequent layers helping save time and effort.
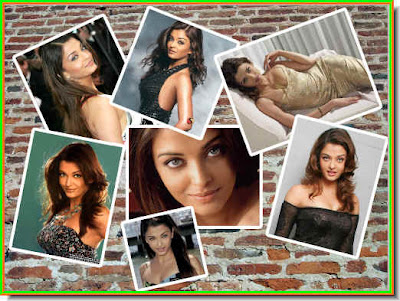
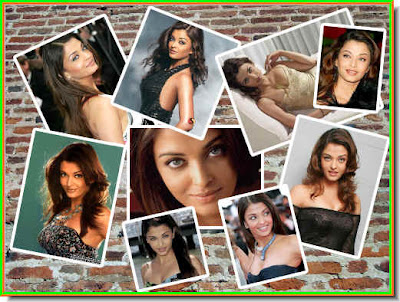 I have finished adding all the photos.
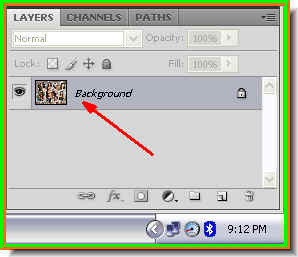 Step 17 : Now press CTRL+SHIFT+E. This is the Merge Layer command. All the layers have been merged into a single layer i.e. the background.
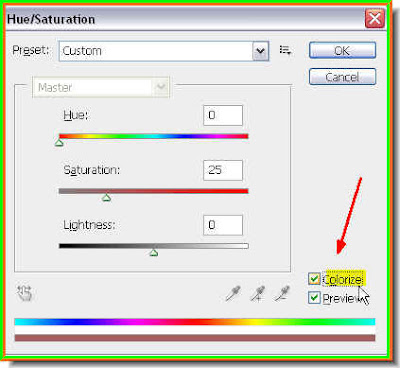 Step 18 : Press CTRL+U. This will bring up the Hue/Saturation dialogue box.
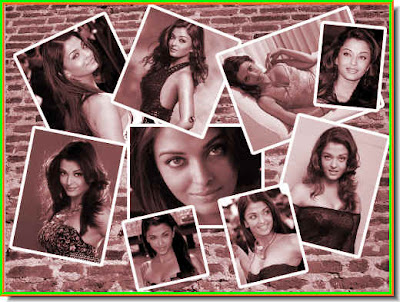 The image looks like this with the default Hue/Saturation settings.
Step 19 : First drag the Hue slider slightly to the right to get the Sepia tone. You can of course change to any other color you like. Dragging the Hue slider will allow you to change the color. Next drag the Saturation slider depending on the saturation you want. Lastly set the Lightness slider which will brighten or lessen the brightness of the image.

And this is the finished collage. Try it out.


