


I have demonstrated the Vanishing Point Tool in Photoshop CS twice earlier. See here.
This is another tutorial on the tool. It takes a bit getting used to, but once you grow accustomed to it, it is easy enough. It just needs a bit of practice.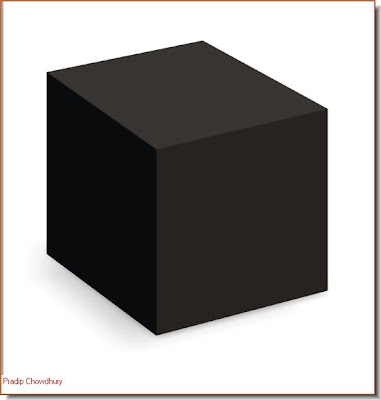

Step 1 : I have opened up a photo of a cube and this scenery. I know you might find it a bit difficult to find a photo of a cube. It is a free stock photo. You can download it from the link given here. You just need to register.
http://www.sxc.hu/browse.phtml?f=download&id=1084978
http://www.sxc.hu/browse.phtml?f=download&id=1084978
 Step 2 : Click the photo you want to paste on the cube. Press CTRL+A (Select All), the CTRL+C (Copy). You will find a column of marching ants all around the edge of the photo. Minimise it.
 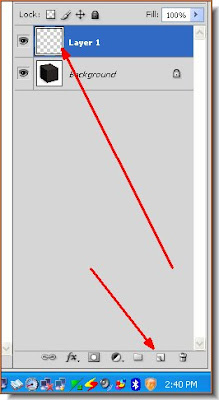 Step 3 : Click the photo of the cube. Click the Add New Layer icon in the Layers pallette and a new layer forms above the background Cube layer.
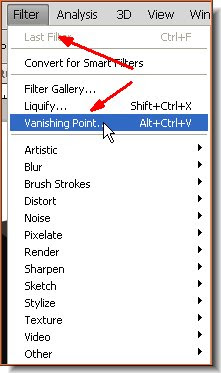
Step 4 : Go to Filter>Vanishing Point. You can also use the shortcut ALT+CTRL+V.
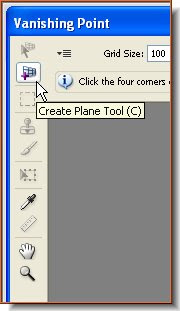 Step 5 : When the Vanishing Tool dialogue box opens, look at the controls on the top left panel. The Create Plane Tool is selected by default. It is the first tool we will use.
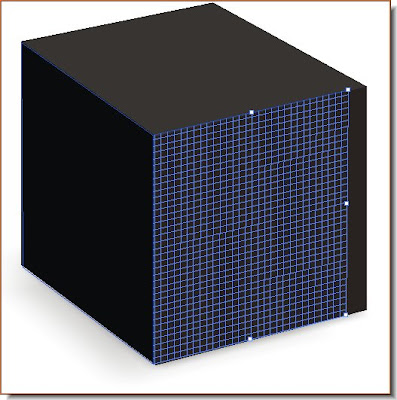
Step 6 : All you need to do is to drag with the Create Plane Tool. You will find it acts like a rubber band. When you click the third point you will find a diagonal connecting the first and third points.
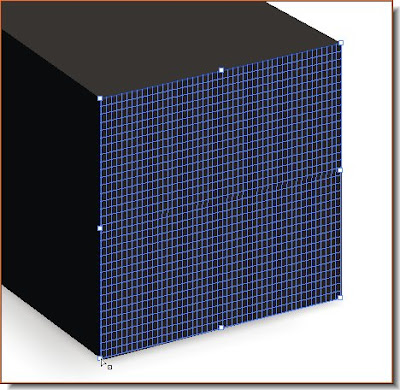
Step 7 : Drag to the fourth corner and a blue grid forms. Note if the grid formed is red, then Photoshop is telling you that the plane is impossible. If the grid is yellow, it means that something is still wrong, but photoshop will try to create the plane. Remember therefore that the grid has to be blue.
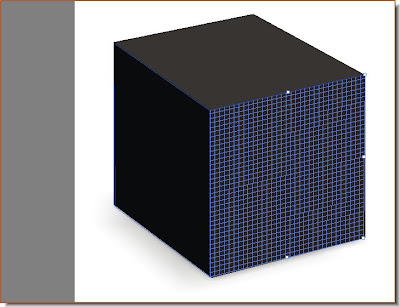
 Step 8 : Now press CTRL and hover your cursor near the midpoint handle. You will find the cursor changes and has a tiny grid icon below it.
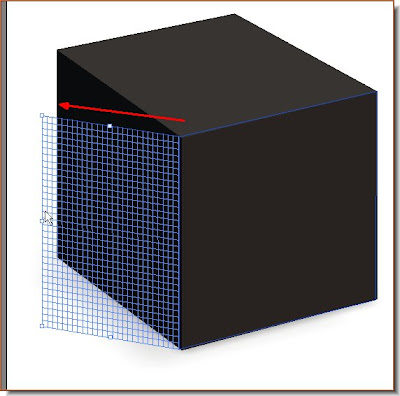 Step 9 : Now drag out the grid. You will find that it does not follow the angle of the cube. That is no problem.
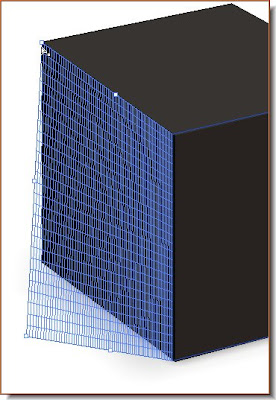 Step 10 : Now press ALT and drag a corner and align with the cube. I have aligned the top left of the grid to the cube. You not keep the ALT pressed after aligning once.
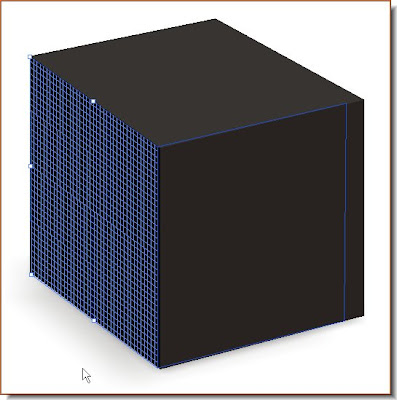
Step 11 : Now align the bottom left corner.
Step 12 : I find now that the grid on the right has moved for some inexplicable reason.
Step 13 : Just drag the middle handle and snap the grid in place.
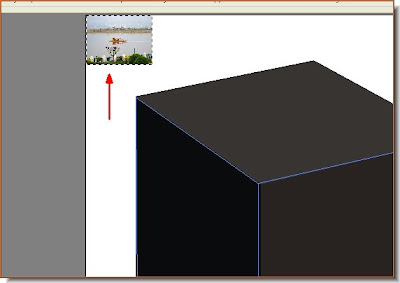 Step 14 : Now press CTRL+V to paste the other image which has been selected. The image appears. (The photo of the cube is a high resolution image, while the other image is of low resolution).
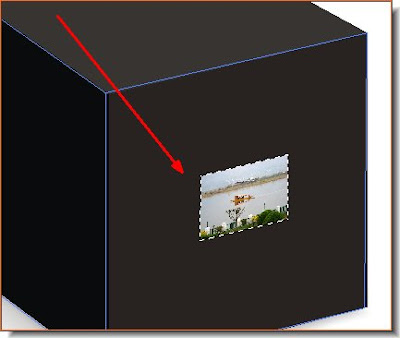 Step 15 : Use the cursor to drag the other photo. You will find that it adjusts to the plane of the cube.
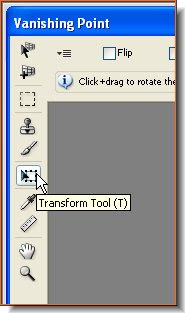 Step 16 : Click the Transform Tool on the left panel.
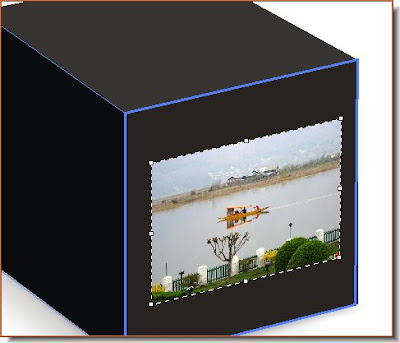
Step 17 : Corner handles appear when you click the Transform Tool. Now keeping SHIFT+ALT pressed and drag any of the corner handles and the photo will increase in size proportionately.

Step 18 : Drag the photo around the side. You will find that it follows the plane of the cube.

Step 19 : Drag the photo up ans sideways till it meets the edge of the cube. Similarly drag downwards.
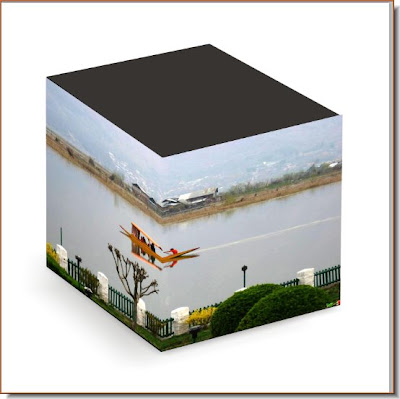
Step 20 : There the photo has fitted snugly to the sides of the cube. The Vanishing Point Tool is particularly useful to wrap artwork around a carton. That is all. have patience, if something goes wrong. As I said, it takes a little bit of practice. The fourth part of the tutorial is here.


