


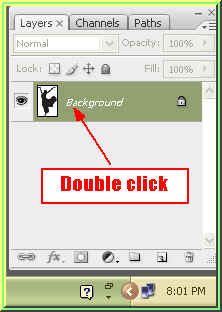
Step 2 : The silhouette has to be made ready for editing. Double click the Background of the silhouette. A New layer dialogue box will open. Click ok.
Step 3 : When you click ok in the New Layer dialogue box (not shown), the background changes to Layer 0.
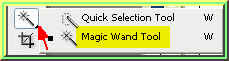
Step 4 : Select the Magic Wand Tool.
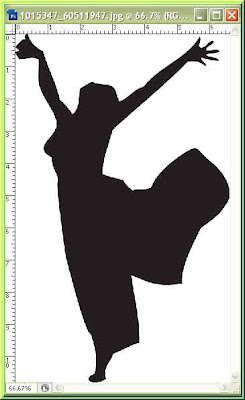
Step 5 : I have click with the Magic Wand on the left side of the silhouette. The portion is immediately outlined by 'marching ants' indicating that it is selected.

Step 6 : Go to Select>Similar.

Step 7 : The entire white background is selected. Hit Delete on the keyboard.

Step 8 : The white background has been deleted. The selection of 'marcing ants' remain. Press CTRL+D to deselect. The 'marching ants will disappear.
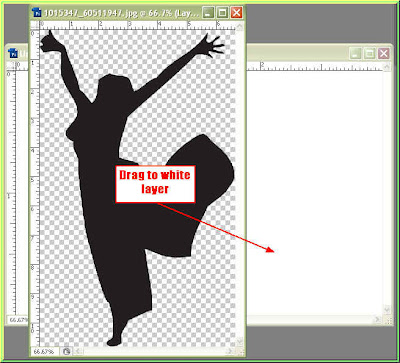
Step 9 : Drag the silhouette onto the white layer keeping SHIFT pressed.
Step 10 : The silhouette has landed in the middle of the white layer, but it has to be resized to fit.

Step 11 : Use the cursor to reposition the silhouette.

Step 12 : Press SHIFT+ALT and you can resize the silhouette proportionately.

Step 13 : Click the tick mark on the top panel to apply the resizing or transformation. So far so good. This part is finished. Now to add the text. You can type out the text, but I will show you an easier way.
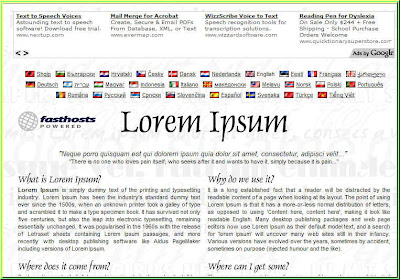
Step 14 : Go to this page on the internet. You will find it here. This is a dummy text generator. Step 15: At the left bottom you will find the Generate Lorem Ipsum button. I have chosen to generate 5 paragraphs. Click the button.
Step 16 : After the text is generated, highlight it with the cursor. Press CTRL+C to copy the block of text.
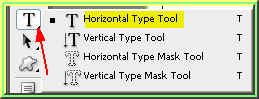
Step 17 : Click on the Text Tool and click on the Horizontal Text Tool.
Step 18 : With the cursor draw out the text box so that it covers the entire white layer.

Step 19 : Press CTRL+V. The text is pasted.
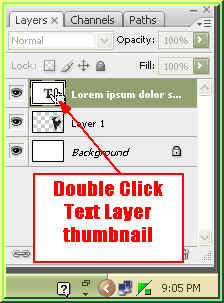
Step 20 : Double click on the text layer thumbnail.
Step 21 : The text is highlighted.

Step 22 : With the text still highlighted press SHIFT+CTRL+, (comma key). Press the comma key. The size of the text will reduce each time you press the comma key.

Step 23. Click the tick mark to apply the transformation. But as you can see in Step 22, the text is black and so are the letters over the silhouette. The letters over the silhouette have to be changed to white.
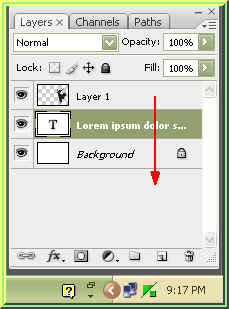
Step 23 : Drag the Type layer to below Layer 1 or the silhouette layer.
Step 24 : Click on the silhoutte layer which is now on top of the Layers palette.

Step 25 : Click on the small box shown by the white arrow to lock the transparent pixels.

Step 26 : Make sure that Foreground is set to Black and Background to White.

Step 27 : Now press CTRL+BACKSPACE and the silhouette will be filled with white.
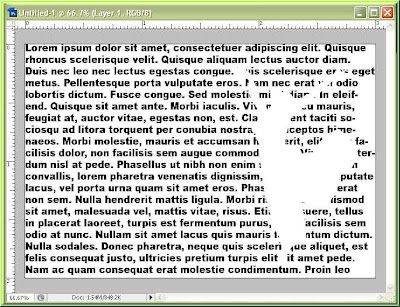
This is how the image looks.
Step 28 : In the Layers pallete change the Blend Mode of the silhouette layer to Difference.

And there you are.
You can reposition the silhouette if you wish.
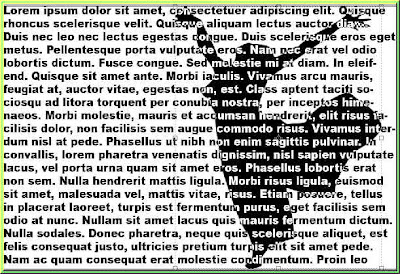
The silhouette with a different text. That is all.


