


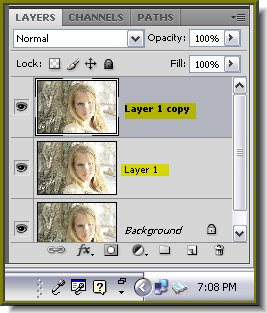
Step 2 : Press CTRL+E twice. This will duplicate the Background layer twice. A new Layer1 and Layer1 copy will form.
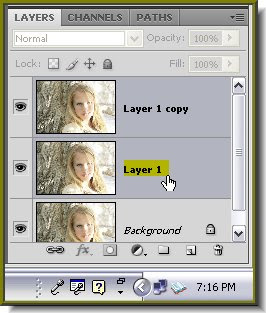
Step 3 : Look at the Layers pallette. You will find Layer 1 copy highlighted. Now press Shift and click on Layer1. Both the layers will be highlighted.
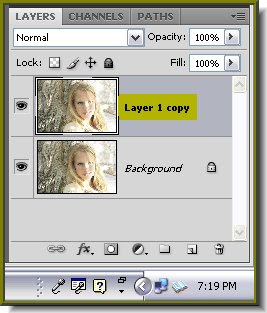
Step 4 : Now press CTRL+E. This will merge Layer 1 into the Layer1 copy.
 Step 5 : Now click where the arrow points to, to bring up the Blend Mode. Click on Multiply.
 This is how the Photo looks like now.
Step 6 : Now press CTRL+J again. This will duplicate the Layer1 copy to Layer1 copy2.
This is how the photo looks like now.
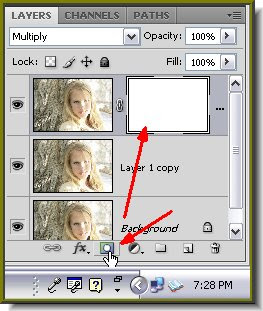
Step 7 : Note that you are on Layer1 copy2 i.e. it is highlighted. Now click the Add Layer Mask button. A layer mask forms next to the layer thumbnail on Layer1 copy2.
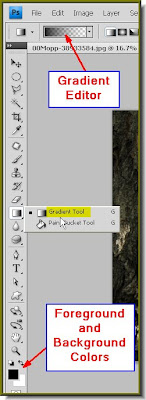
Step 8 : Now make sure that the Background and Foreground Colors are set to Black and White respectively. If it is not press 'x' and then press 'x' and then 'd' on the keyboard. Click on the Gradient Tool. This will bring up the Gradient Editor in the top panel.
If you click the Gradient Editor this dialogue box will open. Make sure that the second Preset where the arrow points to is selected. It is 'Foreground to Transparent'. Click ok.
 Step 9 : : Now drag diagonally with the Gradient Tool from the left top to the right bottom.
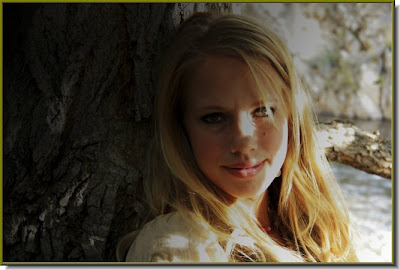 The image looks like this.
 Step 10 : : Click the Brush Tool. The settings are on the top panel.
 Step 11 : When you click on the top panel where the arrow points to, this dialogue box opens. Always set the hardness to zero. The bush tip or the Master diametre you can set as you wish. You can increase or decrease the brush size by dragging the slider to the left or right.
 Step 12 : With the brush begin painting out the dark portions that you want to remove.
Step 13 : I have painted out the darkened bark of the tree.
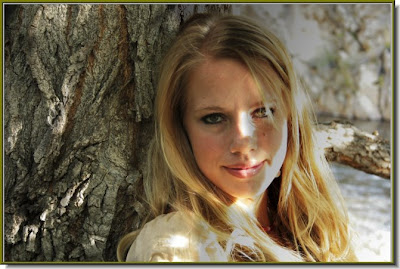
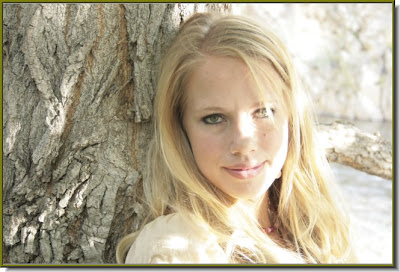
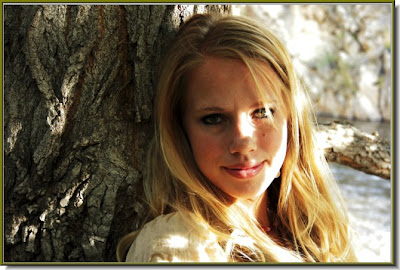
This is my finished image. Compare it to the one I began with. That was easy I think. Try it out for yourself.
Find other Photoshop tutorials here.


