


Continuing with Adjustment Layers, a Curves adjustment can be used to bump up highlights without actually working directly on the image. The trick is to notice the highlights and increase them. If you study the image below you will notice the areas of highlights. Then use a Selective Color Adjustment Layer to tweak colors in the image. Selective Color adjustments will take some time getting used to. I have tried to explain in detail. You will learn how to fine-tune the colors in an image.

I will be using this free stock image. You will find it here
It belongs to Albert-Smirnov


Step 1 : Click the Curves after clicking the New Fill or Adjustment Layer button on the bottom of the Layers palette.

Step 2 : Click the Eyedropper Tool.
 Step 3 : CTRL+CLICK on a highlight.
 A dot appears on the diagonal in Curves.
 Step 4 : CTRL+CLICK another highlight.
 Another point forms on the diagonal.
 Step 5 : CTRL+CLICK another highlight.
 Another point forms on the diagonal.
 Step 6 : CTRL+CLICK another highlight.
 Step 7 : CTRL+CLICK another highlight.
 Every time you CTRL+CLICK a highlight a black dot appears on the diagonal.
 Step 8 : SHIFT+CLICK the dots on the diagonal one by one. They all turn Black. It means all the dots are grouped together and can be moved as one.
 Step 9 : If you move the dots upwards, they all move together.
 This is how the image looks.
 Step 10 : ALT+CLICK on the eye icon to see the before and after.
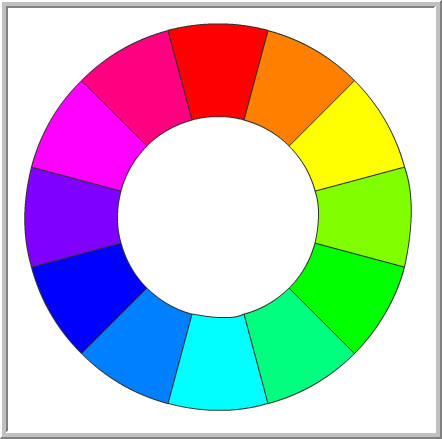
Look at the RGBColor Wheel. You can calculate the opposite colors from it.
 Here are the opposites of the three basic RGB colors and their opposites.
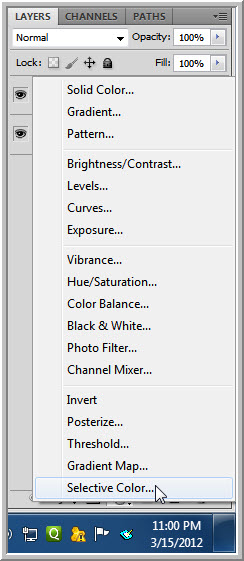
Step 11 : Click on Selective Color Adjustment Layer.
 Step 12 : In the Selective Color click the drop down and you can see all the colors you can adjust. There are also Whites, Neutrals and Blacks at the bottom.
 Working with the Reds pull the Cyan slider to -100.
 The Reds increase.
 Drag the slider to +100.
 The image turns greenish.
 Reset the Cyan to 0. Drag the Magenta slider to -100.
 The images acquires a greenish tinge.
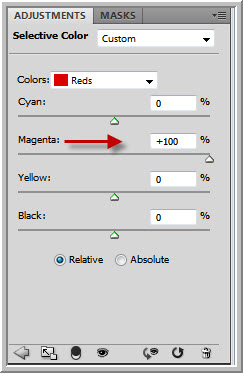 Drag The Magenta slider to +100.
 The image acquires a Red tone.
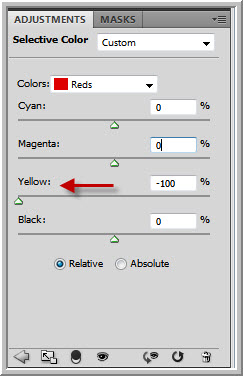 Reset the Magenta slider. Drag the Yellow slider to -100.
 The image acquires a Magenta tone
 Drag the Yellow slider to +100.
 The Yellows become more pronounced.
 Reset the Yellow to 0. Drag the Black slider to -100.
 The colors become muted.
 Drag the Black slider to +100.
 The colors become richer.
 After the Red all the Colors -- Yellows, Greens, Cyans and Magentas do not work at all.
 Coming to the Whites, the Cyan slider does not effect any change. Drag the Magenta slider to -100.
 The highlights turn greenish.
 Drag the Magenta slider to +100.
 The highlights turn Pink.
 Drag the Yellow slider to -100.
 The highlights turn Pink.
 Drag the slider to +100.
 The highlights turn yellow.
 Click on Neutrals.
 Dragging the sliders either way has the same effect as the Neutrals.
 Click on the Blacks.
 Drag the Cyan slider to -100.
 The shadows turn Red. Dragging it to +100 decreases the effect.
 Drag the Cyan slider to +100.
 The Greens in the background increase slightly.
 Drag the Magenta slider to -100.
 The shadows turn Green.
 Drag the Magenta slider to +100.
 The Magentas in the Background increase.
 Drag the Magenta slider to +100.
 The Blues in the Shadows increase.
Now we can see that Reds, Yellows, Greens, Cyans, Blues and Magenta affects the most prominent parts of the image and changes their color. The Whites affect the Highlights and the Blacks the Shadows. The Neutrals play a part in between.
 Step 13 : To give a warmer tone to the image I have selected the Reds and set Cyan -3, Magenta +30 and Yellows at -50.
 The image looks like this.
 Step 14 : Now to tweak the Highlights. I have selected White. I have set Magenta +35, Yellow +35.
 The image looks like this.
 Step 15 : Now to tweak the Shadows.I have selected Blacks. I have set Magenta at +35, Yellow-10.
 The image looks like this.
 Step 16 : Now to set the intervening tones. In the Neutrals I have set Cyan +15, Magenta+25 and Yellow-5.
 This is how the image looks.
 Step 17 : Lower the Opacity of the Layer to 80%.
 The final Image. Other photoshop tutorials are here
Look at the RGBColor Wheel. You can calculate the opposite colors from it.
Step 11 : Click on Selective Color Adjustment Layer.
Now we can see that Reds, Yellows, Greens, Cyans, Blues and Magenta affects the most prominent parts of the image and changes their color. The Whites affect the Highlights and the Blacks the Shadows. The Neutrals play a part in between.


