


A painterly effect is something that looks like a painting. There are many ways how to go about it including using some of photoshops filters. Here is a method that is simple. Here I will use only one filter. It will work best where there is a lot of background together with the subject.

This is the painterly effect to be created. The original image is below.

I will be using this image. You will find it here
It belongs to

Step 1 : Duplicate the Background Layer by pressing CTRL+J.

Step 2 : Go to Filter>Distort>Wave.

The Wave filter opens. I am leaving them at the default settings and clicking OK.

The image looks like this. It does look painterly, but also quite weird.

Step 3 : Click the Add Layer Mask button. A Layer Mask forms on Layer 1.

Step 4 : Press b for the Brush Tool or get it from the fly out.

Step 5 : Select a soft round brush. Set the Hardness to 0. To make the brush large press ] (right square bracket key) and [ (left square bracket key) to make it small.
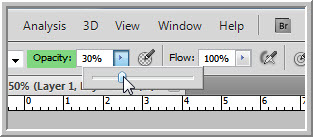
Step 6 : In the top panel set the Opacity to 30%. It is set at 100% by default. Let the Flow remain at the default 100%. Remember to reset it at 100% after completing the tutorial.

Step 7 : Begin painting the face to reveal the layer underneath. Since you are painting at 30% opacity you will have to paint slowly to reveal the layer underneath.

Step 8 : As you paint notice the Layer Mask. A gray patch forms as you paint.

Step 9 : It takes some time before bit by bit the face is revealed. You will have to paint the portions you wish to reveal, while leaving the background as it is..
The completed painterly effect.
Other photoshop tutorials are here


