


 Step 1 : I have opened this free stock photo. You can download it here.
 Step 2 : And this texture. You can download it here.
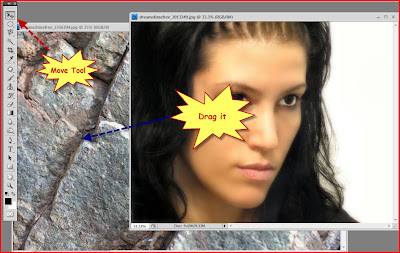 Step 3 : Drag the girl's photo over the texture with the Move Tool.
 Step 4 : Press SHIFT+ALT and drag a corner handle till the girl's image completely covers the texture.
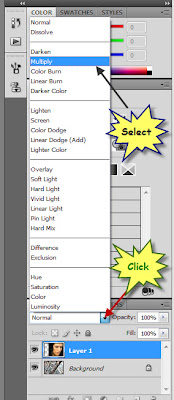 Step 5 : In the Layers pallette click where the arrow points to, to change the Blend Mode. From the popup click on 'Multiply'.
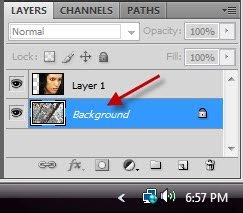
Step 6 : Click on the Background Layer which contains the Texture. Press CTRL+SHIFT+U to desaturate the Texture. When using a Texture always desaturate it.

Step 7 : Now click on Layer 1 which contains the girl's photo.

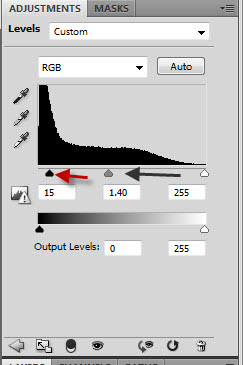
Step 8 : Now click on the Add New Fill/Adjustment Layer button. From the popup click on Levels.

Step 9 : First drag the black slider gently towards the right and note the change in your image. Next drag the grey slider in the middle towards the right until you are satisfied with the result.

Step 10 : The result. But I'm not satisfied.
Step 11 : I have dragged back the black and grey sliders slightly towards the left. It is just to demonstrate that you should experiment with the Levels.
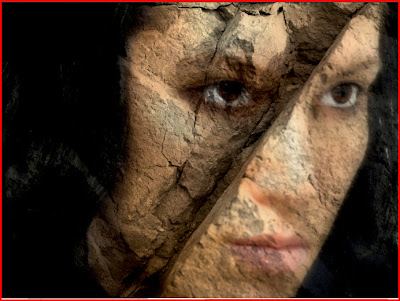
There that looks much better. Try it out. It's easy.
Other photoshop tutorials are here.


