


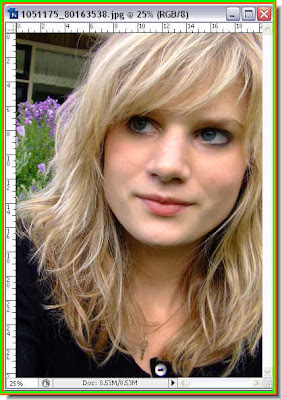
Step 1 : I have opened this photo. It is a high resolution one and is suitable for the effect that I wish to demonstrate. You can download this free stockphoto here.
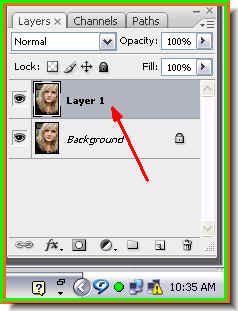
Step 2 : Press CTRL+J to duplicate the Background layer.

Step 4 : This is the Surface Blur dialogue box. When you place your cursor in the box a small white hand will appear with which you can scroll the image. I have scrolled the image to make the eye visible. Notice that the details are still sharp after I have applied the Radius at 25 pixels and Threshold at 15. These settings suit this particular image. It might vary with the image you use. The Surface Blur keeps the edge details of the eye and lips, while smoothing out the skin. Click ok. Step 5 : Press CTRL+J again. Layer 1 will be duplicated into Layer 1 copy.
Step 6 : With the Layer 1 copy selected press SHIFT+CTRL+U. This will remove the color from the layer as you can see above.
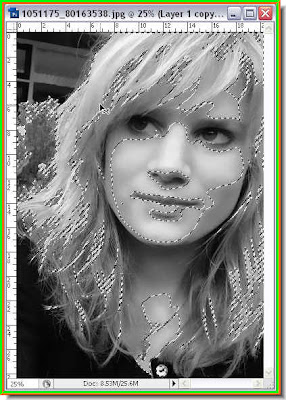
Step 7 : I will now load the luminosity of this layer as a selection. To do this press ALT+CTRL+ Tilde ( ~ This key to the left of 1 on the keyboard). You can see the selection.
Step 8 : With the selection in place, click on the New Layer icon and a new Layer 2 will be created.
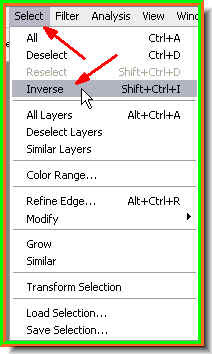
Step 9 : Go to Select>Inverse.
Step 10 : Make sure that Foreground Color is set to Black and Background to White. If it is not press X then D on the keyboard.

Step 11 : Now press ALT+BACKSPACE to fill the selection with the Foreground Color which is Black here. Press CTRL+D to deselect. The marching ants of the selection will go away.
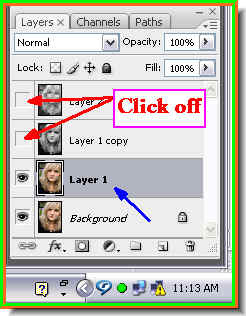
Step 12 : Turn of the top two layers by clciking off the eye icons. Then click on Layer 1 to select it. The color returns to the image.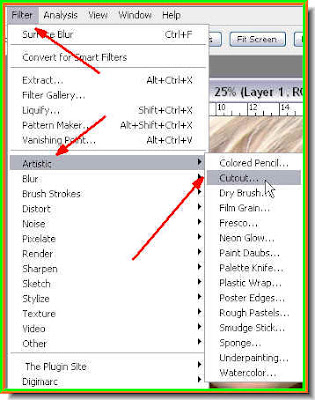 Step 13 : Go to Filter>Artistic>Cutout.
 Step 14 : The Cutout dialogue box opens.
Step 15 : The controls of the Cutout are on the right top. I have put the Number of Levels at 6, Edge Simplicity at 0 and edge Fidelity at 3 for this image. You can try a higher value or less for Number of Levels for your own image. Click ok.
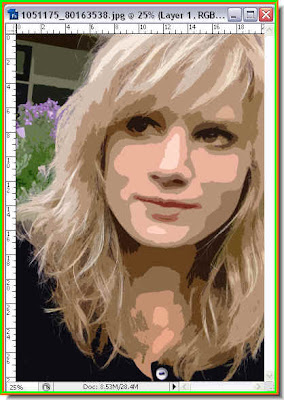
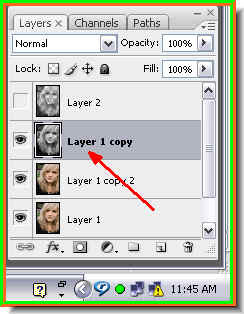
This is how the image looks. Step 16 : Now drag Layer 1 to the New Layer button and a Layer 1 copy 2 forms.
Step 17 : In the Layers pallette change the Blend Mode of the Layer to Soft Light.

Step 18 : The image brightens with the change in Blend Mode.
Step 19 : Now click on Layer 1 copy which we had desaturated earlier.
Step 20 : Go to Filter>Artistic>Poster Edges.

Step 21 : The Poster Edges dialogue box opens.

Step 22 : In the controls at the right top, I have put the Edge Thickness at 2, Edge Intensity at 2 and Posterization at only 1 for this image. Click ok.
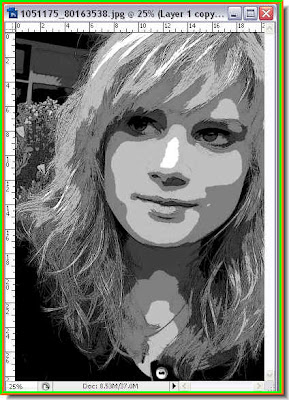
This is how the image looks.

This is how the image looks. It looks a bit dark. Let us fix that.
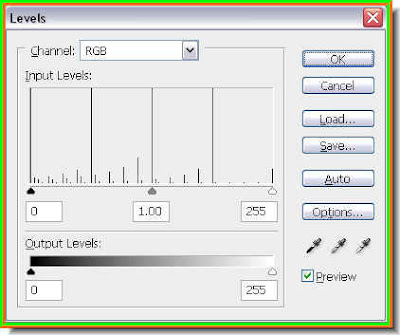
Step 24 : Press CTRL+L to bring up the Levels dialogue box.
Step 25 : Now drag the White slider almost all the way to the middle from the extreme right.

Step 26 : The image brightens up.
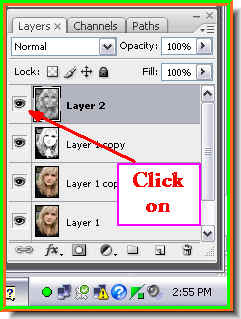
Step 27 : Now click back the eye icon on the topmost layer i.e. Layer 2. Click to select it. Press ALT+CTRL+Tilde. (See Step 6). This will load the luminosity as a selection.

Step 28 : With the selection in place, click the Add Layer Mask button. The Layer Mask forms next to the layer thumbnail on Layer 2. It looks like a negative.

This is how the image looks.
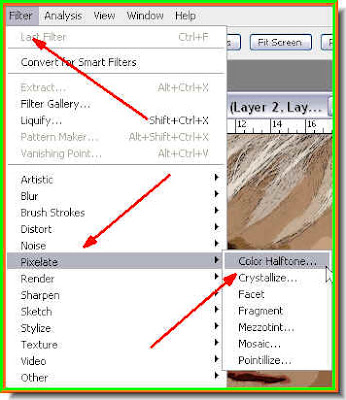
Step 29 : Go to Filter>Pixelate>Color Halftone.
Step 30 : The Color Halftone dialogue box opens. I am not going to change any of the settings. But depending on your image you can increase or decrease the Max radius which here is set to 8. Click ok.

The completed image.

A closer view of the image. That is all. Try it out.


